Add Asset

Adding an Asset Manually

Adding an Asset using CSV

Adding an Asset using Inventory Agent
Adding an Asset Manually
Adding an Asset using CSV
Adding an Asset using Inventory Agent
This guide explains how to add an asset to a created asset category. There are three methods: manually, using a CSV file, or through Discovery (only applicable to IT assets).
This tutorial will focus on manually adding an asset.
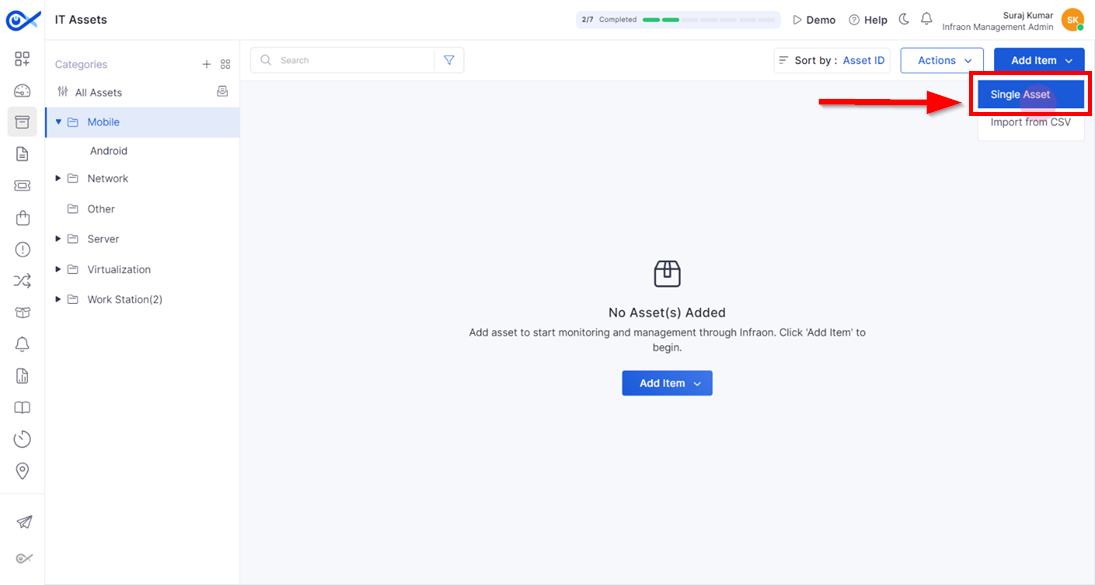
Step 1: Click on the add item at the top right corner of the page and select the single asset option.
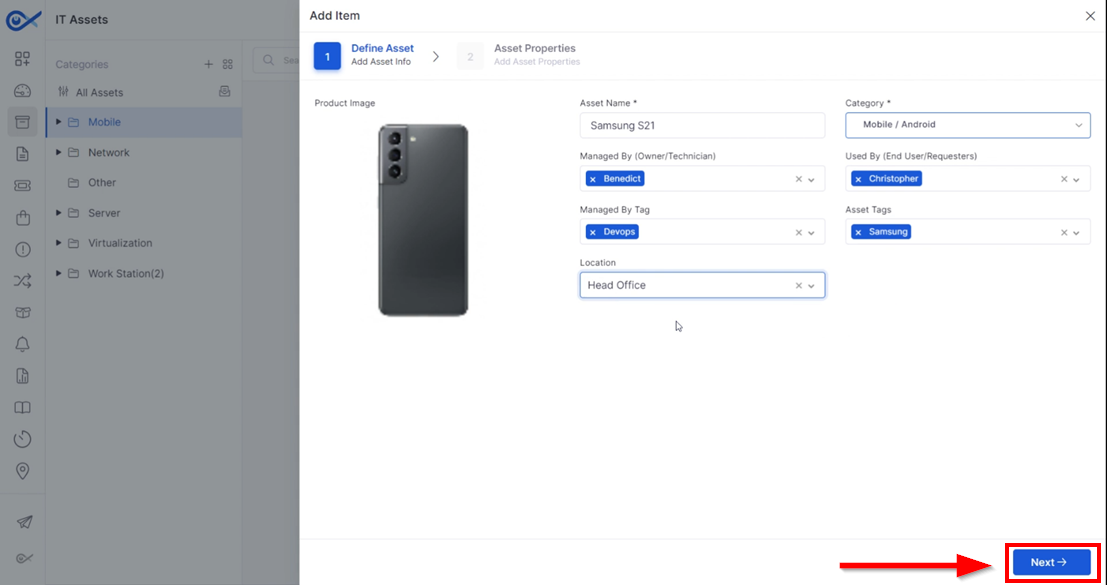
Step 2: On the Define Asset page, fill out the details in the respective call-out boxes, starting with the product image for the asset. (Formats: png, jpeg, jpg | Max size: 20 MB | Aspect ratio: 4 / 4)
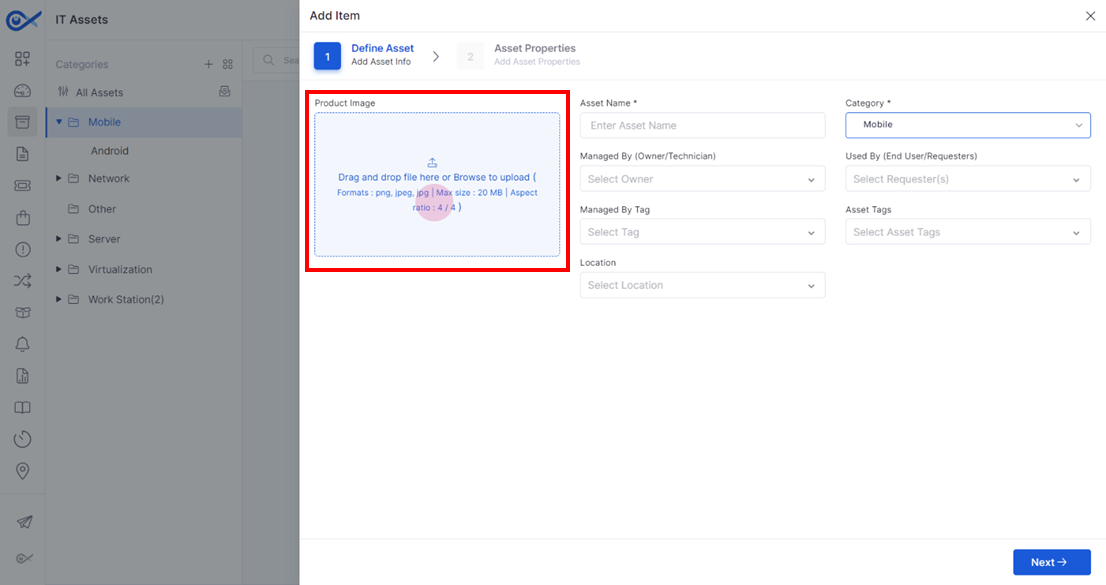
Step 3: Drag and drop the asset image or select the file to upload.
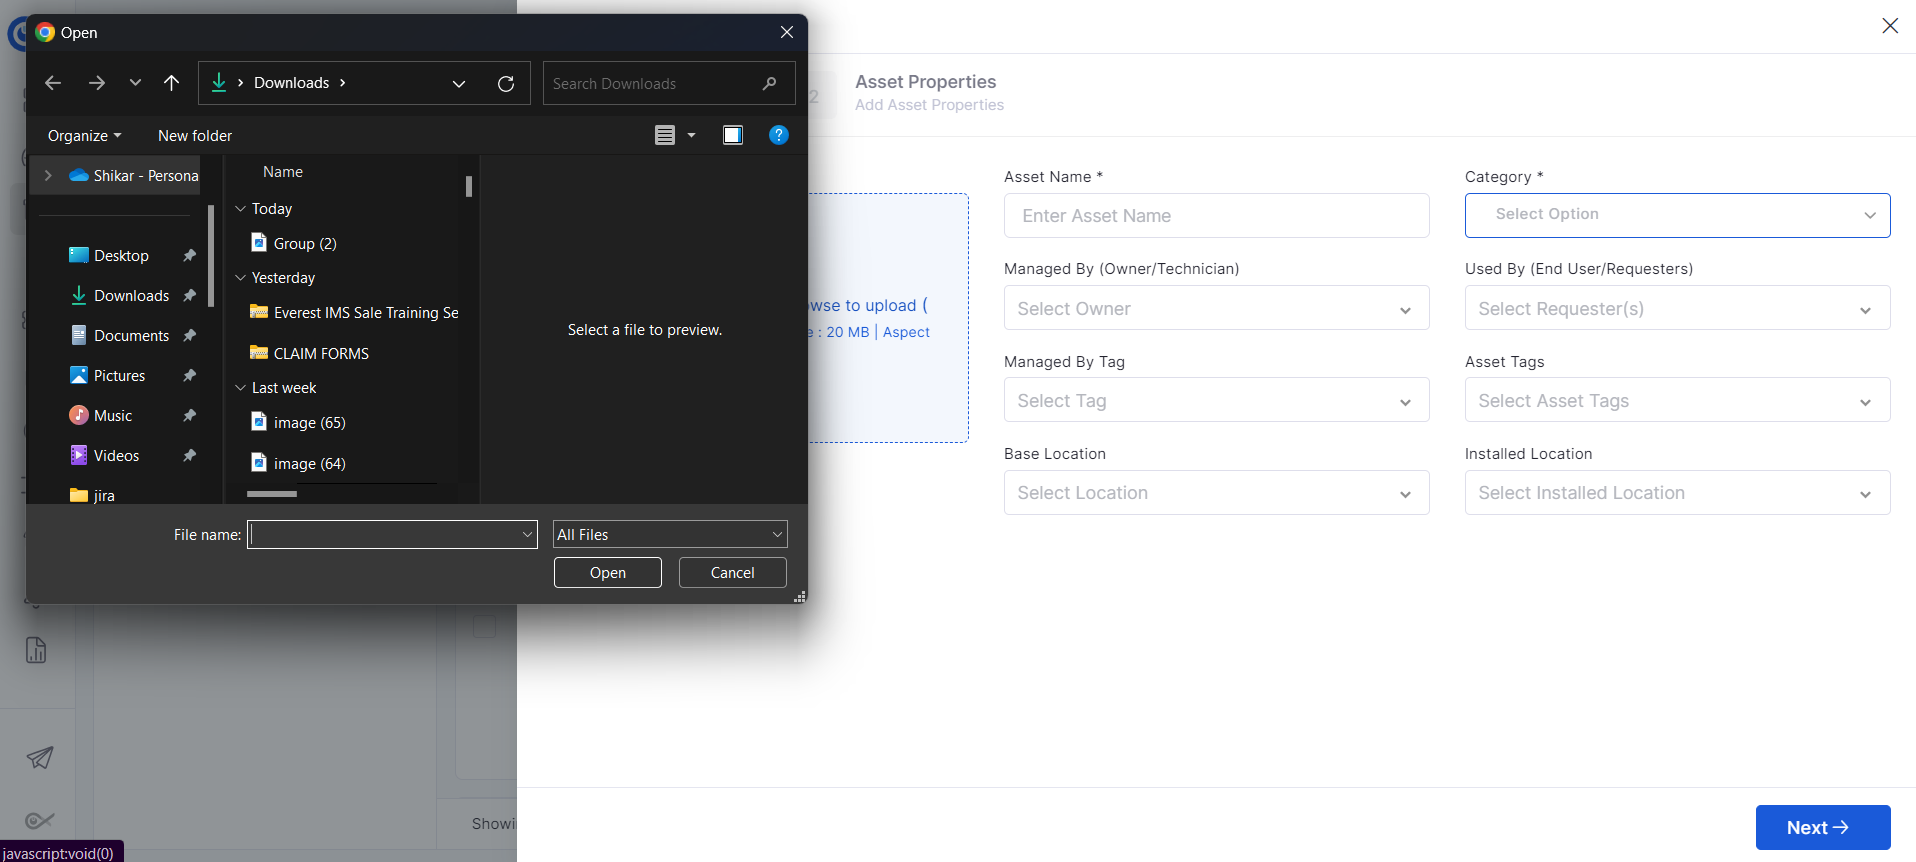
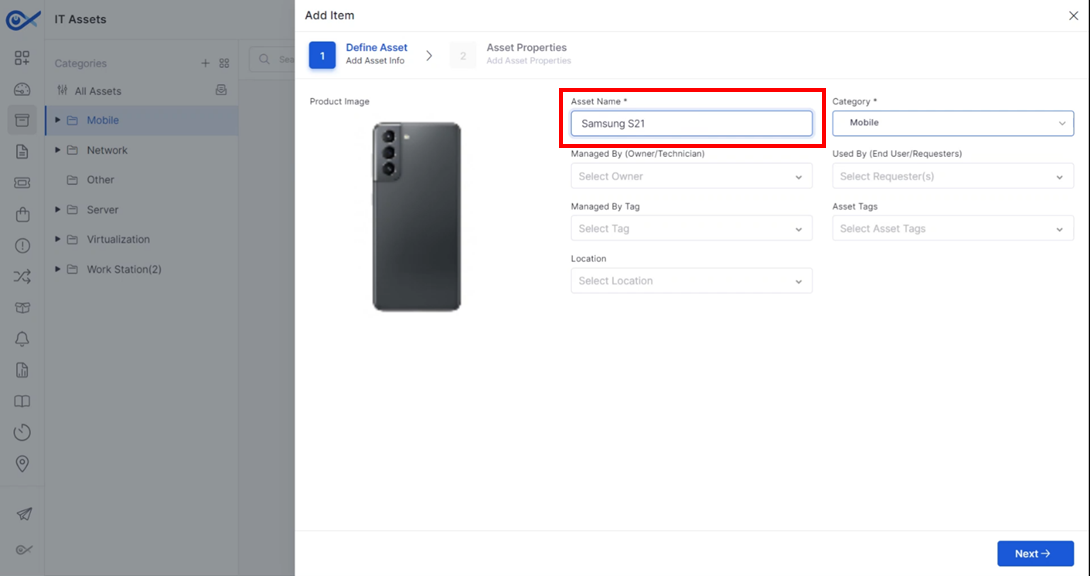
Step 4: After uploading the product image, click on the asset name input field and enter the name, for example, "Samsung S21."
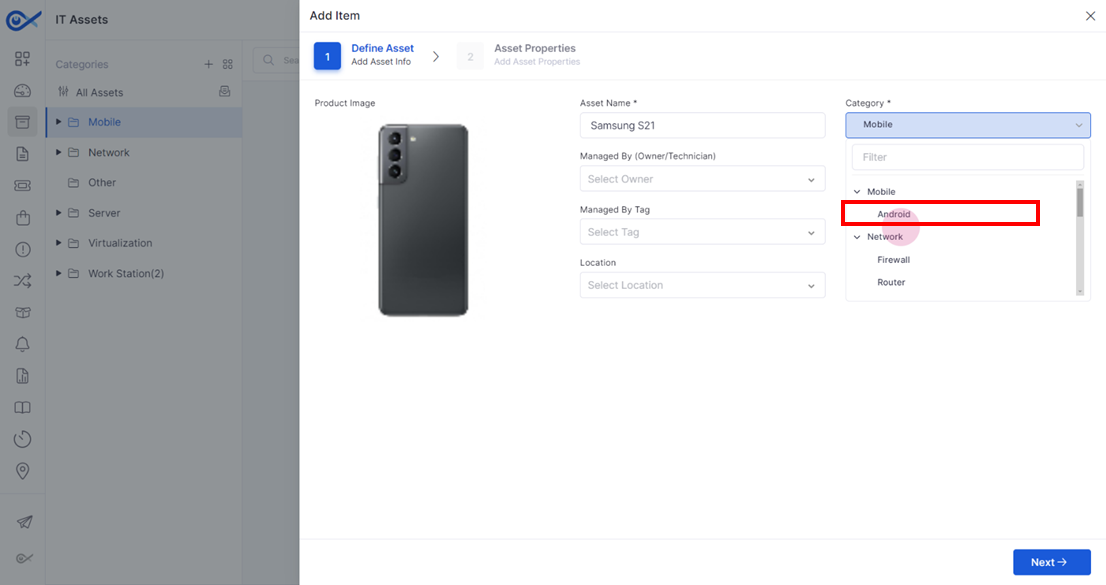
Step 5: The dropdown menu maps the asset to a parent or child category. For this example, select "Android" as the sub-category.
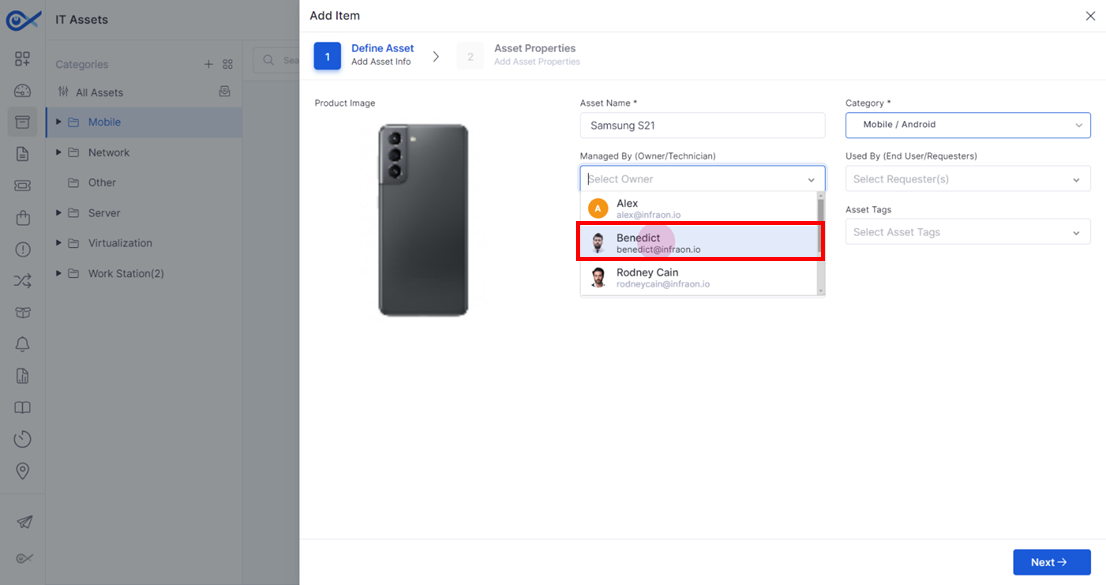
Step 6: In the "Managed by" field, designate the owner or the person managing the asset, potentially a technician. Users can make multiple selections based on the usage of the assets.
Step 7: The "Used by" field indicates the person using the asset, also known as the requester. Based on the usage of the assets, users can make multiple selections.
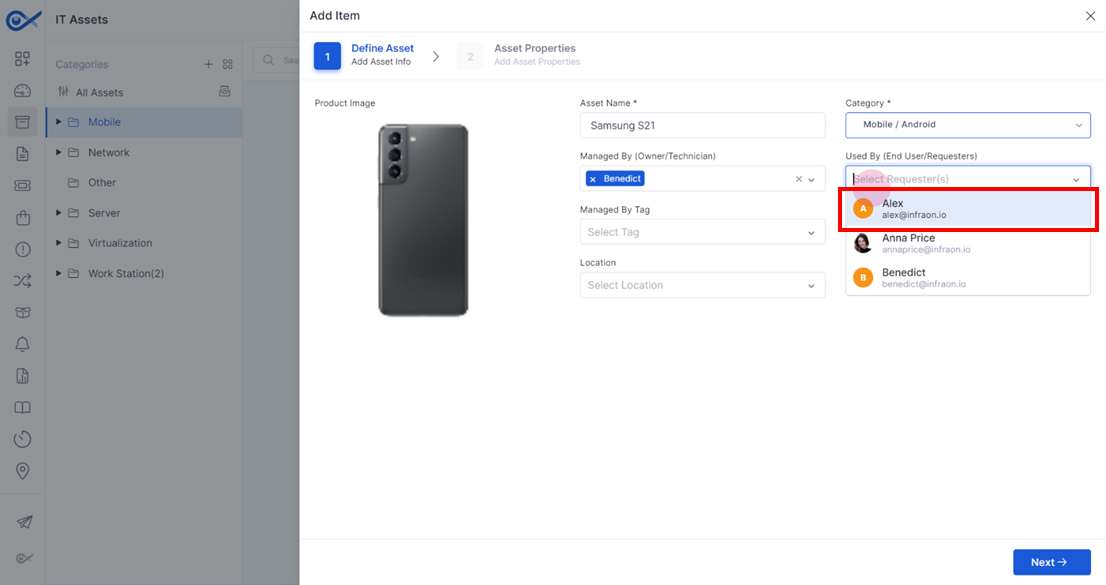
Step 8: In the 'Managed By' call-out box, select a tag from the drop-down list to specify the team that will manage the asset.
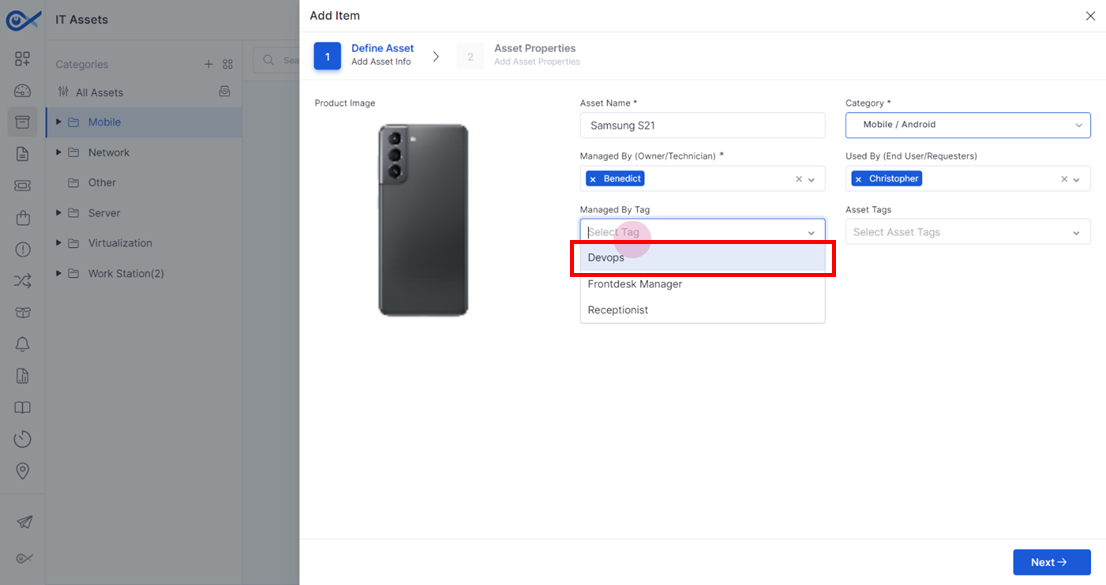
Step 9: Assign an asset tag to the specific type of asset by selecting it from the dropdown.
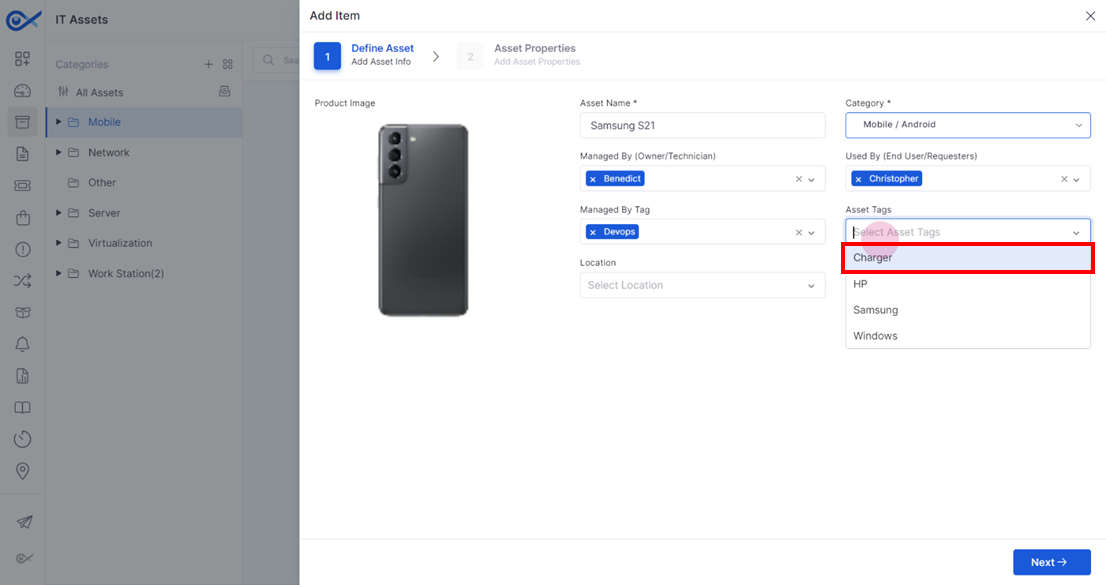
Step 10: Specify the location where the asset is situated.
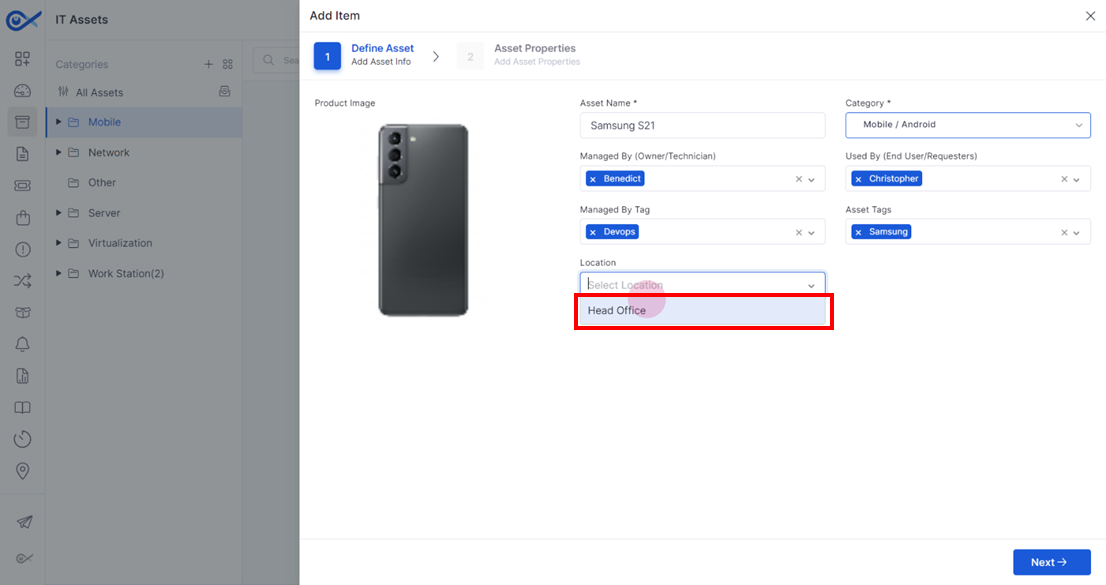
STEP 11: After filling in the data, proceed to the next step to view the asset properties.
STEP 1: The Asset Properties section contains categories such as common properties, cost properties, procurement properties, assignment properties, and CPU properties. Each property has input fields where data can be entered.
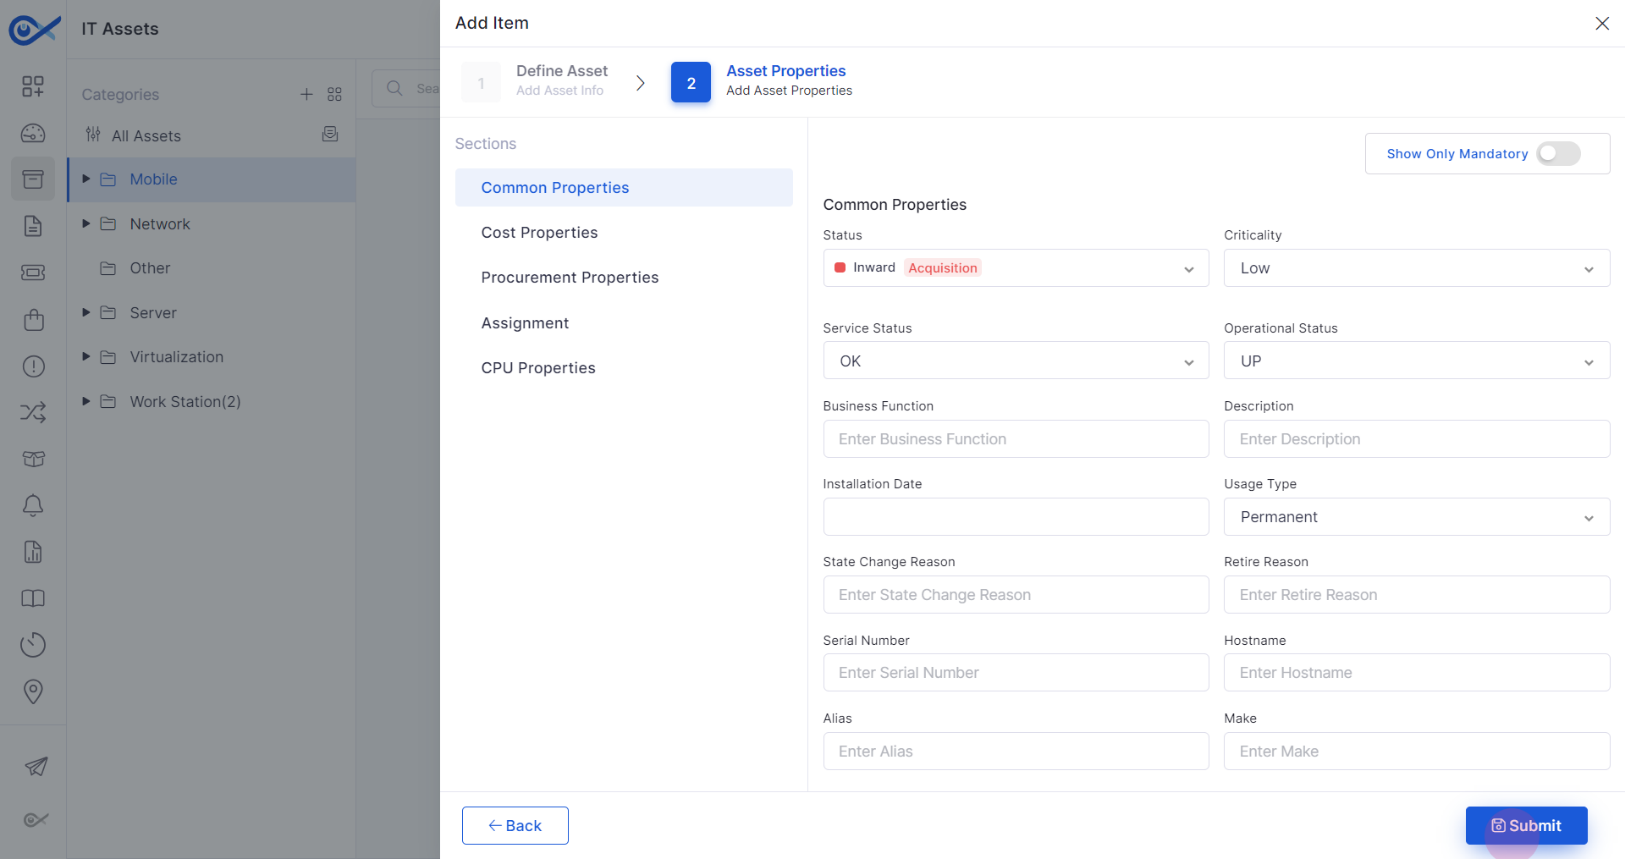
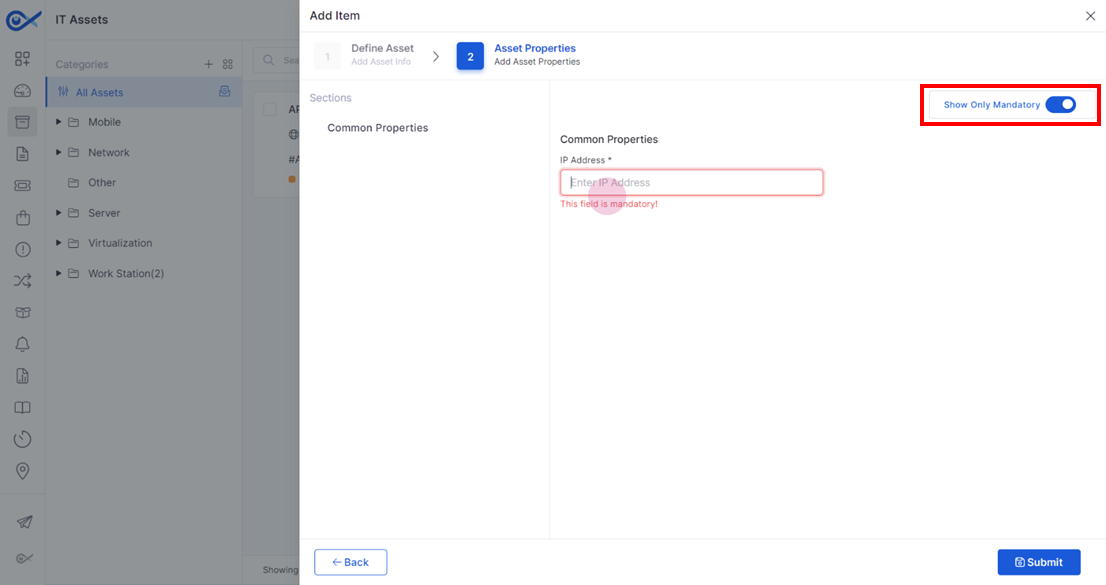
Step 2: After adding the mandatory data, submit the form to finalize the creation of the asset.
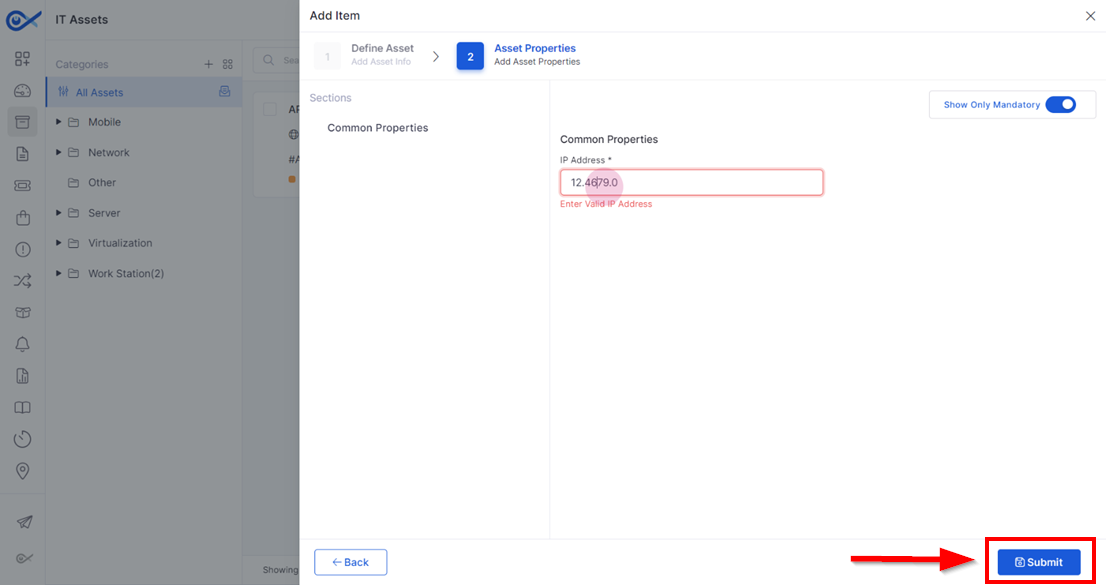
Step 3: After submission, the respective asset will be generated with a unique ID, facilitating its identification.
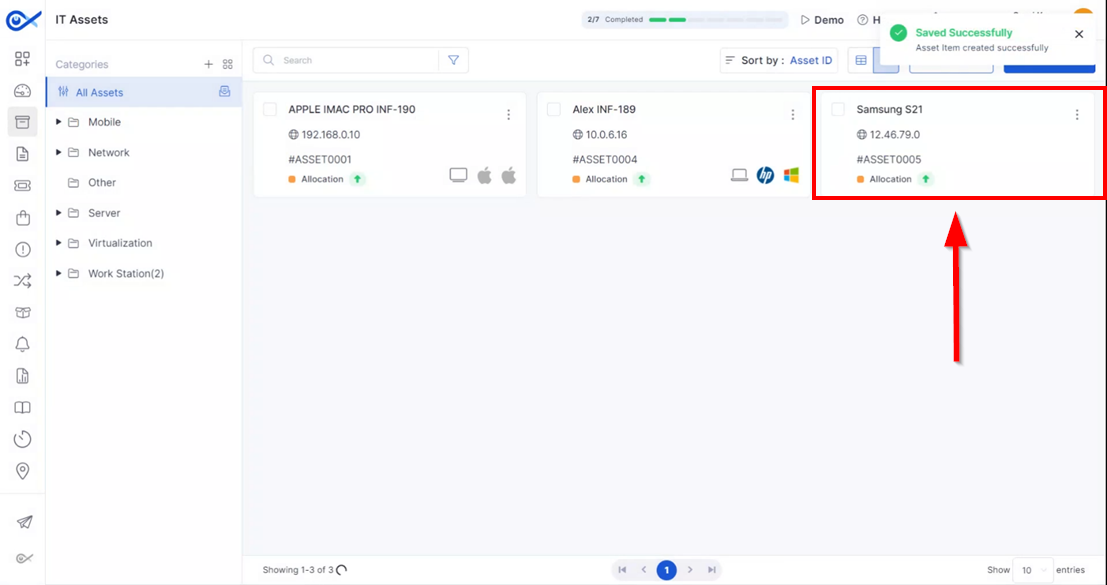
This tutorial outlines the steps to add multiple assets using the CSV file method.
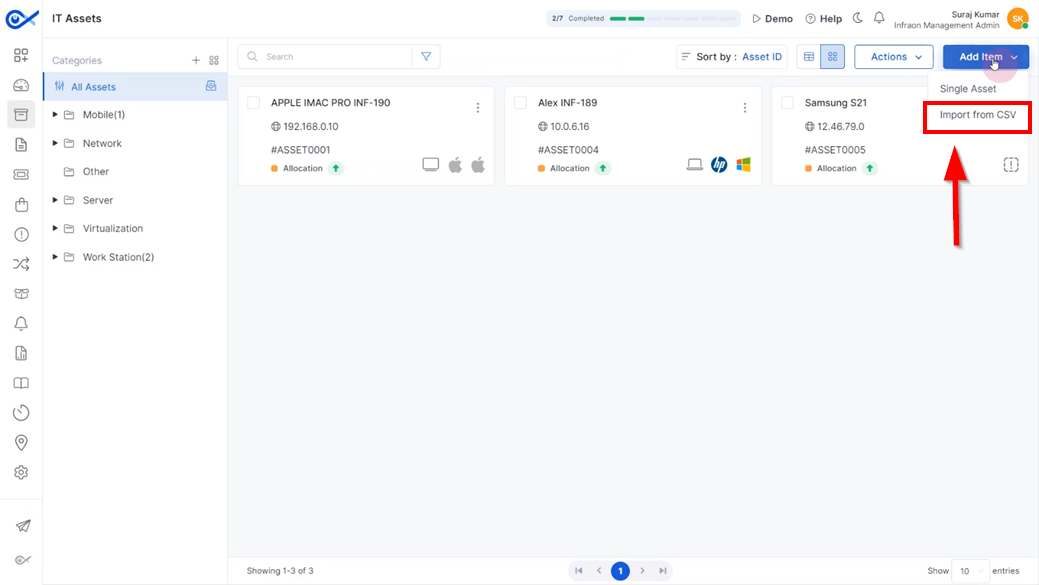
Step 1: Click on Add Item at the top right corner of the page and choose the ‘Import from CSV’ option.
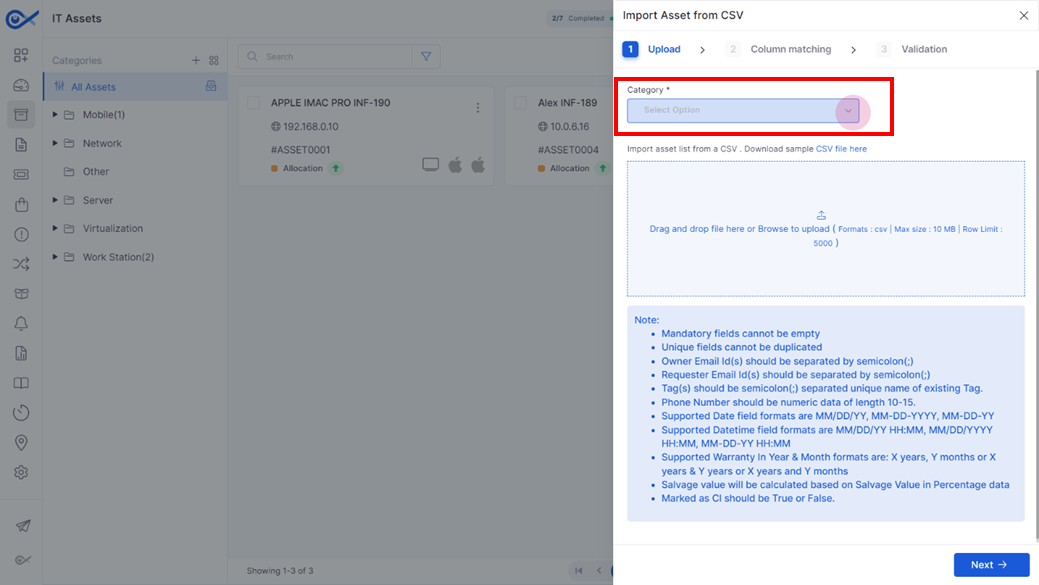
Step 2: In the pop-up tab, use the dropdown menu to map the assets to a parent or child category. Select the category in which the assets will be added.
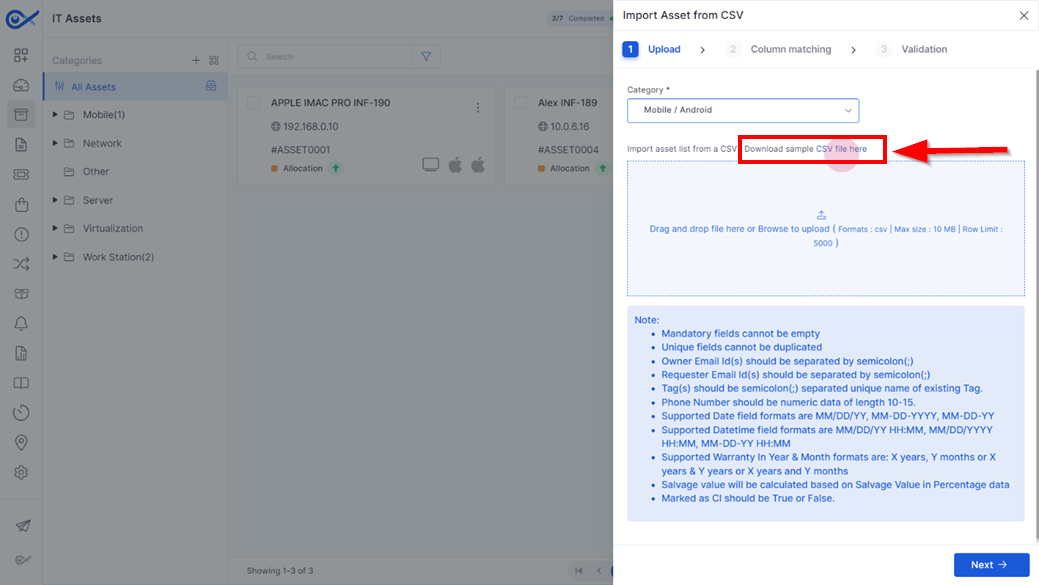
Step 3: Download the sample CSV file by clicking on the ‘CSV file here’.
Step 4: Open the downloaded CSV file and fill in the required details for the assets in the appropriate columns.
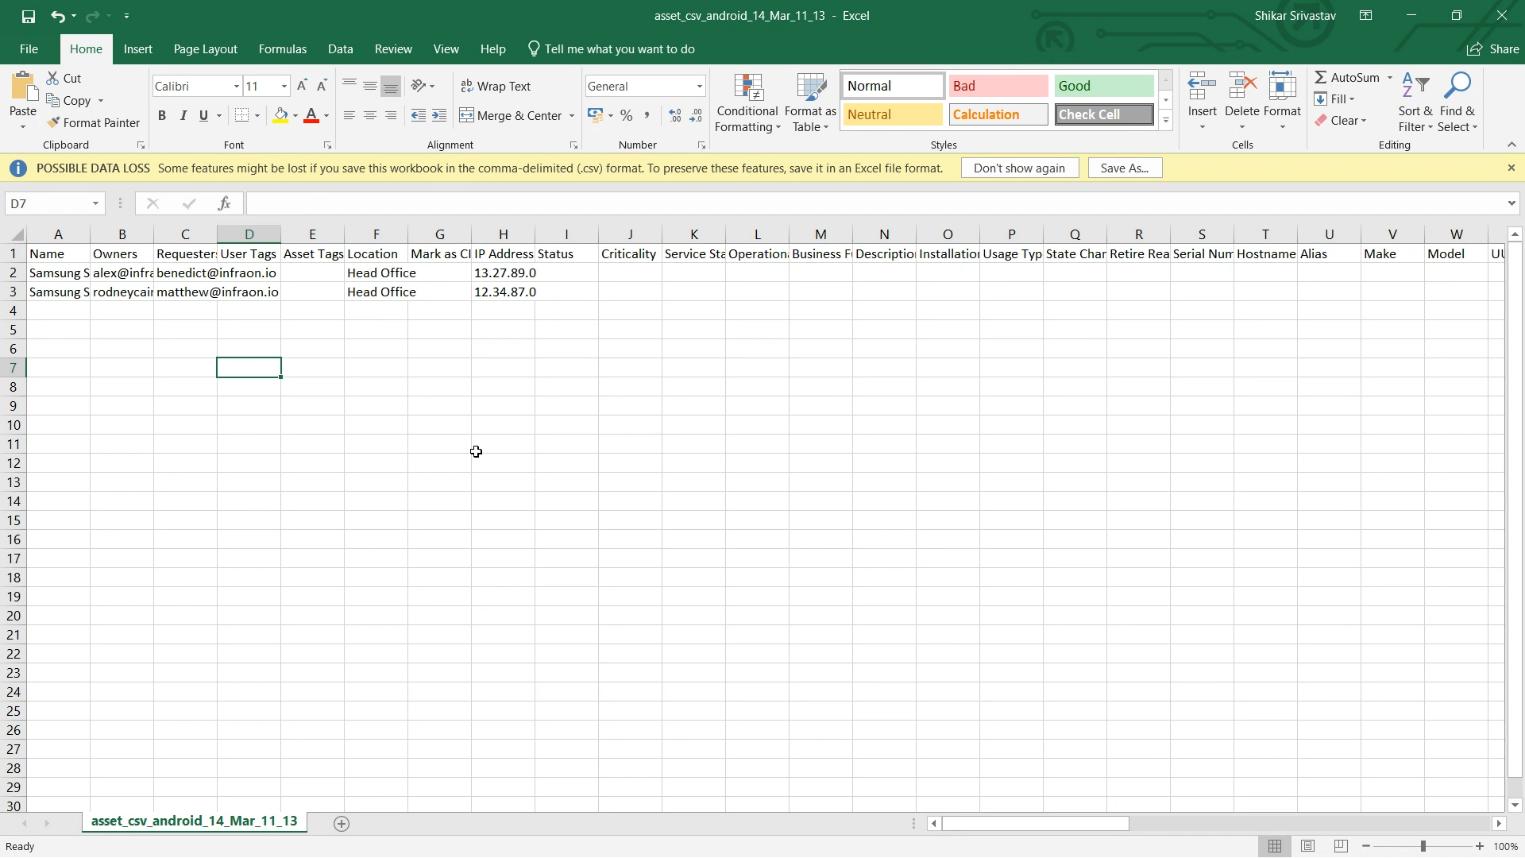
STEP 5: After filling in the details, save the CSV file and upload it.
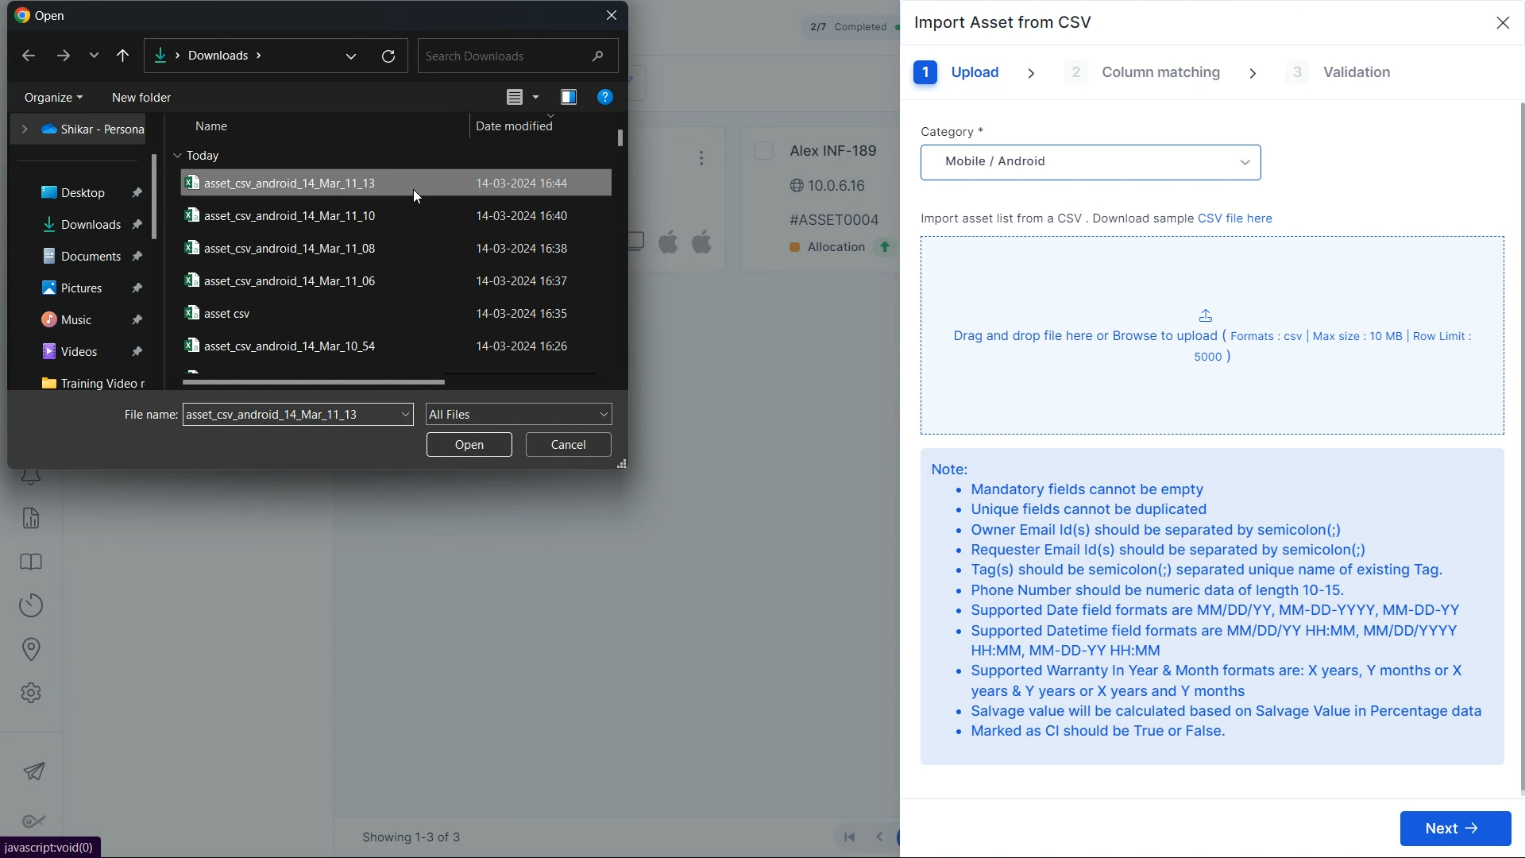
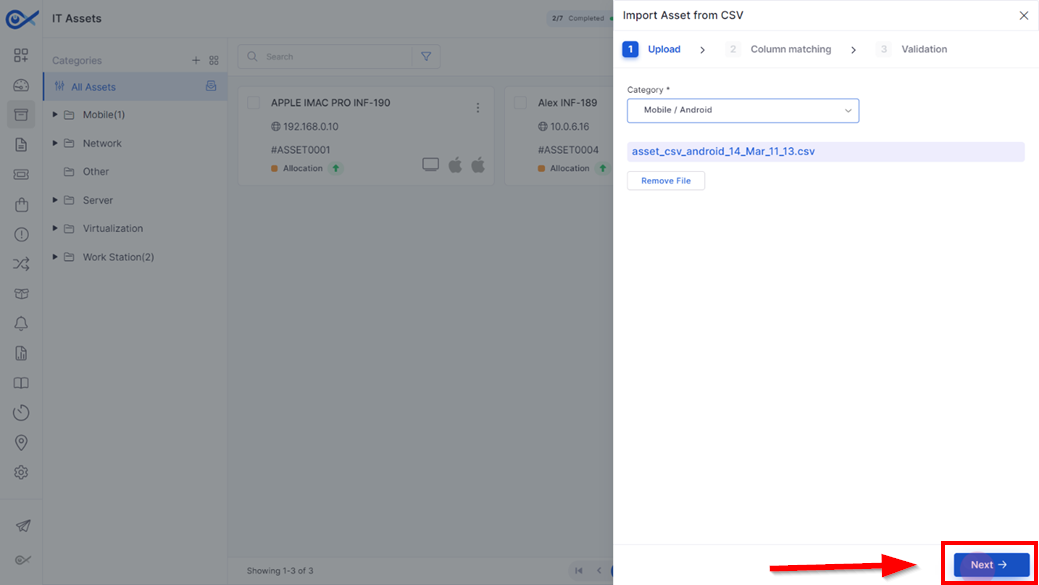
Step 6: After a successful upload, click Next.
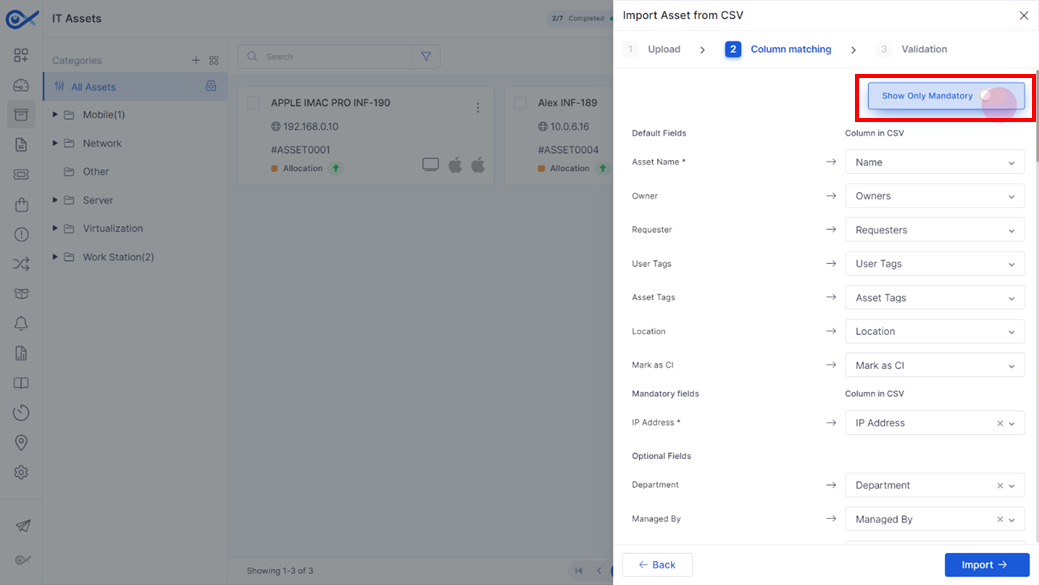
Step 7: On the column matching page, make sure the columns match the data in the CSV file. Use the ‘Show Only Mandatory’ toggle to view only mandatory fields.
Step 8: Click Import to start importing the CSV file.
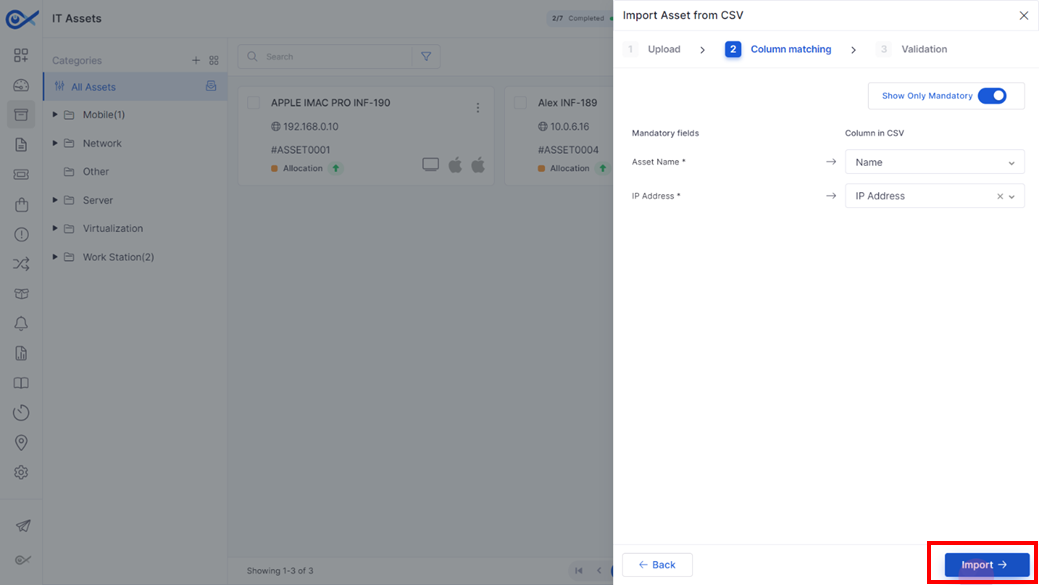
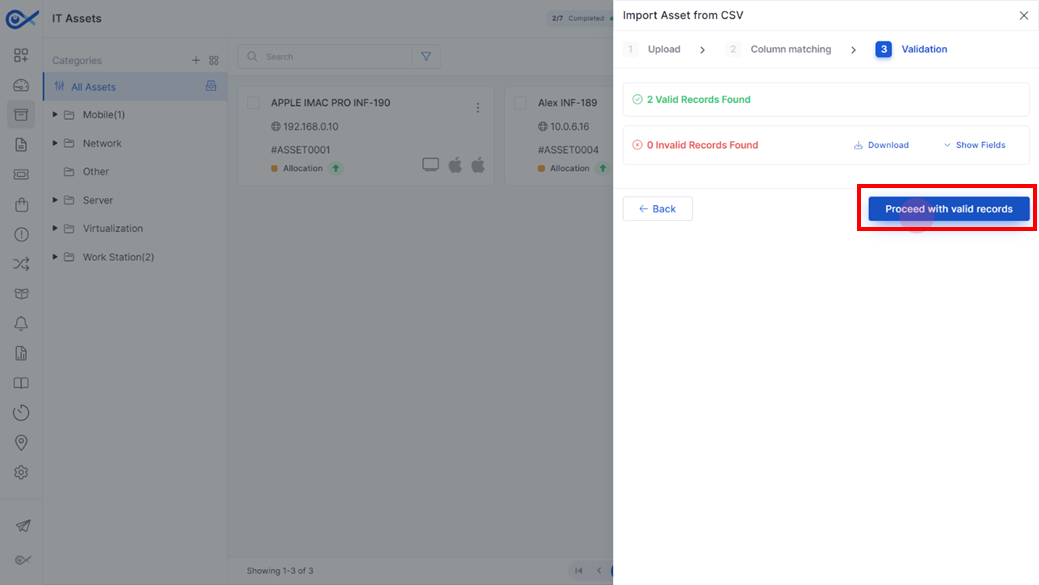
Step 9: Once the import is successful, select Proceed with Valid Records to add the assets.
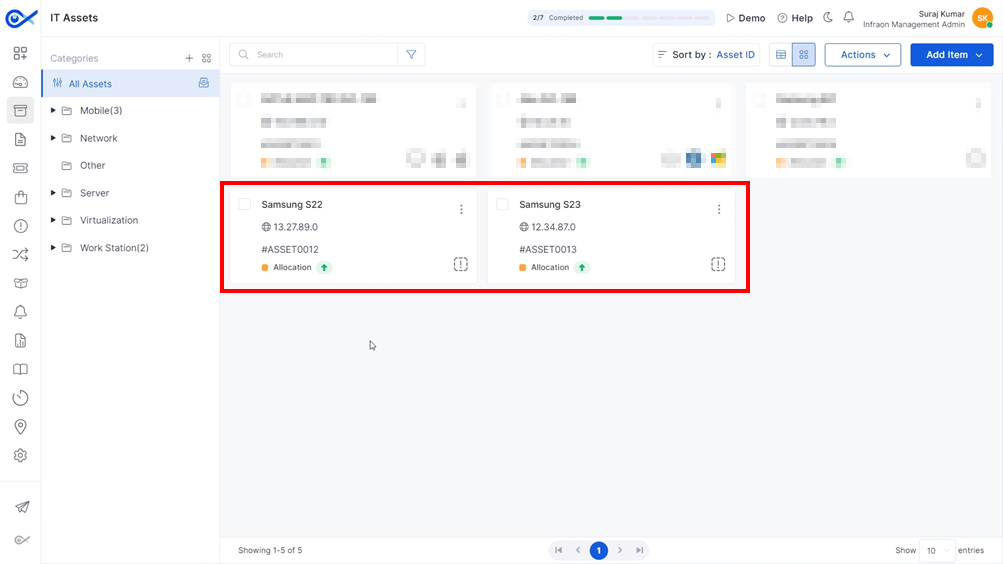
Step 10: A popup will appear confirming the successful upload of the CSV file and the addition of the assets to the selected category.
This guide explains how to add an asset using the Infraon Inventory Agent. The Infraon Inventory Agent is a software tool that automates inventory management for businesses. It functions like a digital inspector, scanning systems and compiling a comprehensive report of both hardware and software components. The Infraon agent is available for Windows, Mac, and Linux users.
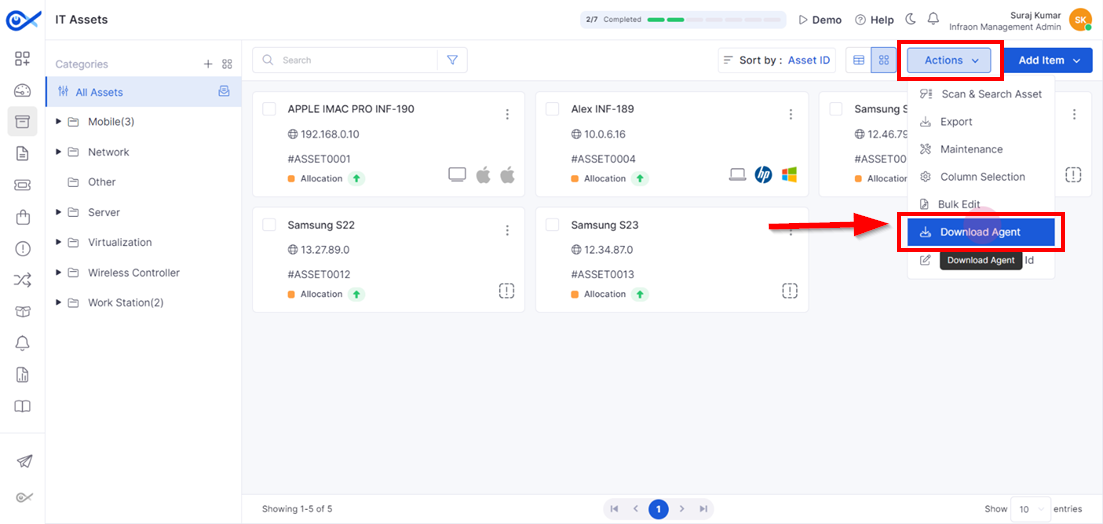
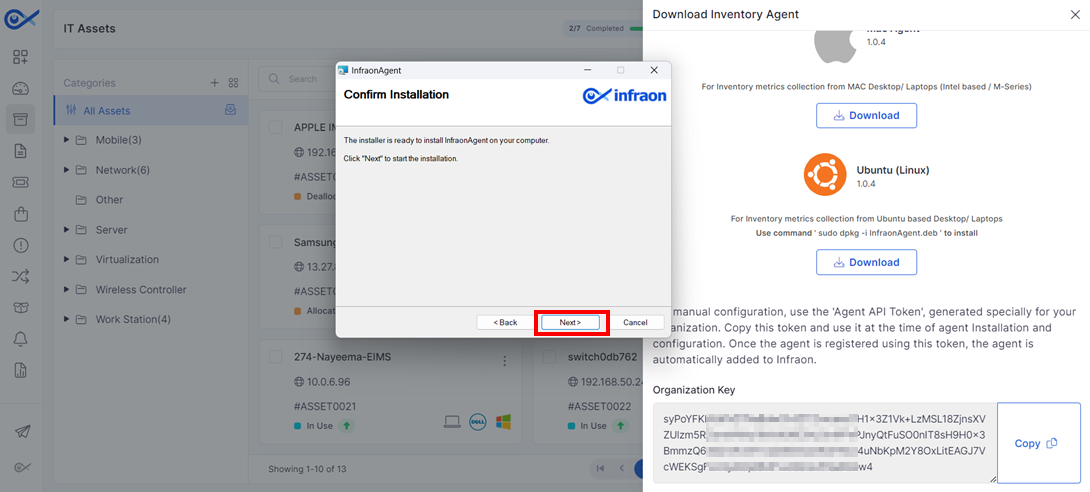
Step 1: To begin adding the asset using the agent, download the inventory agent itself. In the IT Asset tab, click 'Actions' on the top panel, and then select 'Download Agent'."
OR
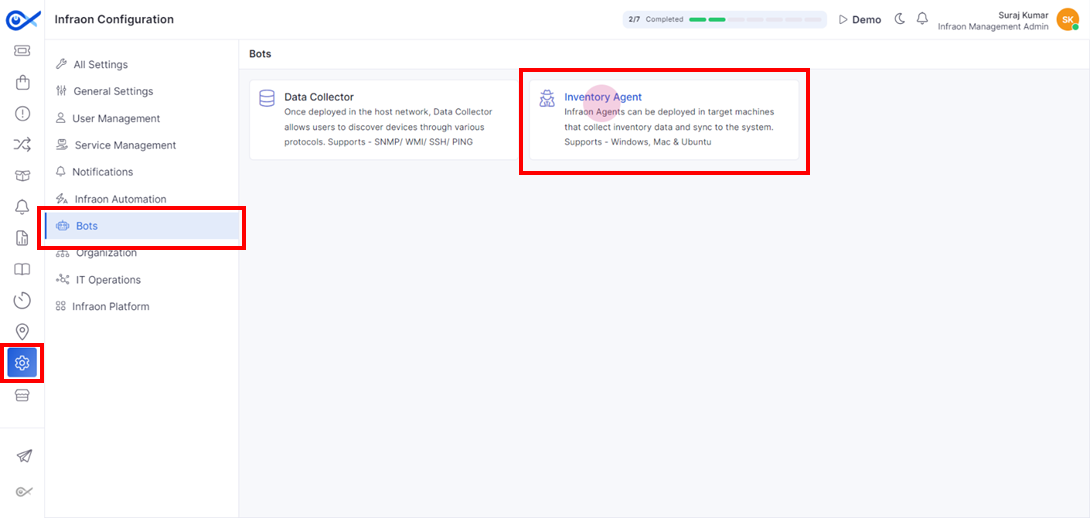
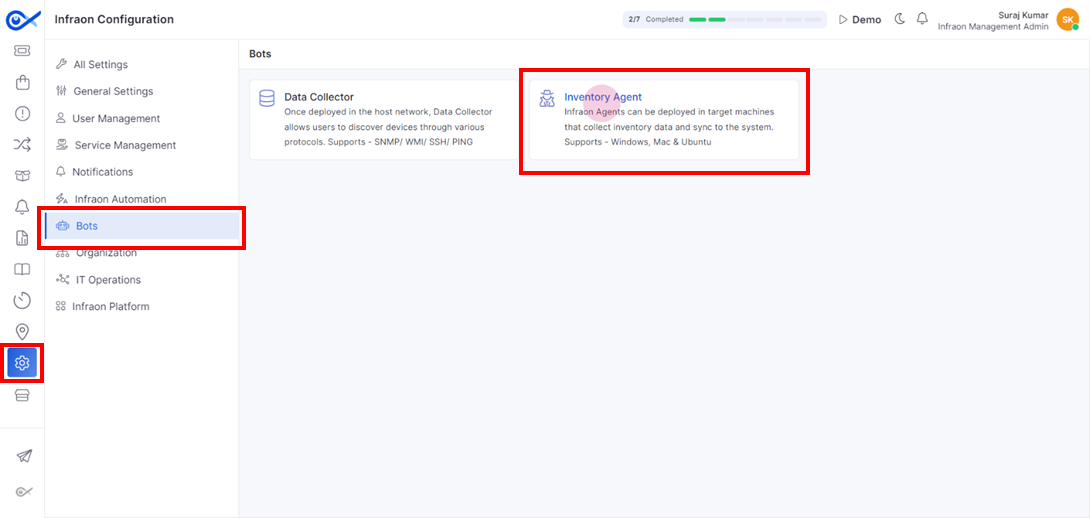
Alternatively, you can download the Inventory Agent from Infraon Configuration. Go to Bots and navigate to the Inventory Agent module.
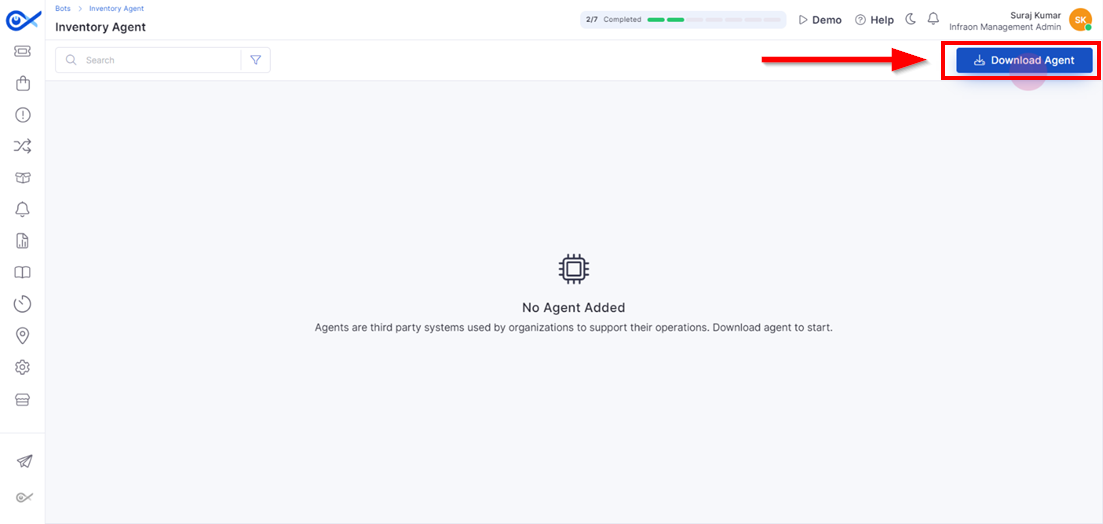
Click on the download agent located at the top right corner of the page.
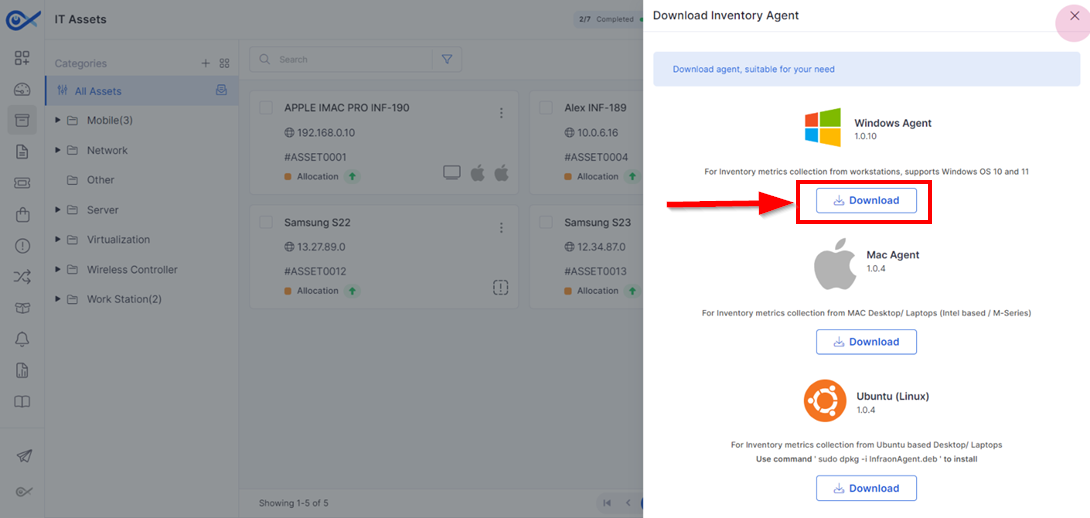
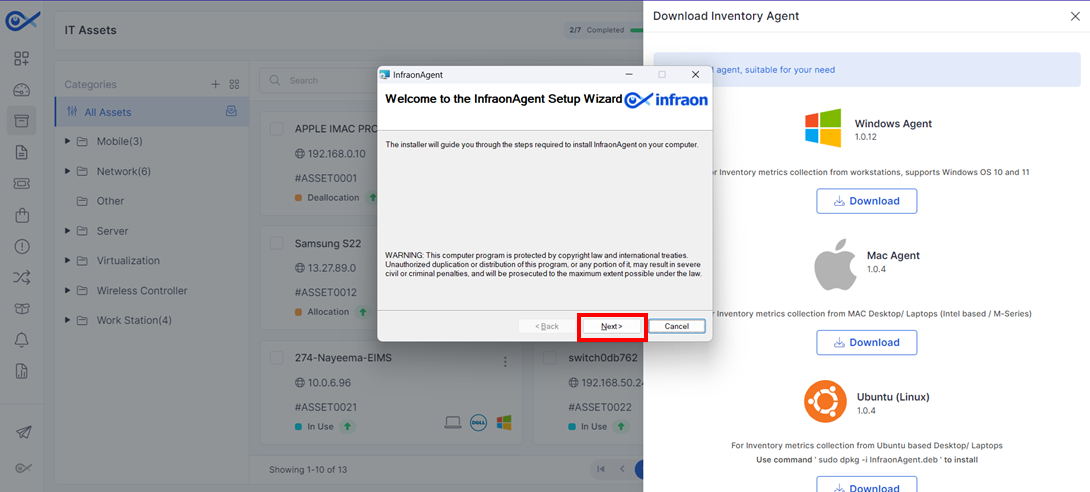
Step 2: The Inventory Agent is compatible with Windows, Mac, and Ubuntu (Linux) devices. Clicking the download button next to your chosen operating system will download the installation package for the Inventory Agent.
Step 3: Open the downloaded file to begin the installation. In the Infraon agent installer, click Next to proceed.
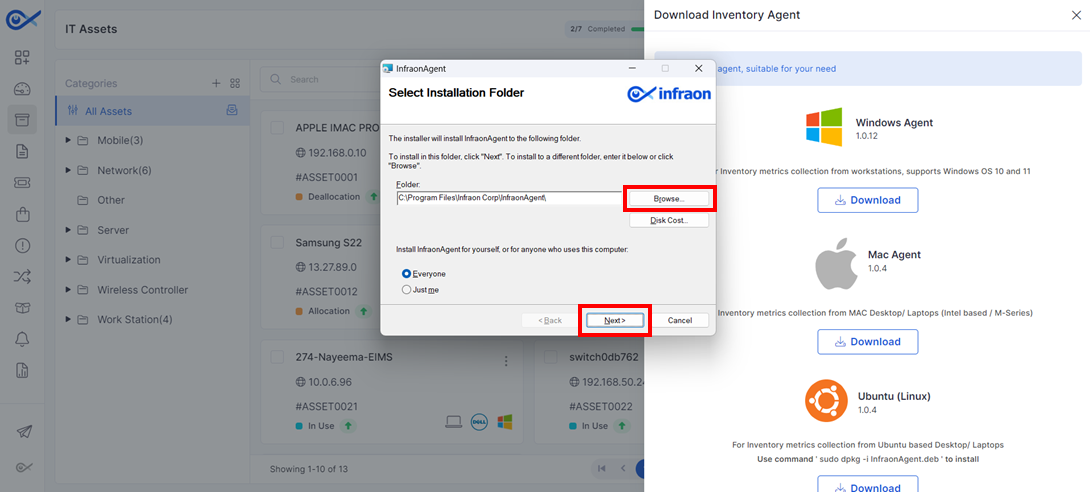
Step 4: Select the desired file path where the Infraon agent should be installed, then click Next.
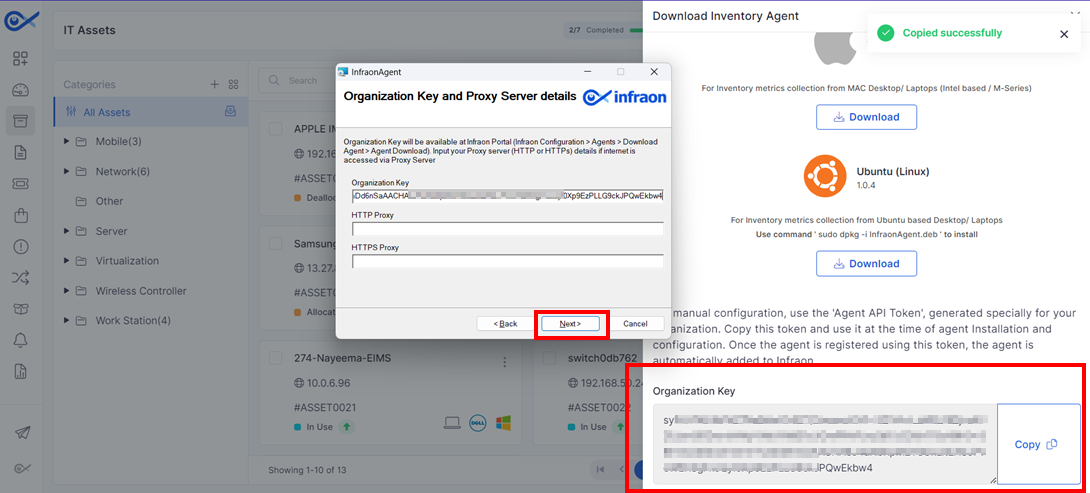
Step 5: Enter the organization key available in the download inventory agent module, then click Next.
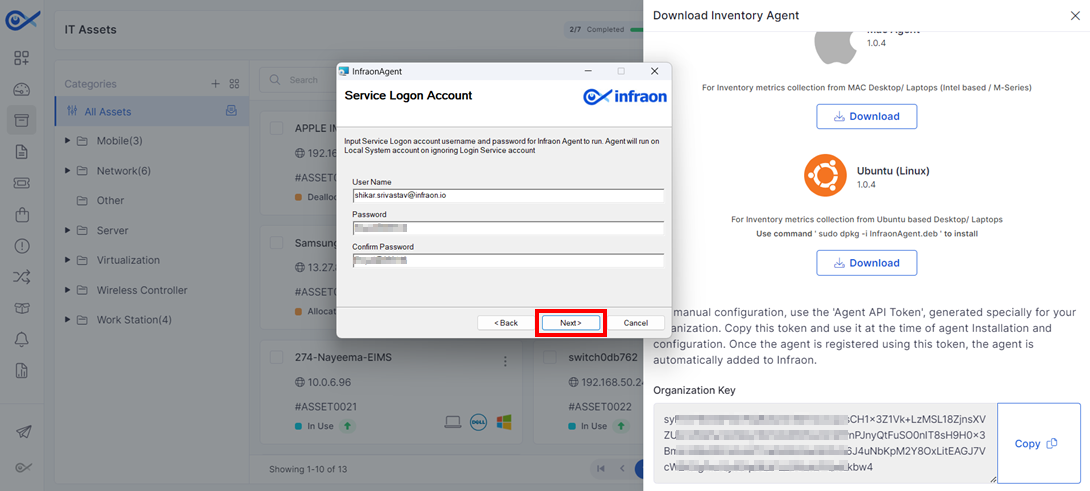
Step 6: Enter the username and password for the Infraon agent. Click Next to proceed.
Step 7: Once the configurations are added, proceed to install it by clicking Next.
The inventory agent is now successfully installed.
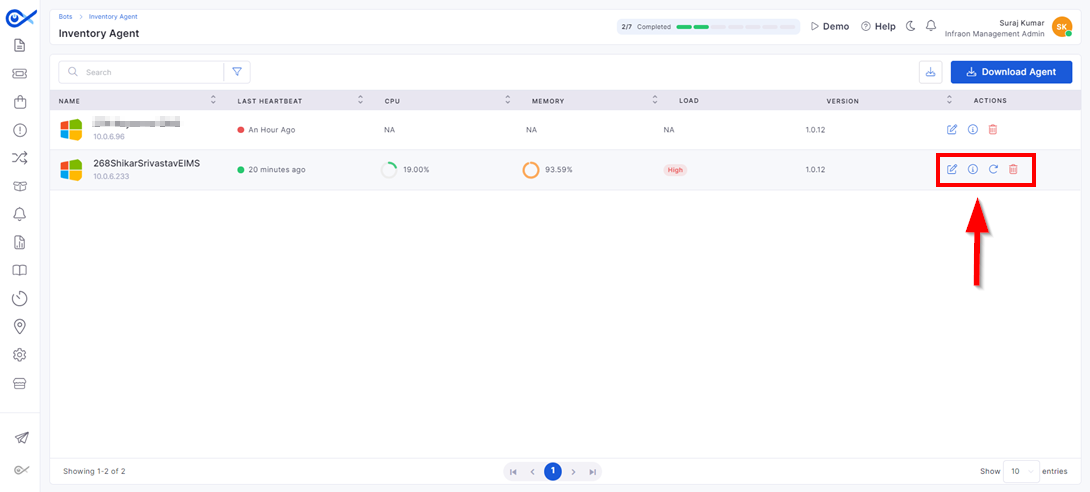
Step 1: Navigate to Infraon Configuration -> Bots -> Inventory Agent to view the list of installed agents.
Check the inventory agent list for the Infraon agent after installation.
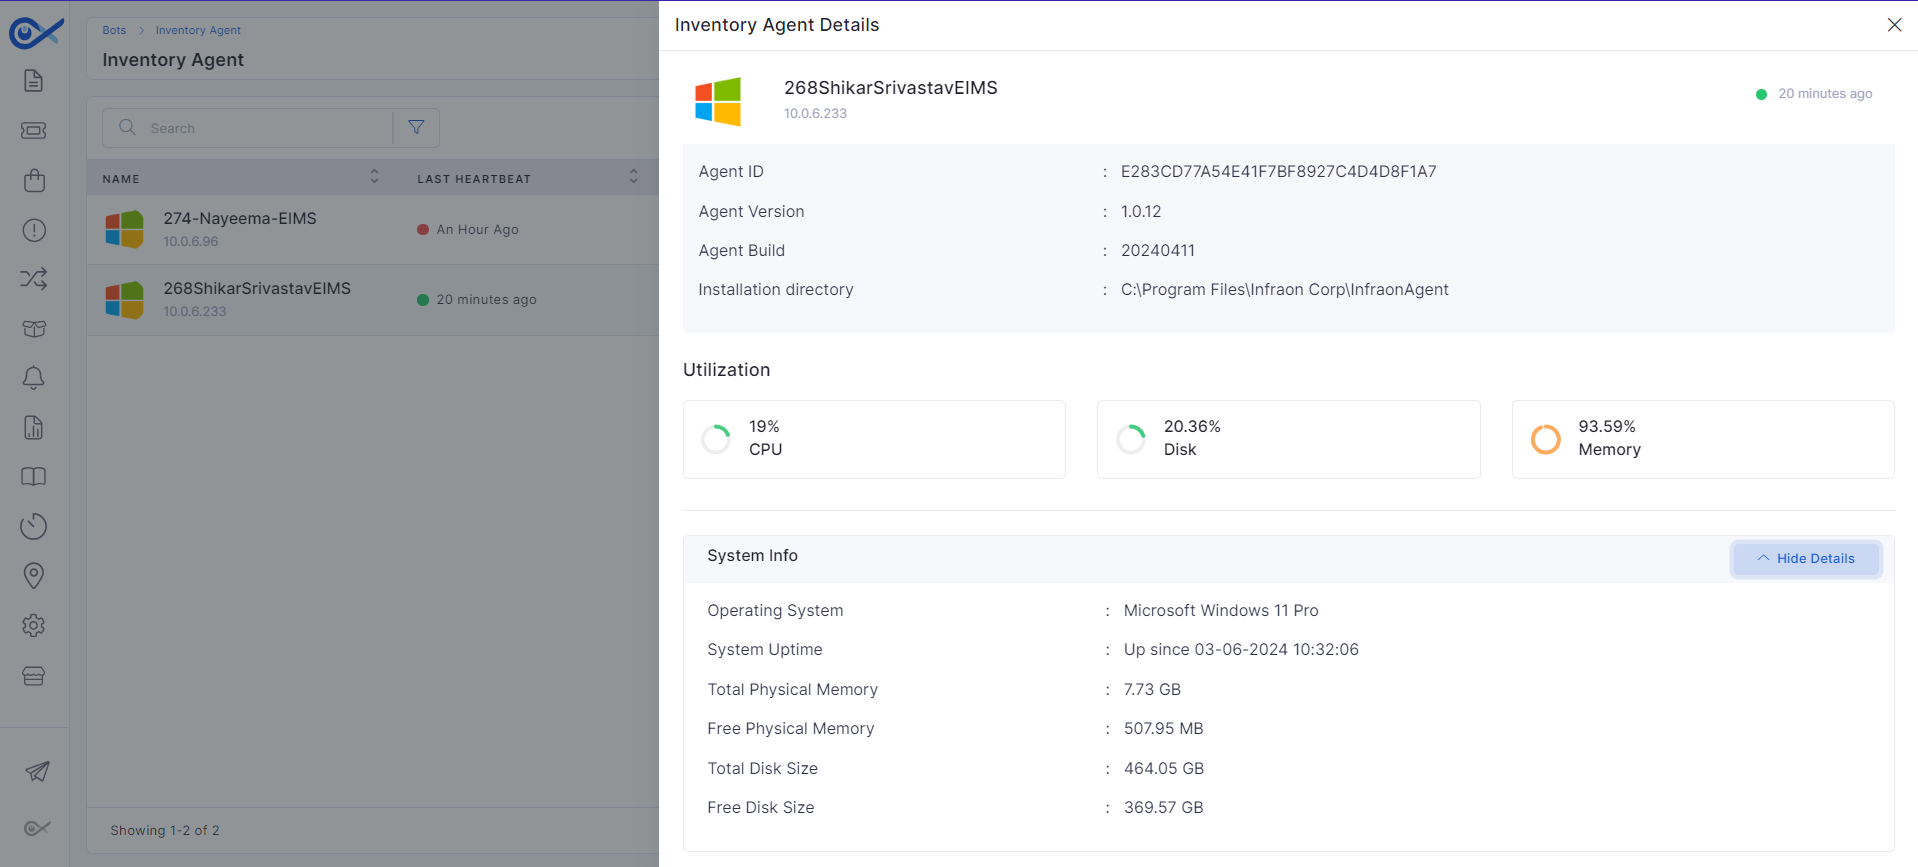
Step 2: Clicking on the (i) icon will open a pop-up page reflecting all the agent's name, last heartbeat, CPU usage, memory load, and version of the Infraon agent.
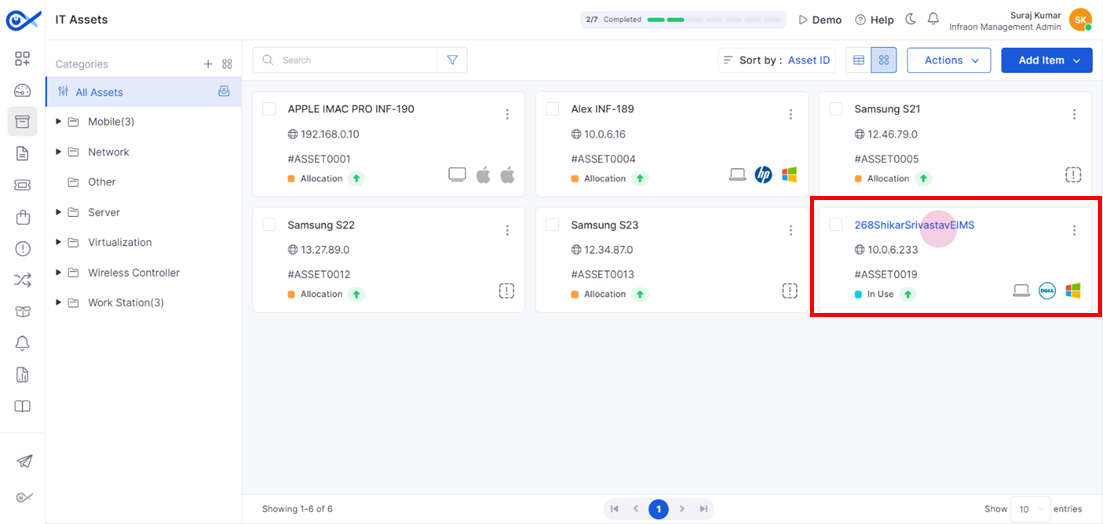
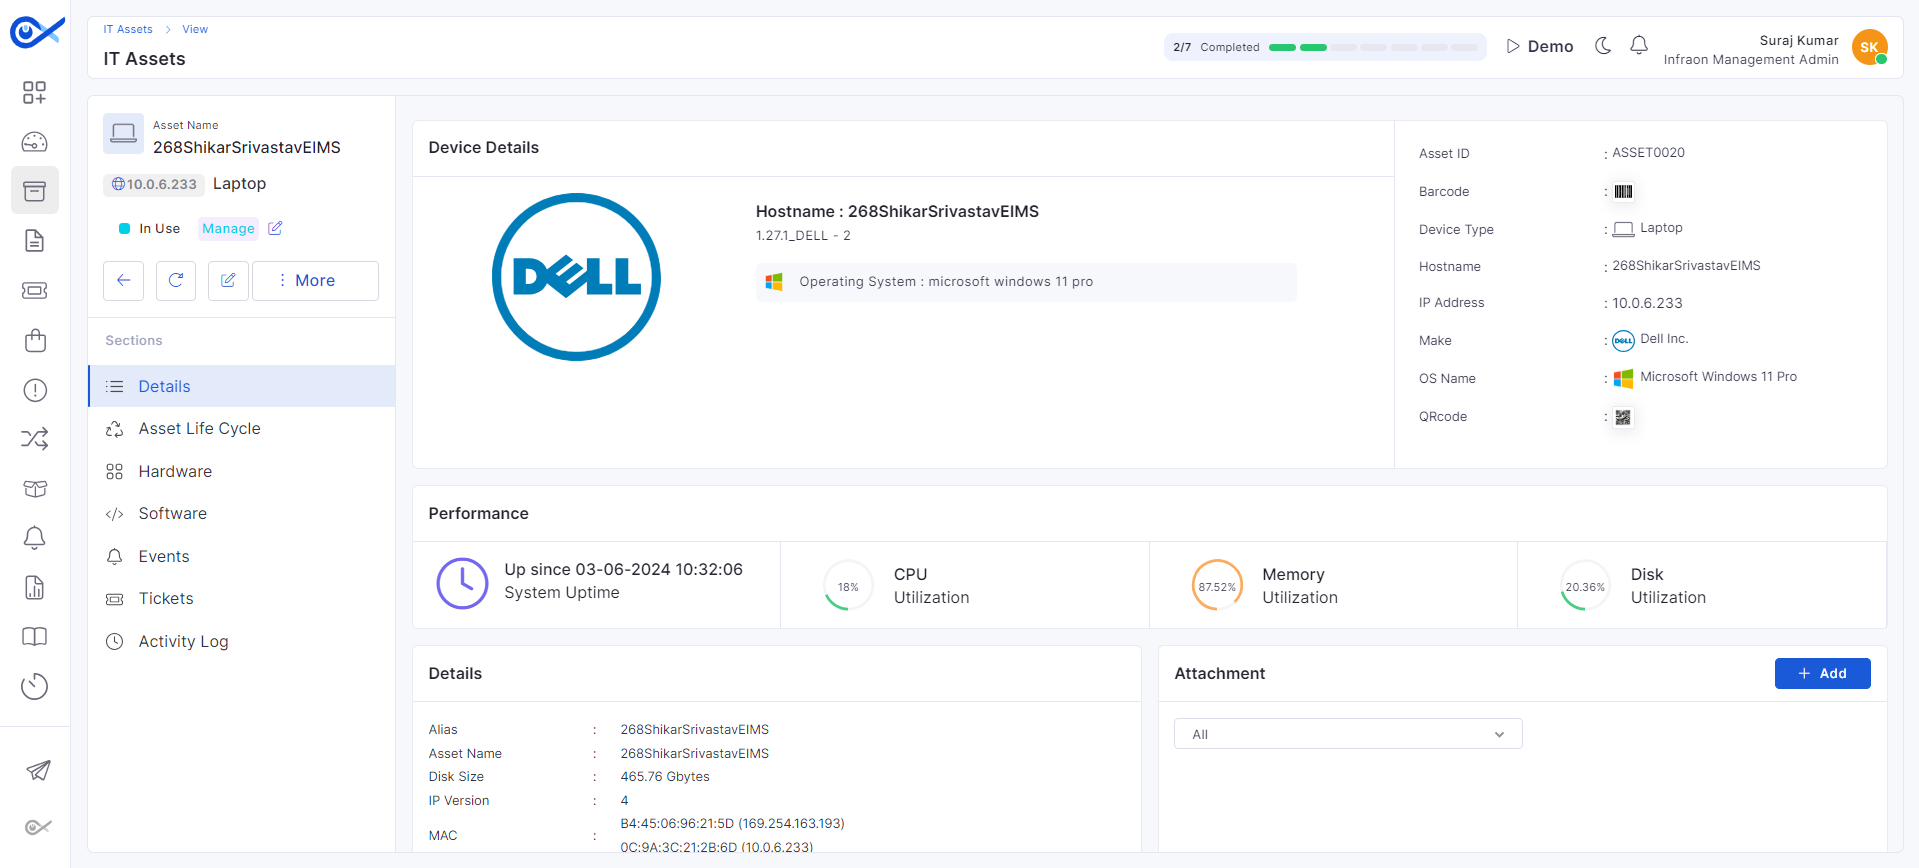
Step 3: The IT asset tab will reflect the asset discovered by the agent. Click on the discovered asset for more information.
Step 4: Review the detailed information captured by the Infraon agent, including hardware and software details, asset lifecycle, and any associated events.