Loading...
Loading...
Loading...
Loading...
Loading...
Loading...
Loading...
Loading...
Loading...
Loading...
Loading...
Loading...
Loading...
Loading...
Loading...
Loading...
Loading...
Loading...
Loading...
Loading...
Loading...
Loading...
Loading...
Loading...
Loading...
Loading...
Loading...
Loading...
Loading...
Loading...
Loading...
Loading...
Loading...
Loading...
Loading...
Loading...
Loading...
Loading...
Loading...
Loading...
Loading...
Loading...
Loading...
Loading...
Loading...
Loading...
Loading...
Loading...
Loading...
Loading...
Loading...
Loading...
Loading...
Loading...
Loading...
Loading...
Loading...
Loading...
Loading...
Loading...
Loading...
Loading...
Loading...
Loading...
Loading...
Loading...
Loading...
Loading...
Loading...
Loading...
Loading...
Loading...
Loading...
Loading...
Loading...
Loading...
Loading...
Loading...
Loading...
Loading...
Loading...
Loading...
Loading...
Loading...
Loading...
Loading...
Loading...
Loading...
Loading...
Loading...
Loading...
Loading...
Loading...
Loading...
Loading...
Loading...
Loading...
Loading...
Loading...
Loading...
The Infraon Configuration module consists of all types of configurations required for the efficient functioning of modules. While there are multiple levels of configurations, few of these configurations are mandatory.
General Settings: Configure business hours, create tags for grouping assets, users, etc., and review the complete audit log.
User Management: Invite requesters and users, assign roles, group them as teams or departments, and view their leave information.
Service Management: Configure technical and service catalogues to offer services and products seamlessly through the self-service portal.
Notifications: Configure and track notifications sent through Infraon.
Infraon Automation: Configure workflows within Infraon to define a flow of process modules like Incident, Request, Etc.
Bots: Install agents to enable discovery and monitoring.
Organization: View and add organization and branch locations.
IT Operations: Add device credentials to initiate the discovery of devices.
Vendor configuration: Customize the multiple tasks in the vendor configuration module, access various details about the vendors, display them in the address book, easily edit or delete them and utilize them on the software license page for efficient management.
Infraon Platform: Check and edit account configuration settings.
A few additional configurations are needed to enable device monitoring. Follow the instructions in the links below to enable protocols as required.
Upgrade Option for Credential-less Organizations! Users can access the management portal to select services. Selected services, with 193 options, are enabled post-payment.
Enabling SNMP is vital to initiating the monitoring of the routers and switches. Follow the steps below to enable SNMP on Cisco routers and switches.
Connect to the router/switch via telnet.
prompt#telnet testrouter
Now, enter the password to enable mode.
Router>enable
Password:
Router#
The next step is to configure your device:
Router#configure terminal. Enter one configuration command per line and finish each line with CNTL/Z. Router(config)#
Add the Read-Only community string using the following command.
Router(config)#snmp-server community public RO ('Public' is the Read-Only community string here)
For a Read-Write community, use the below command.
Router(config)#snmp-server community private RW ('Private' is the Read-Write community string here).
You can now exit the configuration mode and save the settings
Router(config)#exit Router#write memory Building configuration... [OK] Router#
The general settings module is a part of Infraon Configuration and is accessible by administrators and other users authorized by administrators.
This module of Infraon consists of three additional modules. They are:
Audits: Infraon monitors and records every user's actions. Only the administrator can access these audits.
Business Hours: Configure business hours to control SLAs and better efficient work allocation.
Tag Management: Tagging is a way of grouping assets, users, etc. Tags can be applied to multiple categories across Infraon.
Template: Lets administrators create predefined templates to standardize and speed up recurring processes across modules like Ticket, Request, Change, Release, and Risk.
Let's see each of these in detail.
Infraon records all automated and manual activities that occur within the tool and saves them as Audits.
Audit records information of the user, the action performed, the IP address, and the time stamp when the action was performed.
No actions can be performed from this page.
The AI Audit module provides visibility into all AI-driven operations performed within the system. It captures detailed logs of AI feature usage, including the model used, execution time, request and response data, token consumption, and status.
The AI Audit page displays a consolidated list of all AI interactions performed across the platform. Each record represents a single AI request, including its execution details, such as feature, model, time taken, and response status.
Users can search, filter, and analyze audit records using multiple parameters to identify specific AI operations or performance insights.
AI Audit | Basic Details
Audit Data Fields | AI Audit
The following columns are available in the audit table:
The daily working hours of teams/departments within an organization are called business hours. This, in turn, aids in assigning work based on users' working hours and setting and meeting SLAs.
When creating a profile, you could choose between specific working days/hours and 24/7 availability.
Use the Exclude Hours option to add a break in the business hours. This can be the weekend, an official lunch hour/break time, or a change in the Technician's shift. SLAs are adjusted as needed.
To view the complete list of holidays applicable to your region, add 'Holiday' or click on import holidays. 'Exclude hours and Holidays' are excluded while calculating SLAs for the ticket.
Go to Infraon Configuration -> General Settings -> Business Hours.
Click the 'Add Profile' button
Once all the parameters are added, click 'Submit' to save the profile. Business Hour Profiles can be linked to SLA, Reports, and Discovery. Please refer to the module below for more details.
Repeat the process to add multiple profiles. Business Profiles can be edited or deleted using the respective icons.
Search
Input text
Allows users to search audit records using keywords such as feature name, message content, or user.
Filter
Apply conditions
Enables filtering of audit data based on selected fields and conditions. Available Fields: Feature, Model, Request Time, Message, Response Time, Status, Settings, User, Provider, Request Token, and Response Token.
Date Range
Select from the dropdown
Filters audit records based on a selected time period (e.g., Last 60 Days).
Feature
View
Displays the AI feature used (e.g., KB Creation, Service Classification).
Model
View
Shows the AI model used for execution (e.g., GPT-5.4-mini).
Request Time
View
Label
Action
Description/Example
Profile Name*
Give a name to the Business Hour Profile.
Support Team, Main Branch, Tech Support
Description
Add a brief description of the profile.
Tech support team from the Head Office.
Timezone
Select Timezone applicable for the profile.
Select 'Timezone' based on the team's work location. Multiple business profiles can be created to align to SLAs of multiple teams supporting multiple locations.
Work Hours
Use the option to select if the team works 24*7 or selected working days/hours.
24*7 - Select exclude hours for your team.
Select Working Days/Hours - Select weekdays, start and end times. The selected days and hours are taken as official working hours for the organization/team.
For the 'Select Working Days/ Hours' option, there is an option to add multiple Business Hour profiles. This can define business hours on weekends (Saturday/Sunday) or other holidays.
Exclude Hours
Add a reason and select weekdays, start, and end times to add exclude hours.
This can be the weekend, an official lunch hour/break time, or a change in the technician's shift.
Use the 'Add Exclude Hours'option to add multiple instances. 'Exclude Hours'are excluded while calculating SLAs.
Yearly Holiday List
Add Date and Holiday Name to add a specific day as a holiday.
To view the complete list of holidays applicable to your region, add 'Holiday' or click on import holidays.
'Holidays'are excluded while calculating SLAs for the ticket.
Indicates when the AI request was initiated.
Response Time
View
Indicates when the AI response was generated.
Time Taken (sec)
View
Total execution time for the request.
Request Token
View
Number of tokens used in the request.
Response Token
View
Number of tokens generated in the response.
Total Token
View
Combined token usage (request + response).
Message
View
Displays the input sent to the AI model.
Response Message
View
Displays the AI model's output.
Status
View
Shows execution status (e.g., success, error).
LLM Settings
View
Displays configuration details used for the AI request.
User
View
Indicates the user/system that triggered the AI action.
Error
View
Displays error details if the execution fails.
Key Type
View
Indicates the type of API key used (e.g., External).
Key Name
View
Displays the configured key name.
Provider
View
Shows the AI provider (e.g., OpenAI, Azure).
Passwords are mandatory to verify user identity (authentication) and protect information. Therefore, it is crucial to have more robust password policies across the Organization.
Infraon can be configured with multiple Password Policies to suit the organization's internal and external compliance. Different password policies can be configured for various roles.
The Password Policy page can create new policies and edit and delete existing ones.
Go to Infraon Configuration -> User Management -> Password Policy
Click the 'Add' button.
There are two tabs on the 'Add Password Policy' page.
The Policy Details tab contains options to customize passwords, including Password Length, Upper/Lower Case, Numbers, Symbols, and Frequency to Change Password. The applicability tab lets the user choose the policy's privacy level.
Policy Details | Applicability
Fields marked with * are mandatory.
Click 'Next' to configure the password policy's applicability.
Policy Details | Applicability
Fields marked with * are mandatory.
Once all the parameters are added, click 'Submit' to save the password policy. Password policies can be linked to newer roles.
Administrators and privileged users can edit and delete policies using the respective icons.
The default password policy cannot be deleted.
Messenger Audit acts as the Notification Log. Displays the complete list of notifications triggered and received within Infraon.
Use the options on the left panel to filter out notifications based on the notification type.
Slack
SMS
Trash
You can view, reply to, or forward messages using the respective icons on the message.
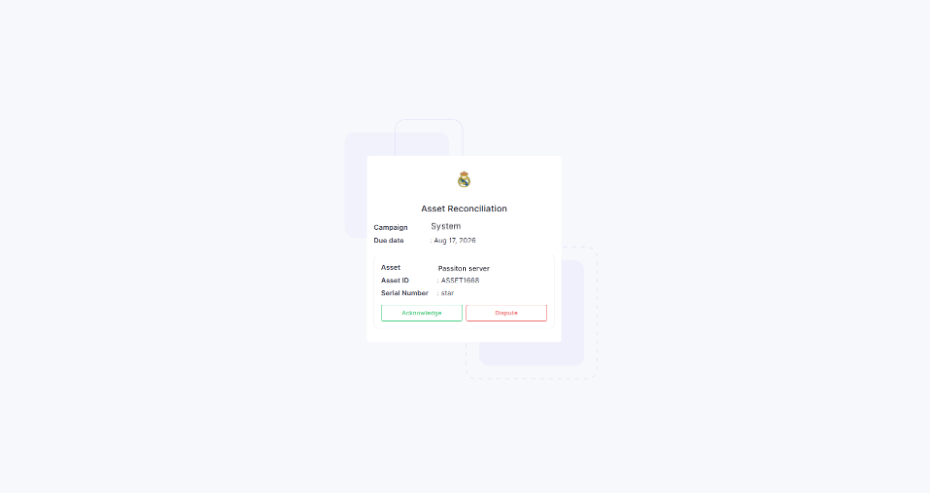
Messenger Audit reconciles the asset information and sends a notification to the Messenger when changes are identified in their assigned assets. The Messenger can acknowledge the reconciliation if the changes are valid or dispute them if the information is incorrect.
If the number '4' is entered, Infraon will not enable users to use the previous four passwords when changing or resetting their passwords.
Minimum Password Length
Enter the minimum number of characters for the password length.
If the minimum password length is set to '8', Infraon will only accept passwords at least eight characters long.
Maximum Password Length
Enter the Maximum number of characters for the password length.
If the maximum password length is set to '20', Infraon will only accept passwords less than twenty characters long.
Minimum Upper Case Characters
Enter the minimum amount of uppercase or capital letter characters required in the password.
If the minimum upper case character length is set to '2', Infraon will only accept passwords with two uppercase characters (neither one nor more than two).
Minimum Lower Case Characters
Enter the minimum amount of lowercase or minor letter characters required in the password.
If the minimum lower case character length is set to '2', Infraon will only accept passwords with two lowercase characters.
Minimum Numerals
Enter the minimum amount of numerals or numeric characters required in the password.
If the minimum numerals are set to '2', Infraon will only accept passwords with two digits (neither one nor more than two).
Minimum Special Characters
Enter the minimum amount of special characters required in the password.
If the minimum unique character is set to '2', Infraon will only accept passwords with two special characters (neither one nor more than two). Special characters include
Continuous N Upper Case Characters
Enter the count of continuous upper case characters allowed in the password sequence.
If the continuous upper case character is set to 1, Infraon will not allow more than one upper case character in the password sequence.
For example, Eims would be accepted, whereas EIMS would not.
Continuous N Lower Case Characters
Enter the count of continuous upper case characters allowed in the password sequence.
If the continuous lower case character is set to 3, Infraon will not allow more than three lower case characters in the password sequence.
For example, Eims would be accepted, whereas eims would not.
Continuous N Numerals
Enter the count of continuous numerals or number characters allowed in the password sequence.
If the continuous numeric character is set to 3, Infraon will not allow more than three numeric characters in the password sequence.
For example, Eims123 would be accepted, whereas Eims1234 would not.
Continuous N Special Characters
Enter the count of special characters allowed in the password sequence.
If the continuous unique character is set to 2, Infraon will not allow more than two special characters in the password sequence.
For example, Eims@123! would be accepted, whereas Eim$@1234 would not.
Label
Action
Description/Example
Policy Name*
Give a name to the password policy.
Vendor Team, Requesters Only.
Description*
Add a brief description of the policy.
Assign to the external vendor team; This is for requesters only.
Change Password Every N Day(s)
Enter the number of days until the password needs to be changed.
Users are reminded to change their passwords every (n) day by Infraon.
Last-Used Password Count
Label
Action
Description/Example
Roles
Select a role to apply the password policy.
Vendor Team, Requesters.
Roles must be pre-defined to be available for selection.
Enter the count of last used passwords that are considered for non-repetition.
Serial Number
View Serial Number
Displays the serial number associated with the asset. Compare it with the physical asset or available records to verify the asset details.
Example: star
Acknowledge
Select Acknowledge to accept the verification
Select Acknowledge when you have verified the asset details and confirm that the asset is assigned to you and the information is correct.
Dispute
Select Dispute if the information is incorrect
Select Dispute when the asset details are incorrect, the asset is not with you, or the information does not match the actual asset. This allows you to report the discrepancy for further review.
Reason
Enter a reason
Specifies the reason for disputing the asset reconciliation.
Comment
Add a comment
Allows the messenger to provide additional details or remarks about the reconciliation.
Label
Action
Description / Example
Campaign
View Campaign Name
Displays the reconciliation campaign associated with the Messenger Audit.
Due Date
View Due Date
Indicates the deadline by which the Messenger Audit must be completed.
Example: Aug 17, 2026
Asset
View Asset
Displays the name or identifier of the asset being audited. Verify that it matches the asset in your possession.
Example: Dell Latitude 5440
Asset ID
View Asset ID
Displays the unique identifier assigned to the asset. Use it to confirm that the correct asset is being audited.
Example: ASSET1668
Tags are simplified identification keywords used to group items or users within Infraon. Tags can be applied to users, assets, Incidents or requests, articles, etc.
Tagging enables quick grouping of items/users. At this point in time, tags are added for:
Assets - Tag assets by brand, vendor, location technician, etc.
Users - Tag users by the team, skills, location, service catered, etc.
Expertise - Tag teams (team creation) with Hardware, Python, Django, or product expertise like washing machines, TV, etc.
Services - Tag services by team, location, category, classification, etc.
Incident - Tag incidents by the team, technician, site, catalogue, criticality, device, etc.
Requests - Tag incidents by the team, technician, site, catalogue, criticality, device, etc.
In a business where the end-users call from multiple locations for support on laptops and desktops, asset tags such as Laptop, Desktop, NY, AU, and IND can be used to assign these incidents to technicians tagged as Laptop, Desktop, NY, AU, and IND.
Go to Infraon Configuration -> General Setting ->Tag Management
Click the '"Add Tag button'
Once both the parameters are added, click 'Submit' to save the tag.
Repeat the process to add multiple tags. Tags can be edited or deleted using the respective icons.
Here are the 7 methods you can assign the asset tag.
Method 1: Single Asset
Go to Infraon Asset Card page -> Select the asset-> ( ⋮ ) More -> Edit
Enter the required details, add the tag in Asset Tag, and click Next.
Check the details in Asset Properties and click Submit.
Method 2: Bulk- Card/ Grid View
Go to the Infraon Asset Card page -> Select multiple Assets.
Click on Tag at the center of the top panel. Click on “Yes, Edit it.”
Name your Tag and click Submit.
Method 3: Bulk Edit
Go to the Infraon Asset Card page -> Actions -> Bulk Edit.
Select the Category.
Download the CSV file (Excel sheet) and enter the tag name on the sheet.
Upload the same edited CSV file.
Method 4: Tags can be assigned directly while adding an asset.
Go to the Infraon Asset Card page -> Add Item -> Single Asset
Add the required details to add the asset.
Select the Tag in the Asset Tag section.
Click Next -> Asset Properties -> Submit.
Method 5: Manually from CSV file (excel sheet)
Go to the Infraon Asset Card page -> Add Items -> Import from CSV
Select the required Category and download the CSV file.
Enter the Tag name in the sheet, use a semicolon (;) to add multiple tags at a time Eg: SHQ; BHQ
Upload the same edited CSV file.
Method 6: Asset details page
Go to the Infraon Asset Card page -> Select the Asset Name and redirect to the Details page.
Locate the Tags button in the center of the page, near the left panel.
Click to proceed to Add the required tags.
Method 7: Import from CSV
Go to Infraon configuration page -> IT Operations -> Discovery -> Automatic Discovery.
Click the "Import from CSV" button at the bottom center of the page.
Download the CSV file (Excel sheet) and enter the tag name on the sheet.
Upload the same edited CSV file.
Method 1: Bulk
Go to the Infraon Asset Card page -> Select the Asset Name and redirect to the Resource page.
Check the boxes next to the resources you need to tag.
Click on the Add Tag option, add the required tag, and click Submit.
Method 2:
Go to Infraon configuration page -> IT Operations -> Advance Resource Configuration.
Click Configure.
Navigate to the top right corner and click Actions -> Tag.
Add the required Tag.
Method 3: Advance configuration (CSV file)
Go to Infraon configuration page -> IT Operations -> Advance Resource Configuration.
Click Configure.
Click the "Export" button in the top right corner.
Clicking the button downloads the CSV file immediately (a pop-up may appear).
Method 1: Single
Go to Infraon Asset Card page -> Select the asset-> ( ⋮ ) More -> Edit
Enter the required details, add the tag in Owner Tag, and click Next.
Check the details in Asset Properties and click Submit.
Method 2: Bulk Edit
Go to the Infraon Asset Card page -> Actions -> Bulk Edit.
Select the Category.
Download the CSV file (excel sheet) and Enter the Tag name in the sheet.
Upload the same edited CSV file.
Method 3: Bulk- Card/ Grid View
Go to the Infraon Asset Card page -> Select multiple Assets.
Click on Tag at the center of the top panel. Click on “Yes, Edit it.”
Name your Tag and click Submit.
Method 4: Import from CSV
Go to Infraon configuration page -> IT Operations -> Discovery -> Automatic Discovery.
Click the "Import from CSV" button at the bottom center of the page.
Download the CSV file (Excel sheet) and enter the tag name on the sheet.
Upload the same edited CSV file.
APIs or Application Programming Interfaces are added to enable data exchange between Infraon and computers/programs/applications. API integrations are possible with other third-party applications and web services supporting HTTP protocol.
Infraon supports REST API. REST stands for Representational State Transfer that adheres to REST architectural constraints. REST serves as a bridge between the client and the server, allowing communication over HTTP. It enables servers to cache responses, resulting in improved application performance.
The REST-API serves as a single point of entry into the system. Before granting access to the application's resources, it encapsulates the business logic and processes all client requests, including authorization, authentication, data sanitization, and other necessary tasks. Infraon supports the below content types:
application/json
application/x-www-form-urlencoded
txt/plain
APIs use authorization to secure client requests accessing data. While integrating third-party APIs, these credentials are provided by the respective API provider. Based on the API, you can select one of the below Auth Types:
API Key - Uses a key-value pair in the API's request headers or query parameters.
Basic Auth - Uses a verified username and password with the request.
Custom Auth - Uses token-based authorization that requires CSRF URL, token, key, username, and password with the request.
No Auth - Uses when there is no authorization to request data.
Requests
Sites
Technicians
Assets
Worklog
It enables external applications or systems to receive real-time updates when specific events occur in Infraon workflows. It facilitates unified automation and communication between Infraon and third-party tools by invoking a registered API when triggered by workflow conditions.
It allows users to:
Register external APIs to be invoked during a workflow transition (such as when a ticket moves from Open → In Progress, etc.)
Enable or disable webhook responses for specific workflow actions.
Automate actions like sending notifications, updating external systems, or triggering remote scripts without manual intervention.
Go to Infraon Configuration -> General Settings -> API Registration
Click the 'Add API' button and refer to the table below for more details:
API Key - Auth Key, Auth Value, and Add Key to (Header/Query)
Basic Auth - Username and Password
Custom Auth - Token details, Key, Request Type (GET, POST), Username, and Password
No Auth - No credentials required.
Once all the parameters are added, click 'Submit' to add the API. APIs can be edited or deleted using the respective icons.
Now navigate to the Infraon configuration page -> IT Operations -> Advance Resource Configuration.
On the top right corner, click Bulk Resource Update.
Upload the same edited CSV file.
Click Next -> Import -> Proceed with Valid Records.
Label
Action
Description/Example
Tag Name*
Give a name to the tag
Laptops, Desktops, IT, HR, India, NY, etc.
Type*
Select tag type using the drop-down menu.
Refer 'Tag Types' section above for detailed information
Label
Action
Description / Example
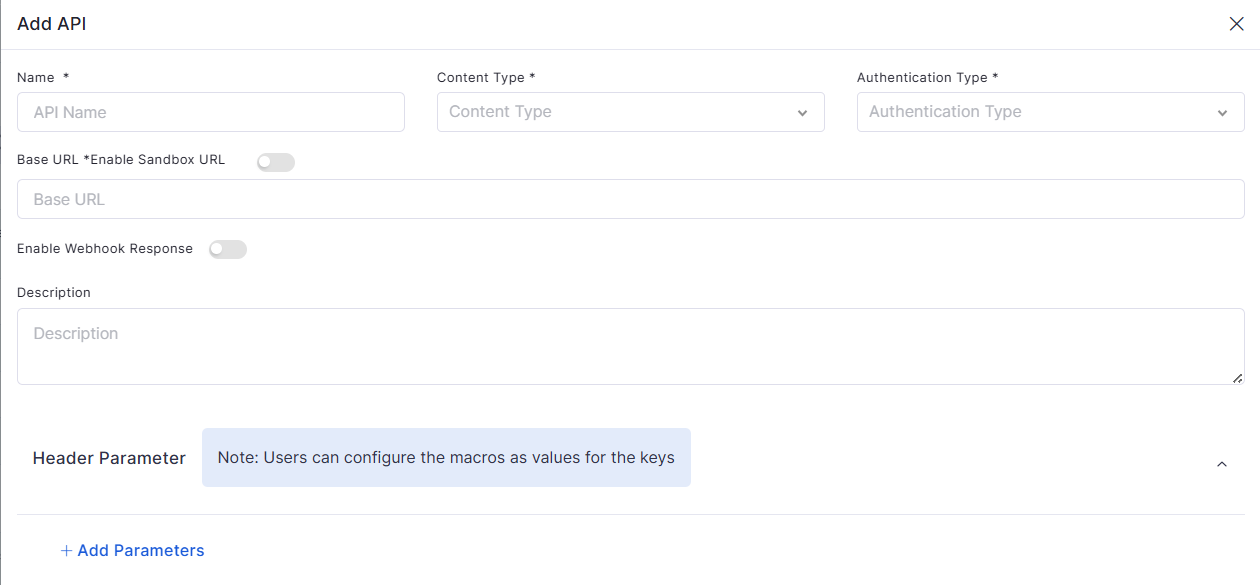
Name
Enter a name
It helps identify the integration's purpose, especially when managing multiple APIs in Infraon. This will display the name for the API integration you're configuring.
Example: JIRA, ServiceNow, etc.
Content Type
Choose from the dropdown
This defines the format of data being sent to the API.
Options: application/JSON, text/plain, multipart/form-data, and application/xml.
Authentication Type
Choose from the dropdown
This defines the method by which the API call is authenticated. The correct type must be selected based on the API provider’s documentation.
Options: API Key, Basic Auth, Custom Auth, and No Auth.
Username
Enter your username
The username is used to authenticate API calls using authentication methods like Basic Auth. This typically refers to your registered email address or username in the third-party platform.
Example: When integrating Jira, this would be your Atlassian email ID, username@example.com.
Password
Enter your password
This field is used along with the username to authenticate the API. If you're using Basic Auth, this is often your account password, or an App Password generated from the external platform’s security settings—especially in platforms like Jira or GitHub, where regular passwords are restricted.
Is Base64 Encode
Toggle ON/OFF
When enabled, Infraon will automatically convert the username and password into a Base64-encoded string for APIs requiring that format (standard with Basic Auth).
Secret Key
Enter the token/key.
The secret key refers to an API token or access key required for secure authentication. It replaces or supplements the password in many modern APIs. You can generate this token from the API/Developer settings section of platforms like Jira, Freshdesk, or Salesforce.
Example:
cJXbGJI2y1oIh3IsnTI5jR6VCJ9....
Client ID
Enter the client ID.
The Client ID is a unique identifier assigned when registering your application in an OAuth2-compliant platform (e.g., Azure, Google, Atlassian).
Example: 11853234773……...
Base URL
Enter API base URL
This is the root URL of the third-party API to which Infraon will send requests. It forms the foundation of all endpoint calls.
For Jira, it might look like: https://yourdomain.atlassian.net/rest/api.
Enable Webhook Response
Toggle ON/OFF
This option allows Infraon to receive real-time call-back responses from external platforms via webhooks. It ensures Infraon can process workflow actions or status updates triggered externally when enabled.
For instance, if Infraon creates a ticket in Jira and Jira later changes the ticket status, enabling webhook response ensures that Infraon receives and updates the ticket status automatically.
Description
Optional input
You can provide an internal description to explain the purpose of this integration. This is not used for functional purposes but is helpful for clarity and documentation.
Example: Integration for auto-creating tickets in Jira.
Header Parameter
Enter key-value pairs
Some APIs require additional headers for authentication or custom handling. Here you can define header keys (e.g., Authorization) and assign static values or macros.
Add to Query Parameter
Toggle ON if needed
When enabled, the header parameter is attached to the URL as a query string instead of being sent in the header.
Infraon is enabled with an intelligent notification system. Infraon Notifications are displayed as floaters across all pages. The respective notification icon is displayed with the notification count when a notification is triggered.
The notifications module is a part of Infraon Configuration and is further split into:
Messenger Audit - View the log of communications sent from and received within Infraon
Configure SMS - Configure SMS gateway to enable SMS notifications from Infraon.
Configure SMTP - Configure your email server details to send and receive emails from Infraon.
Trigger Configuration - Configure a trigger to trigger an alarm or an event.
Let's see each of these in detail.
This is where you can record your organization's branch offices, vendors' location information and view license details..
The default address or the Head Office address is added based on the address given at the time of registration. Additionally, multiple branch offices can be added. Location information is used to align users, assets, and services.
Configuring SMTP server information is mandatory when sending out email notifications from Infraon. SMTP server configuration is a part of 'Getting Started' with Infraon. Mails sent to this address are converted as Incidents. This email address also acts as a reply to the mail address for all customer communication. Before configuring, ensure that you have the below details from your service provider:
Host Name
Host Username
Password
Port
There are two options within the SMTP server configuration. You can configure your existing email address onto Infraon or set up a new one using Infraon's email server.
Go to Infraon Configuration -> Notifications -> Configure SMTP
On the page, either use the Microsoft OAuth login or manually enter API credentials.
Click to log in using the Microsoft account.
Enter the Microsoft credentials and grant the appropriate permissions to configure the SMTP configuration easily.
There are two tabs in the SMTP configuration.
Configuration | Test
Configuration | Test
Once the test is successful, click 'Submit' to save the configuration.
Label
Action
Description/Example
SMTP Hostname*
Add the SMTP Hostname.
The service provider usually gives this.
SMTP Host Username*
Add the SMTP Host Username.
The service provider usually gives this.
SMTP Host Password*
Provide the SMTP password.
The service provider usually gives this.
Sender Email*
Add Sender's email address.
Label
Action
Description/Example
Test
Test the entered credentials.
Click 'Test' to send a test mail to authenticate the configured email credentials.
Mails sent through Infraon are delivered with the specified email address as the sender.
SMTP Host Port*
Add SMTP host's port details.
Use the toggle option to enable SSL or TSL encryption.
Authentication Type
Select the authentication type from the drop-down
Basic Authentication and OAuth2 Microsoft. Configure SMTP with Office 365 is now seamless, requiring Client Secret, Tenant ID, Client ID, and Authority.
Web/URL/Port Monitoring empowers us to be proactive, informed, and in control of discovery. Keep a watchful eye on any web server, including your own and others.
The Web/URL/Port Monitoring page contains one tab: Discovery Details.
The Discovery Details section provides the discovery profile, device information, credentials, agent details, and data collector details settings.
Discovery Details | Profile and Discovery Information
Label
Action
Description / Example
Application*
Select or enter the application to be monitored.
Specifies the application associated with the Web / URL / Port Monitoring configuration.
The Notification module enables you to automate notifications across different Infraon modules by defining notification rules and reusable templates. It helps ensure that users receive timely updates whenever specific events or actions occur within the selected module.
Notification configuration is organized into two tabs:
Notification Rules – Define when notifications are triggered, who receives them, the delivery channels, and the delivery schedule.
Templates – Create and manage reusable notification templates that define the notification subject and message content.
The Notification module supports the following modules:
Select the required module from the Module drop-down to configure notification rules and templates specific to that module.
The Notification Rules tab lets you create and manage automation rules that determine when notifications are generated for events in the selected module.
Each rule combines a trigger, notification template, recipients, delivery channels, conditions, and delivery schedule to automate notifications.
Using Notification Rules, you can:
Define the event or trigger that initiates a notification.
Associate a notification template with the rule.
Configure notification delivery channels, such as Email and In-App notifications.
Specify recipients based on users or roles.
The Templates tab allows you to create and manage reusable notification templates that can be associated with notification rules. Templates define the notification subject and message content, providing a consistent communication format across multiple notifications.
Using Templates, you can:
Organize templates by notification category.
Configure the notification subject and message body.
Insert supported module-specific variables (tokens) into the message body.
Reuse templates across multiple notification rules.
Access control within Infraon is managed through role-based privileges. A Role defines a user's role within Infraon, and Privileges define the user's level of access across multiple modules of Infraon. Infraon comes with seven default roles with pre-defined privileges.
On Infraon, multiple default roles are displayed as a list with icons for editing, cloning, and deleting. The 'New Role' button is at the top right corner of the page.
Details displayed are as follows:
Role Name
User Count
Role Description
Configure real-time or scheduled notification delivery.
Description
Enter a description.
Provides additional information about the monitoring configuration.
URL
Enter the URL to be discovered.
Specifies the web URL that Infraon should discover and monitor.
Example: https://solution.sd.everest-ims.com/
Import from CSV
Import URLs from a CSV file.
Allows multiple URLs to be added for discovery by importing them from a CSV file.
Data Collector Details*
Select details.
Select the Data Collector to be used for the AIX Monitoring discovery process.
The Data Collector is installed within the customer's network and communicates with the target environment using the configured protocols and credentials.
It collects the required inventory, availability, and performance information and sends the data to Infraon for monitoring.
Submit
Click submit
Click Submit to submit the web discovery configuration.

Icons to edit/clone/delete
Roles are crucial for managing workflows and ensuring secure access to specific modules. Infraon uses dynamic, role-based access control (RBAC) to define user access and responsibilities across the platform.
Role
Description
Infraon Admin
Has complete access to the Infraon platform. Can manage all configurations, users, assets, and modules. This role is equivalent to the ITIL v4 “Administrator” or Platform Owner. Note: This role cannot be edited or deleted.
Approver
Has access only to the Requester Portal and can approve workflows related to tickets, changes, SLAs, and onboarding processes. Reflects the Change Authority or Approver Role in ITIL v4.
IT Manager
Can manage IT asset lifecycles, including adding/editing assets via CSV/Discovery (with approval). It can also view dashboards, monitor reports, alarms, and notifications, and handle discovery profiles. Aligns with the IT Asset Manager and Service Owner roles in ITIL.
IT Support Operator
Provides support for IT infrastructure. Has full access to:
Discovery Profiles (add/edit)
Asset onboarding via CSV/Discovery
Dashboards and Reports
Alarms and Notifications
This role reflects the IT Support Role in ITIL.
NOC Operator
Monitors and manages network operations. Inherits all privileges of the IT/Tech Support Operator and can additionally manage:
Alarms
Events
Notifications
The role reflects the Monitoring Specialist or NOC Engineer in ITIL.
Go to Infraon Configuration -> User Management -> Role and Privileges
Click on the 'New Role' button in the top right corner.
Privileges for default roles are saved as templates and can be selected and customized to suit needs. Privileges are customized at the ‘General,’ ‘Ticket,’ ‘NCCM,’ ‘Privacy Settings,’ and ‘Reports’ levels.
Label
Action
Description/Example
Role Name*
Add a name for the new role.
Manager, Support Team, L1 Support, etc.,
Select Template
Select a template to import privileges.
Selecting existing role templates helps import privileges from an existing role to the new role.
Description
Add a brief description of the role.
Assign to L1 support members of the team.
Privileges
Select privileges to enable access to the new role.
The Privileges module within Infraon Infinity empowers administrators with granular control over user permissions. This ensures users have the necessary access to perform their tasks effectively while safeguarding sensitive data within the platform.
Here, admins can define specific actions/modules that users can perform within each module using checkboxes. These levels include:
Label
Action
Description/Example
View
If selected, the 'View' privilege allows the user only to view the selected module/page.
For example, if the user is given the 'View' privilege to the 'Business Catalogue' module, the user will be able to view the services listed.
Add
If selected, 'Add' allows the user to view and perform add operations within the selected module/page.
For example, if the user is given the 'Add' privilege to the 'Business Catalogue' module, the user will be able to view the services listed and add new services. The user will, however, not have edit or delete privileges.
Edit
If selected, 'Edit' allows the user to view and perform edit operations within the selected module/page.
For example, if the user is given the 'Edit' privilege to the 'Business Catalogue' module, the user will be able to view the services listed and edit existing services. The user will, however, not have add or delete privileges.
Delete
If selected, 'Delete' allows the user to view and perform add operations within the selected module/page.
Here's a breakdown of the functionalities offered by the Privileges module and its sub-modules:
Grant access to various Infraon Infinity modules:
Agent
API Registration
Audit
Business Hour
Bot Configuration
Business Rule
Business Catalogue
Change
CI Relation rule
Asset
Contract Management
Correlation Rule
CSAT
Client Registration
Dashboard
Department
Device Credentials
Diagnosis Tools
Discovery
Events
Geomap
Holiday
IMACD
Mail Automator
Jobs
Knowledge Base
Leaves
Maintenance
Messenger
My Profile
Network Configuration
Network Diagram
Organization
Address Book
Password Policy
Problem
Release
Request
Requester
Service Catalogue
Shift
SLA
SMS Gateway
Software License
SSP Configuration
Tag
Task
Team Escalation
Teams
Template
Thresholds
Topology
Trigger
Technician
Role
Vendor
Workflow
Workspace
Meetings
Log Management:
Manage user access to functionalities related to Log Management and configurations. This sub-module offers permissions for:
Log Multi-Index: Create and manage the multi-indexes that help retrieve data from Elasticsearch.
Log Export Configs: Export Configs define how logs are exported, including format, size, and downloaded exported log files.
Log Search: Enables rapid searching and analysis of vast amounts of structured and unstructured log data, delivering results in seconds.
Log Rule: A critical component in monitoring systems that defines how log data is processed and analyzed in real-time to quickly detect and respond to security threats.
Define permission levels (Add, View, Edit, Delete, etc.) for different user roles regarding ticket management tasks. This allows for granular control over how users interact with tickets within the system.
Manage user access to functionalities related to network changes and configurations. This sub-module offers permissions for:
Baseline Scheduler: Control access to scheduling tasks for network baseline configuration.
Configuration Download Job: Manage permissions for initiating downloads of network configuration data.
Configuration Parameters: Define user access to view or modify network configuration parameters.
Configuration Profiles: A configuration profile is a template or predefined set of configuration settings that network administrators can create and customize configuration profiles with information like device details and connection protocols for SSH and Telnet.
Configuration Search: Configuration Search specifically focuses on download jobs, allowing users to view or export the "startup" or "running" configurations within these jobs to identify any configuration.
Configuration template: Configuration templates hold the commands for uploading jobs and making changes to network devices, including provisioning, OS upgrades, creating or deactivating services, and any other change.
OS Image: OS images are used primarily for managing and deploying configuration changes across network devices such as routers, switches, and firewalls.
Administrators can control the visibility of requester information for technicians working on service requests. This helps balance transparency and data privacy within your Infraon Infinity platform.
Unmask Requester's Contact: This section provides a toggle button. Enabling this option grants technicians visibility to the requester's contact information, potentially including phone numbers. This can be beneficial for situations where direct contact with the requester might be necessary to resolve an issue.
Unmask Requester's Email: Another toggle button allows administrators to control the visibility of the requester's email address for technicians. Granting access to email addresses can facilitate direct communication between technicians and requesters, potentially expediting issue resolution.
Unmask Requester's Name: The final toggle button controls the visibility of the requester's name for technicians. Enabling this option ensures technicians can easily identify the person requesting assistance.
Define permission levels (Add, View, Edit, Delete, etc.) for different user roles regarding reports. This ensures users can access reports relevant to their needs while restricting access to sensitive data as necessary.
Once all the parameters are added, click 'Submit' to save and add the role. Administrators and privileged users can edit and delete roles using the respective icons.
Controls permissions related to attendance marking across the Infraon Web App and Infraon Mobile App. When enabled, users can Clock In/Clock Out based on the assigned platform.
Label
Action
Description / Example
Attendance Infraon Mobile App
Toggle On/Off
Allows access to mark attendance from the Infraon Mobile App. Enabling this also shows the Clock In/Clock Out option for mobile usage. Example: A field engineer marks daily attendance on a mobile device.
Infraon Web App
Toggle On/Off
Allows direct access to mark attendance in the Infraon Web Application. Enabling this also shows the Clock In/Clock Out option on the web. Example: A helpdesk operator marks attendance from their office workstation.
The Announcement module enables administrators to create and manage time-bound messages that are displayed to users within the application. It supports targeted communication through configurable visibility settings, including users, teams, and tags, ensuring that announcements reach the intended audience.
Announcements are automatically published and expire based on the configured date and time.
The Announcement page displays a list of all created announcements with their current status.
Users can view announcements under two tabs:
Active: Displays currently ongoing announcements within the publish duration
Expired: Displays announcements that have passed their publish end date
Each announcement record includes details such as:
Announcement ID
Created By
Created On
Publish Start Date
Publish End Date
Announcements are created with a defined publish window and optional visibility configuration.
Once the Publish Start Date is reached, the announcement becomes visible to users.
Announcements are displayed in the Notifications panel → Announcement tab in the top navigation bar.
Users can click Read More to view the full announcement content.
Use this option to create a new announcement and configure its visibility and duration.
Add Announcement | Field Descriptions
After entering the required details, click Add Announcement to save the configuration. The announcement will be published automatically based on the defined start and end dates.
The Infraon platform automates ticket assignment not only at the technician level but also at the group level, based on Business Rules.
Tickets can be automatically assigned to a designated group based on defined conditions such as:
Category
Priority
Location
Ensures workload distribution across groups without requiring manual assignment.
Within a group, tickets can be routed to a subgroup or specific member based on additional filters like:
Expertise
Workload capacity
Provided for targeted allocation while still using the business rule framework.
Administrators can configure rules for both group and subgroup levels.
Rules can be modified dynamically without affecting ongoing tickets.
All rule-based assignments are logged in the system.
Provides transparency with detailed tracking of:
Business rule executions
Group/subgroup assignment logs
Workflows act as visual flowcharts of processes within Infraon. They are designed to automate and visualize a multi-step process as a sequence of activities, such as assigning tickets, triggering email or SMS notifications, and requesting approvals. With Infraon, workflows can be created using simple drag-and-drop elements, which can be added as a flowchart to indicate the sequence of activities.
At this point, you can configure workflows for Ticket, Request, and Problem. Workflows can be triggered using single or multiple conditions within the service catalogue.
To build a workflow, the following components must be defined:
Triggers are the initial action(s) that trigger the workflow. One or more triggers can be configured. At this point, only service catalogue-based triggers can be added.
One or more conditions can be added to be validated while executing. To add a condition, define
Operand - Operand is the parameter that needs to be validated. In this case, Service Catalogue.
Tech Support Operator
Handles end-user support by managing:
Service Catalog
Workflows
Assets
Own Dashboards and Reports
Add/Edit Tickets
The role aligns with that of a 1st Line Support or Service Desk Technician in ITIL v4.
Tech Support Manager
Supervises support teams. Inherits all Tech Support Operator permissions and adds:
Access to the request portal
Dashboard/Report Management
Fixed Asset Management
Limited Admin Configuration
Matches the Team Leader or Support Manager role in ITIL.
Limited Access Technician
Restricted access role for contractors or temporary staff. Has limited permissions across the Infraon platform. Helpful in implementing Least Privilege Access practices in ITIL.
Requester
End-users who can log in to the Self-Service Portal to:
Raise Incidents
Submit Service Requests
Raise Change Requests
Track their request status
Access Knowledge Base
This aligns with the Service Consumer or End User role in ITIL v4.
Read Only Admin
The user can view all modules and data across the platform, but cannot create, edit, delete, configure, approve, or perform operational actions. Suitable for monitoring, audits, vendor reviews, and oversight access.
API User
Intended for system-to-system integrations and API consumption. Users assigned this role can authenticate using long-term API tokens and access supported APIs based on the permissions granted to the role.
API Users cannot log in to the Infraon web portal, participate in approval workflows, or be assigned as approvers. All API activities, including token generation, token regeneration, authentication attempts, and API usage, are tracked through audit and metering logs.
API usage is also subject to license-based consumption tracking, where API calls are monitored against the organization's licensed API call limit. When usage approaches or exceeds the configured threshold, the system can generate notifications and enforce API access restrictions based on the license in effect.
VC Admin
VC Admin is used to give designated users organization-wide control over meetings. A user assigned a role with VC Admin enabled can access and manage meetings created by other users, even when they are not the meeting host or an attendee.
Privileges are split into modules: General, Ticket, NCCM, Privacy Settings, and Reports.
Permissions can be explicitly selected - view, add, edit, delete, copy, and configure.
For example, if the user is given the 'Delete' privilege to the 'Business Catalogue' module, the user will be able to view the services listed and delete existing services. The user will, however, not have to add or edit privileges.
Copy
If selected, 'Copy' allows the user to view and perform add operations within the selected module/page.
For example, if the user is given the 'Copy' privilege to the 'Business Catalogue' module, the user will be able to view the services listed and add new services. The user will, however, not have edit or delete privileges.
Configure
If selected, 'Configure' allows the user to view and perform add operations within the selected module/page.
For example, if the user is given the 'Add' privilege to the 'Business Catalogue' module, the user will be able to view the services listed and add new services. The user will, however, not have edit or delete privileges.
Upload
If selected, ‘Upload' allows the user to view and perform add operations within the selected module/page
Download
If selected, ‘Download’ allows users to download and perform export operations within the selected module/page.
The Download privilege allows users to export logs from the Log Management module in PDF, CSV, or XLS formats, enabling offline analysis, sharing, and integration with other tools.
VC Admin
Enable or disable the VC Admin toggle.
The VC Admin toggle is available only for the Meeting module and is disabled by default.
When enabled, the user can manage meetings created by other users, including Edit Meeting, Cancel Meeting, and End Meeting, subject to the applicable Meeting permissions.
Users without VC Admin permission can access only meetings they created, attend, or are mapped to. Meetings created by other users that are unrelated to them remain inaccessible.
Value - Value of the Operand or the parameter's value to validate.
Relation - (and/or) Relation between the conditions (applicable only if multiple conditions are selected)
Status (Ongoing/Expired)
Actions (Edit/Delete)
Associated Change
Select from the dropdown
Links the announcement to a specific change record. This makes announcements visible within the module.
Users
Select users
Defines specific users who can view the announcement. If not selected, the announcement is visible to all users.
Teams
Select teams
Limits visibility to selected teams. Useful for targeted communication within specific groups.
User Tags
Select tags
Filters visibility based on user tags. Example: IT Team, Support Team
Requester Tags
Select tags
Defines visibility for requesters based on assigned tags.
Requesters
Select users
Allows selecting specific requesters who can view the announcement.
Add Announcement
Click button
Saves the announcement and publishes it based on the configured schedule.
Announcement Message*
Input text (Rich text editor)
Enter the announcement content to be displayed to users. Supports formatting such as bold, lists, and links. Example: Scheduled server maintenance on May 15 from 2 AM to 4 AM.
Publish Start Date*
Select date & time
Defines when the announcement becomes visible to users. Example: May 07, 2026 11:00 AM
Publish End Date*
Select date & time
Defines when the announcement expires and is no longer visible. Example: May 15, 2026, 12:00 PM
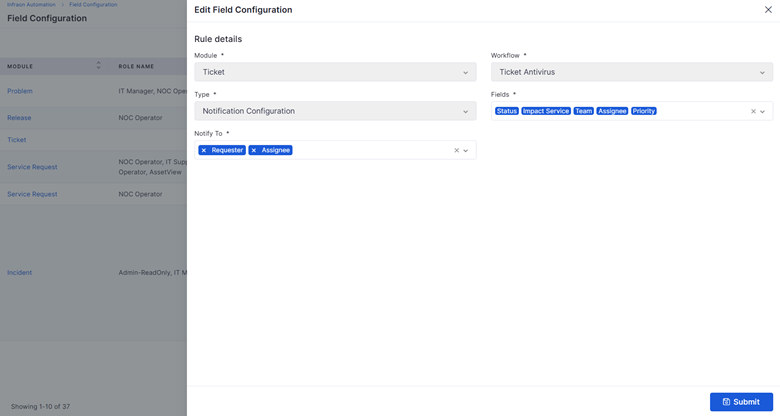
In a support environment, certain ticket updates—such as changes to Status, Priority, Assigned Team, or Impact Service—can significantly affect resolution timelines and ownership. To ensure transparency and timely communication, the system must automatically notify relevant stakeholders whenever these critical fields are modified.
An administrator configures a Notification Configuration rule with the following details:
Module: Ticket
Workflow: Ticket Antivirus
Type: Notification Configuration
Fields: Status, Impact Service, Team, Assignee, Priority
Notify To: Requester, Assignee
This configuration ensures notifications are triggered only when one or more of the selected fields are changed.
A ticket is created and assigned to a support engineer.
During ticket handling, the assignee updates one or more configured fields—for example:
Status is changed from Implementation to Reschedule
Priority is changed from Medium to High
Notifications are triggered only when fields listed in the Fields configuration are modified.
Changes to other, non-selected fields do not trigger any notification.
Multiple field changes in a single update are consolidated into one notification email.
The notification email is automatically logged in the Communication tab of the ticket for audit and reference.
This configuration ensures that:
Key stakeholders are immediately informed of meaningful ticket changes.
Noise from unnecessary notifications is avoided.
All field change communications are traceable and auditable within the ticket lifecycle.
Ensure that specific fields are required before allowing a ticket status transition, per configured Field Configuration rules.
This enhancement validates mandatory fields during status change and prevents progression if required fields are not completed.
An organization wants to:
Enforce completion of specific fields before moving a ticket from one status to another.
Prevent users from bypassing mandatory fields during quick status updates.
Ensure validation works consistently across:
Grid View (Smart Grid)
Navigate to: Infraon Configuration → Automation → Field Configuration
Click Add Field Configuration
Configure the following:
A user attempts to change the ticket status, but the mandatory fields configured for the status are not filled.
This validation applies in:
Grid View (Smart Grid)
Panel View
Panel Quick Edit (Nested View)
When a user attempts to change the ticket status:
The system checks the configured Field Configuration rules.
If mandatory fields for the target status are empty:
A toaster message is displayed indicating mandatory fields are missing.
The ticket sidebar opens automatically.
Once the user:
Fills all mandatory fields as per the configured rule.
Attempts to change the status again.
Then:
The status change is processed successfully.
No toaster message is displayed.
The ticket moves to the selected status.
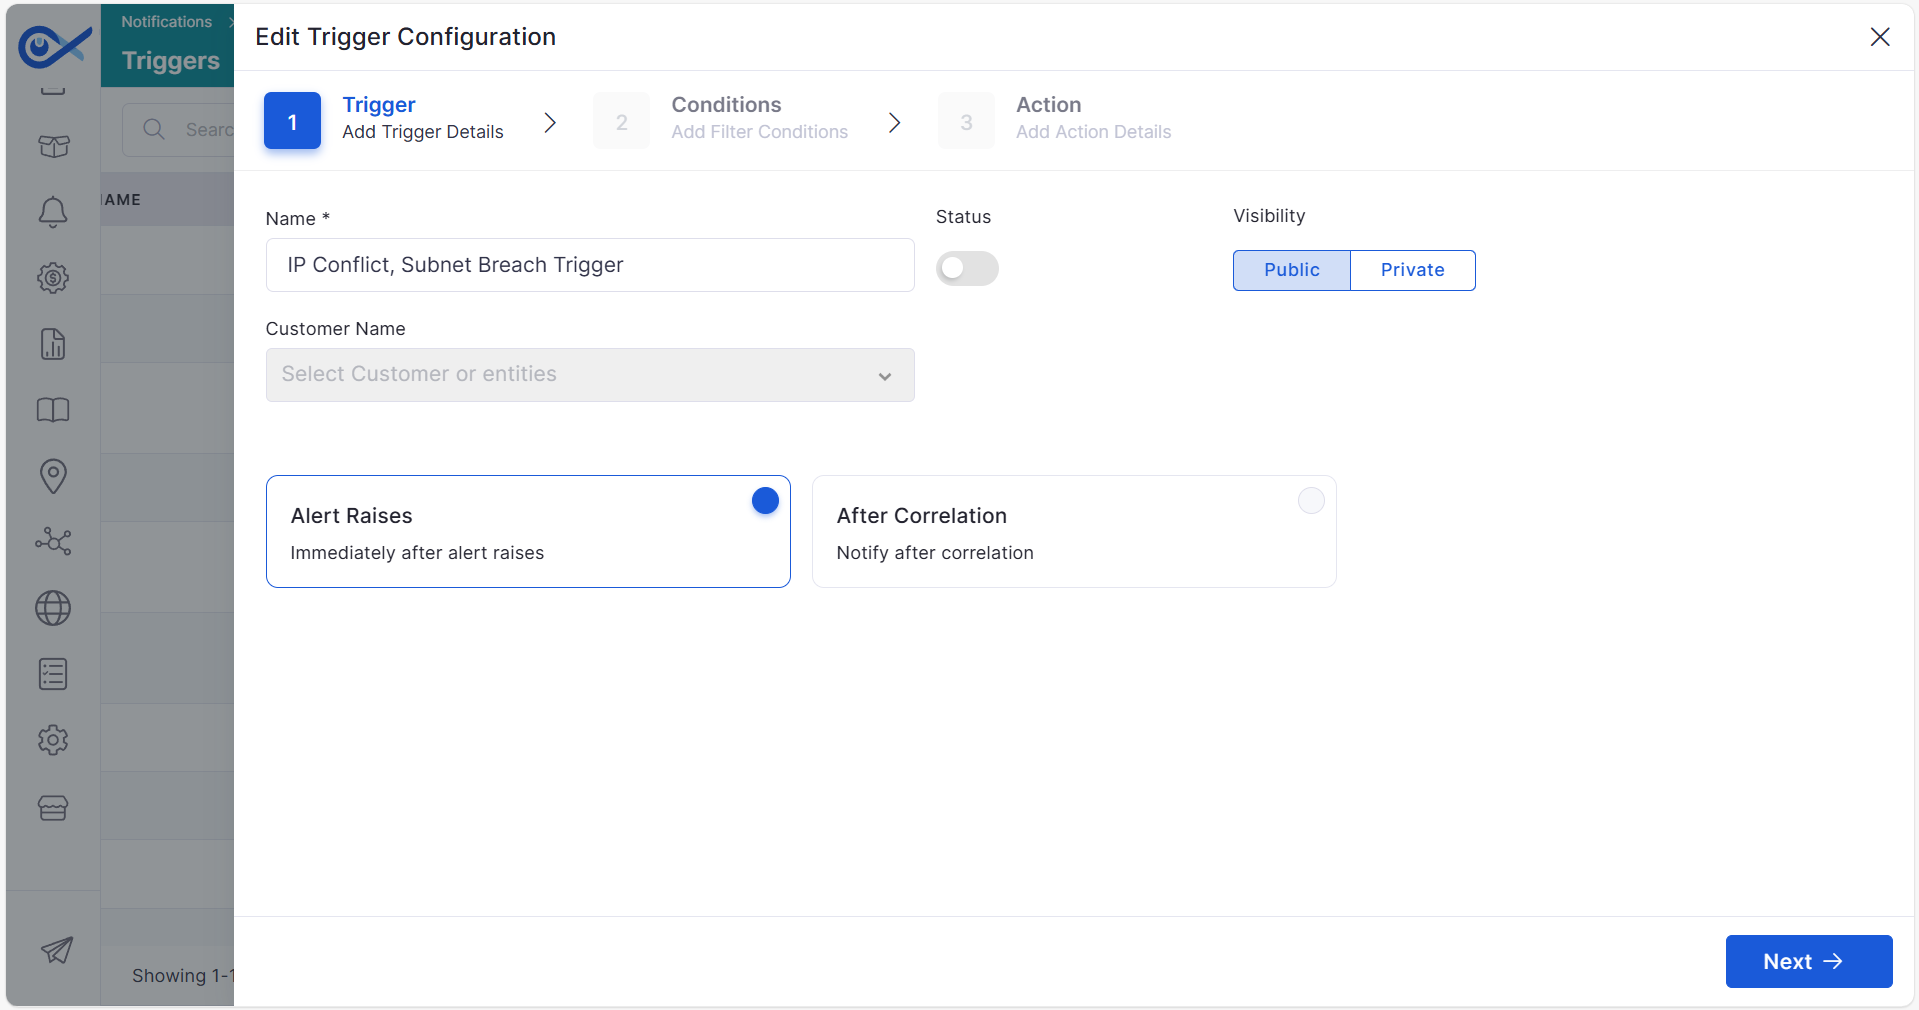
To automatically alert the network operations team when a Subnet Breach occurs or an IP Conflict is detected in the IPAM module, ensuring a quick response to capacity risks and IP duplication issues.
A large enterprise manages multiple subnets through IPAM. When a subnet exceeds its utilization threshold or when two devices are assigned the same IP address, this can lead to service outages or network instability.
A trigger is configured to notify technicians whenever critical IPAM events occur.
Trigger | Add Trigger Details
Label
Action
Description / Example
Name
Conditions | Add Filter Conditions
Whenever the IPAM scan detects either an IP Conflict or a Subnet Breach with Critical severity, the trigger conditions are matched instantly. The trigger fires immediately based on the configured profile and raises an alert.
The configured actions notify the support team so they can resolve the IP conflict or release/expand subnet capacity before it impacts network operations.
The Nginx page allows you to configure and initiate discovery for Nginx environments using the Application protocol. It enables Infraon to collect Nginx information from the configured server and monitor the discovered environment.
There are two sections on the Nginx Discovery page: Discovery Details and Schedule.
The Discovery Details section provides the discovery profile, device information, credentials, agent details, and data collector details settings.
Discovery | Profile and Discovery Information
Click Next to proceed to the Schedule section.
The Schedule section determines when the Nginx Discovery should be initiated. You can start the discovery immediately using Discover Now or configure a Discovery Schedule to run it at a specified date and time. To learn more, .
CLI Jobs/sessions in NCCM create direct CLI sessions (SSH or TELNET) between the Device and the User through the NCCM application. Using a CLI Job, the user can write direct commands on devices similar to the Putty application.
The user will request a CLI connection by inputting the Device IP Address, Device account username (in case of SSH), and the reason for the connection. Based on the user’s role (administrator privileged, CLI whitelisted, or normal user), the CLI job will either open a direct connection to the device or put the CLI request into the Request Queue for Change Approval process.
The CLI Job will audit all device user commands, including device response. NCCM does not provide command restrictions in case of Policy violations. The NCCM Policy engine remediates policy violation commands periodically.
This is a privilege-based feature:
The user can access, view, add, edit, delete, execute, and export only if the administrator has given them privileges. These will be defined under roles and privileges.
The user will be white-listed for CLI operations (no need for Approval) only if the “CLI Job Pre-Approved” permission is enabled in the Account Roles and Privileges.
From the “Jobs” menu, click ‘CLI Jobs/Sessions’
This functionality empowers administrators to define automatic ticket assignment rules based on impacted services and requester tags, enhancing the workflow and improving service delivery.
Business rules automate ticket assignments based on predefined criteria. They are configured to:
Tickets associated with a specific impacted service (e.g., hardware diagnostics) can be automatically assigned to a designated team or technician based on expertise level.
Tickets created by users of a particular requester tag (e.g., front desk) can be routed to a predefined team or technician.
This section guides admins through creating business rules with manual service mapping.
Assign the rule a clear and descriptive name (e.g., "Hardware Diagnostics—Assign to IT Team Level 1").
Select the type of rule (e.g., "Impact Service").
Infraon uses multiple protocols to monitor and manage multi-vendor/multi-technology networks, such as IT Infrastructure, Core IP Backbone, Fiber, Transport, Transmission, and SCADA, and data center networks, such as Servers (both physical and virtual platforms), hosted applications, and databases. Infraon supports IPv4 and IPv6-based environments and is proven to scale in monitoring capabilities.
Infraon provides multiple ways to discover networks using:
EMS/NMS Registration and Discovery
Automatic Network Discovery (based on CIDR, IP Range, Hostname)
Single Node Discovery (Protocol Specific)
The system detects that the modified fields are part of the Fields selection in the notification configuration.
A notification email is automatically sent to:
The Requester, to keep them informed of changes
The Assignee, for confirmation and traceability
The system prevents duplicate notification configurations for the same Module and Workflow combination.
Panel View
Nested Quick Edit View
Module
Incident
Workflow
Ticket Workflow
Type
Field Configuration
Role Name
Admin-Read Only (or required role)
Status
Waiting for Closure
Under the selected status, mark required fields as Mandatory (for example: Resolution Notes, Impact Service).
Click Submit.
This rule now enforces mandatory fields for the selected status.
All mandatory fields are highlighted for completion.
The ticket status does not change until all required fields are filled.
Status changed with missing mandatory fields
Toaster message displayed
Mandatory fields missing
Sidebar opens automatically
Mandatory fields completed
Status change allowed
Mandatory fields incomplete
Status change blocked
Profile Name*
Enter a profile name
Specifies the name of the Nginx discovery profile.
Provide Profile Details
Enter profile information
Provides additional information required for the Nginx discovery profile.
IP Address*
Enter an IP address
Specifies the IP address of the Nginx server to be discovered.
Data Collector Details*
Select details
Select the Data Collector to be used for the Nginx discovery process. The Data Collector is installed within the customer's network and communicates with the target environment using the configured protocols and credentials. It collects the required inventory, availability, and performance information and sends the data to Infraon for monitoring.

Infraon Automation is part of Infraon Configuration and contains configurations that can automate features, processes, and activities within Infraon.
This module of Infraon consists of the following:
Mail Automator: Configure IMAP mail accounts on infraon and refer guides to forward your existing emails to Infraon to convert emails into tickets.
Workflow: Visualize and create a process flow involving specific activities in the selected module.
Business Rule : Defines the business rule for the Infraon system for auto assignment of tickets.
Escalation: Defines the escalations process and automatic assignment mechanism are employed in support ticket resolution.
Customer feedback templates: Customize templates to collect feedback to improve service quality and customer experience.
Let's see each of these in detail.
The IT Operations module is a part of Infraon Configuration and is accessible by administrators and other users authorized by administrators.
This module of Infraon consists of four additional modules. They are:
Discovery - As the user specifies, Discover network resources based on configurable parameters such as IP address, protocols, etc. Options to discover include Automatic, Network, Windows Servers, and Linux Servers.
Device Credentials - Configure protocols and credentials for the device(s) to be discovered through Infraon.
Job Progress - To view the list of discovery jobs that are in progress.
Thresholds - View the list of default thresholds and add new thresholds, if necessary.
Advanced Resource Configuration - This will provide options to update configurations of the resources available in the system.
Blacklist and Whitelist – Define Blacklist and Whitelist information of software/ applications installed.
Correlation Rules - Identify root causes of system issues by correlating server errors, network events, etc.
Diagnosis Tools – Used to identify, analyse, and troubleshoot problems or issues in various systems, devices, or networks.
Circuit Discovery – Discover the deployed trails and circuits from the network.
LED Display – Configure thresholds for parameters, which are monitored through Infraon.
Let's see each of these in detail.
User Management is part of Infraon Configuration and is accessible by administrators and authorized users. It involves managing users and defining their role and access level across modules of Infraon.
Infraon's User Management module consists of six additional modules.
They are:
Users: Invite new users or edit/delete existing users.
Roles & Privileges: Create new roles or edit/delete existing roles and define privileges for roles.
Requesters: Create special accounts for end-users to raise Incident or Change requests.
Teams: Create teams of users with similar skills to assign tasks to easily enable collaboration and mutual support.
Department: Create departments, assign team members, and align them with managers.
Password Policy: Create a password policy to enhance security and meet compliance standards.
My Leave: View and apply for leave of absence from work.
Leaves: View Holiday List and leave categories as per organizational policy.
Let's see each of these in detail.
IF – Severity
Select condition
Set Severity in Critical
AND – Alarm Message
Select condition
Choose IP Conflict Identified and IP Subnet Breached
Criteria Pattern
Define logic
Example: (1 AND 2)
Enter trigger name
Example: IP Conflict, Subnet Breach Trigger
Status
Enable the trigger
Turn ON to activate the trigger
Visibility
Select visibility
Choose Public or Private
Customer Name
Select customer
Select relevant tenant/customer
Alert Raises
Select alert mode
Choose Immediately after alert raises
After Correlation
Optional selection
Enable only if alerts must be correlated before notification
Label
Action
Description / Example
Business Hour Profile
Select time profile
Example: 24×7
Trigger only when the Parent Node is up
Toggle ON/OFF
Enable if alert should fire only when the parent device is reachable
Trigger Delay
Optional
Keeps a delay before firing the alert
Seasonal Suppression
Optional
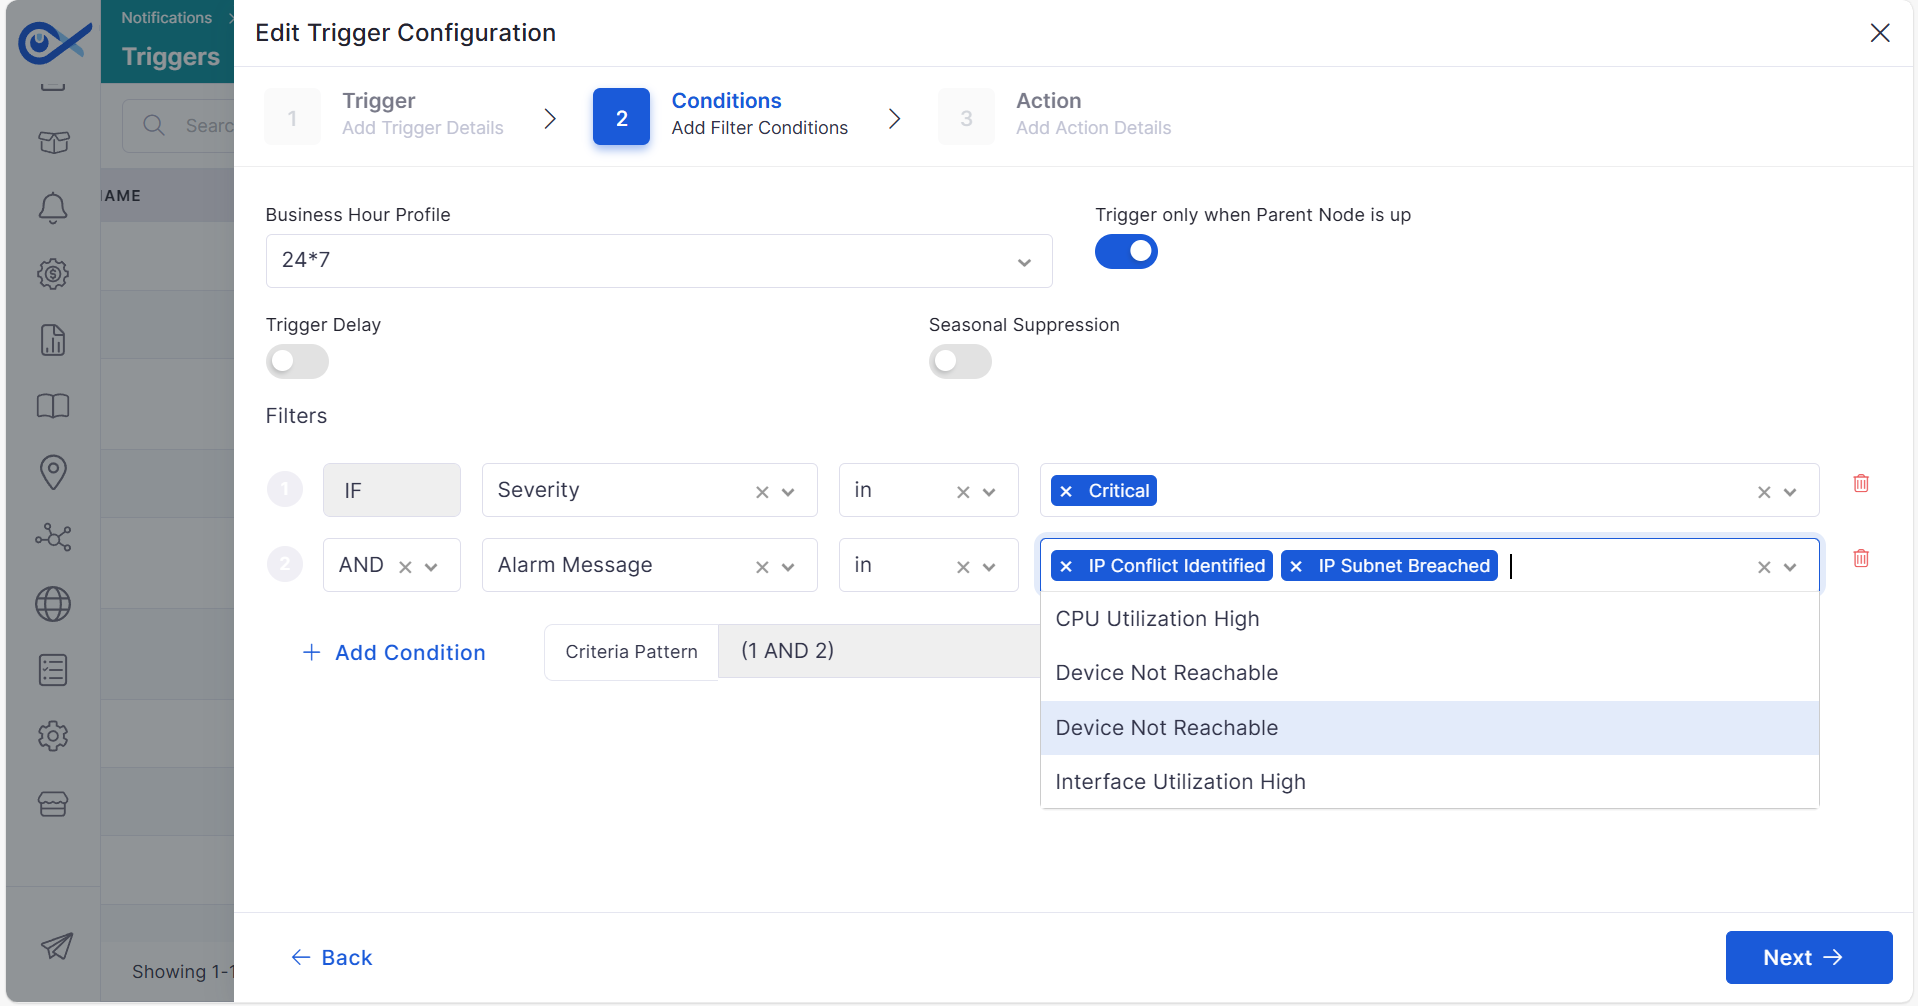
Temporarily suppress alerts during maintenance windows
Briefly explain the rule's purpose (e.g., "This rule automatically assigns tickets related to hardware diagnostics to IT Team Level 1 technicians").
Select the specific service impacted by the ticket (e.g., "Hardware Diagnostics").
Choose the logical operator for the rule (e.g., "equals").
Assign To:
Group/Team: Specify the team responsible for addressing tickets related to the impacted service (e.g., "IT Team").
Expertise: Define the specific expertise required for handling tickets (e.g., "Hardware").
Level: Select the appropriate technician level within the assigned team (e.g., "Level 1").
Considering a scenario where an IT team handles hardware diagnostics. Creating a business rule with the following configuration ensures tickets related to hardware diagnostics are automatically assigned to IT Team Level 1 technicians:
Business Rule Name: Hardware Diagnostics - Assign to IT Team Level 1
Type: Impact Service
Description: This rule assigns tickets related to hardware diagnostics to IT Team Level 1 technicians.
Impact Service: Hardware Diagnostics
Operator: Equals
Assign To:
Group/Team: IT Team
Expertise: Hardware (Optional)
Level: Level 1
Business rules can also be based on requester tags. Here's how to create a rule for a specific requester tag:
Assign Tickets from the Front Desk to the Procurement Team Level 1
Add the respective Requester Tag as Front Desk Manager.
Then Assign To:
Group/Team: Procurement Team
Level: Level 1 Technician
This rule ensures any ticket created by someone with the "Front Desk Manager" tag is automatically assigned to the Level 1 Technician within the Procurement Team.
CSV Based Discovery (For bulk provisioning with additional manual input data for enrichment)
Hypervisor Discovery
Application-Specific Discovery
Database Discovery
Scheduled Discovery (for Network Change Detection)
Scans network as per the given input (IP range, selected protocol, and discovery options set)
Identifies inventory details (refer to below list) in node level
Hostname
IP Address
Make/Model/Series/OS details
Device Type
Gateway
Location
Contact Details
Individual Component Details
Collects inventory-specific details at the node and component levels.
Creates monitoring profile for the node and component per the defined KPI.
Initiates monitoring process for nodes and components.
Multiple forms of discovery allow for adding a wide range of devices. As a result, Organizations will have comprehensive coverage of devices.
Let's see each one in detail:
All CLI Jobs, including history connection and live session, are listed with their active status.
Clicking the session details icon will display live audits.
Using this audit, the administrator can identify the changes, the user responsible for them, and the time of the change.
CLI Jobs not approved within the expiry time will get to the Expired State, and the expiration duration can be configured using System Parameters.
Label
Action/ Description
Search
Search for the required CLI job.
Filter
A filter can be added based on the field (Job Name, Client IP, Device IP Address, Device Account, and Reason), and the condition can be selected from the drop-down box below.
Terminate Session
Terminating CLI abruptly ends an unresponsive session, stopping all active processes. Re-establishing the connection may be required.
Close CLI
Close CLI gently ends a CLI session, ensuring all tasks are finished before closing, preventing data loss.
Assets
Click to navigate to the Assets page
Select the time from the calendar options.
Input the Requester Name in the textbox.
Input Client IP Address in textbox.
Input Device IP Address in textbox.
Select Device Group using the dropdown menu.
Input Device Account in the textbox
Select ‘Protocol Type’ using the dropdown menu.
Select Status using the dropdown menu.
Select ‘Approval Type’ using the dropdown menu.
Input ‘Approver Name’ in the textbox.
Input the Reason in the textbox.
Input the command in the textbox.
Click “Search” to perform the search.
A checkbox appears on the job row when a CLI job is in progress. The user can select the CLI job and terminate the session immediately.
Select Job and click “Terminate CLI Session” to terminate the session.
Navigate to the top panel at the right corner of the page; click the “CLI Jobs” option to download an ELXS file.
When a CLI Job is triggered as part of a Change Task, NCCM shares the Job Execution Details, Job Status, and Job ID with the Change Management module. This ensures that the CLI Job is linked to the corresponding Change Task for reference and tracking.
For Change Tasks of type NCCM, users with CLI Job permissions can access the related job directly from the Change module using the Job button.
Selecting this option opens the CLI Job grid in a new browser tab, prefilling the Change Summary as the search criteria, enabling quick identification of the associated CLI job.
Triggers are rules or configurations that trigger an alert or an event within Infraon. Infraon allows adding of conditions to raise alerts or events when the specified rule is met.
There are two types of trigger configurations within Infraon. They are:
Alerts - Alerts are based on configured thresholds (refer to Threshold module for details)
Correlation - Infraon correlates events based on multiple conditions to trigger an action.
There are three steps to adding a trigger:
Trigger - Define a name and select if it is an alert or correlation.
Condition - Define filters and conditions.
Action - Select action between notifying through email/SMS or creating an incident
Triggers can be created for alarms, severity, asset IDs, names, etc. Ensure the trigger status is enabled to trigger the alerts/actions.
Go to Infraon Configuration -> Notifications -> Trigger Configuration
Click 'Add Trigger.'
There are three tabs on the 'Add Trigger' page.
Trigger | Conditions | Action
Click 'Next.'
Trigger | Conditions| Action
Click 'Next'.
Trigger | Condition | Action
Macros | Details
Simplify email composition for technicians by automatically inserting relevant details such as asset IP address, hostname, device type, and NCCM-specific events like job failures and configuration changes.
This automation saves time, reduces manual errors, and ensures accurate and comprehensive notifications. Using these macros, technicians can quickly generate clear, detailed emails, improving communication and efficiently managing network configurations and changes.
The following Macros can be availed:
Asset
IP Address
Hostname
Alias
Click 'Submit' to save the configuration. The respective action icon allows you to edit and delete triggers.
The Terms & Conditions module allows users to create, manage, and reuse predefined contractual clauses across Purchase Orders and Contracts. Instead of manually entering terms for each transaction, users can define standardized terms with rich text formatting and optional attachments.
These predefined terms can be selected during PO or Contract creation, ensuring consistency, reducing manual effort, and minimizing errors. The module also supports activation control, audit tracking, and prevents the deletion of terms already in use.
This page displays a list of all configured Terms & Conditions records. Users can search, filter, add, edit, or delete terms based on their permissions. Each record shows its title, applicable modules, active status, and available actions.
Terms & Conditions | Basic Details
Label
Action
On the Terms and Conditions page, click on the Add option located at the top right corner of the page. In the pop-up window, enter the required details to create a new Terms & Conditions record.
Add T&C | Basic Details
Displays multiple categories of leaves available within the organization—filter information based on Leave Types or User.
The right calendar displays leaves taken by the team for the selected period (Month/Week/Day).
Administrators or privileged users can configure leaves, i.e., configure/allot limit or no. of leave days applicable for each category. Leaves taken by users are displayed in a calendar view with options to view week/day/list. Filters can be applied to both leave types and users.
Go to Infraon Configuration -> User Management -> Leave
Click on the 'Configure' button.
Once all the details are added, click 'Update/Configure' to save. Once configured, users can see the leaves and apply for the necessary type, as required.
The Configure SMS module allows administrators to integrate and manage SMS gateway services within Infraon Infinity. It is used to configure SMS delivery settings for sending notifications, alerts, OTPs, approvals, ticket updates, and other platform messages.
The module supports:
Global SMS configurations
Customer-specific SMS configurations
SMSGateway and SMPPGateway integrations
Primary and Secondary gateway setup
SMS configuration testing before activation
The Configure SMS module connects Infraon Infinity with external SMS service providers. Administrators can configure the required gateway details, request parameters, authentication headers, and delivery settings based on the SMS provider.
The module supports two SMS configuration types:
SMS Gateway – Uses API/HTTP-based SMS integrations.
SMPP Gateway – Uses SMPP protocol-based enterprise SMS communication.
Each configuration can include:
Primary Gateway
Secondary Gateway (Failover)
Once the configuration details are added, administrators can move to the Test section to validate SMS delivery before saving the configuration.
Follow the below steps to forward emails from MS Outlook.
From the MS Outlook application, click on Settings>View all Outlook settings.
Select Mail > Forwarding.
Select 'Enable Forwarding.'
Enter your Infraon Helpdesk email address (from the 'Getting Started' part of Infraon).
Check the 'Keep a copy of forwarded messages' if required.
Click 'Save.'
A business rule for an infraon product refers to a specific guideline or constraint that governs the behavior, processes, or operations within the context of that product's infrastructure. These rules are typically defined and enforced to ensure consistency, compliance, and efficient functioning of the infraon product.
There are two types of business rules:
Load Balancer: The ticket allocation system ensures a balanced workload distribution between users. It automatically routes any additional tickets beyond the initial allocation to the following user until the same number of tickets per user is reached.
For example, if user one has seven tickets and user two has five tickets, the next ticket will be automatically added to user two, since user one already has seven tickets, which is greater than user two's five.
Round Robin: Despite any existing ticket imbalances, prospective tickets raised are sequentially assigned to the first user, disregarding the need for a balanced distribution among users.
Label
Action
Description/Example
Leave Type - Number of Days
Add a number in the Number of days column of the respective leave type.
This data must be based on the leave policy of your organization.
Active users are currently logged in and actively engaging with activities. They represent the real-time presence of people currently using the system, indicating their availability for interaction or collaboration.
From this page:
You can see a list of users who are currently online.
Export as ELXS
Click to download the “CLI Jobs” in an ELXS file
Go to Assets
Click to navigate back to the asset page.
Actions
Session Details
Click to view the session details
View Session Terminal
Click to view the session terminal
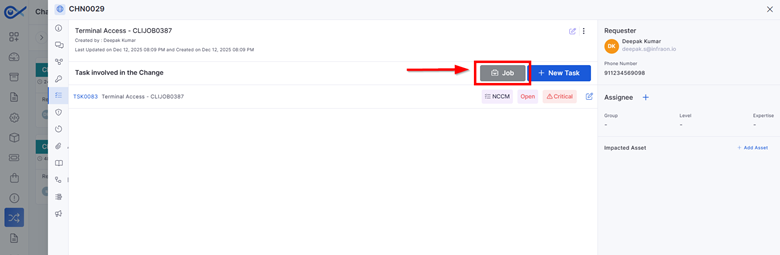
Create Upload Job
Enable this to auto-create an upload job after discovery
This action automatically creates and initiates a configuration Upload Job once the trigger is activated (e.g., after a new device is discovered through ZTP).
When enabled: The configuration is pushed to the device using pre-defined templates and runtime parameters without manual intervention.
If not enabled: The system only discovers the device, and the technician must do the configuration push manually later.
Create Discovery
Enable this to auto-start the discovery of the device.
This action triggers device discovery, which involves logging into the device (via CLI/SNMP) to gather basic inventory and validate access.
When enabled: NCCM collects vendor, model, OS version, interface info, and other details necessary for subsequent tasks like config download or template matching.
If not enabled: The system won’t recognize or validate the new device, and any auto-upload job or config operation might fail due to missing asset data.
Note: Typically, the first step in automated onboarding workflows, like ZTP, is after a syslog pattern match.
Configuration Download
Toggle this option to download the current running configuration during discovery.
This enables Infraon NCCM to download the live configuration from the device right after it’s discovered.
When enabled: Ensures the system captures the current baseline state before pushing any changes. Helps compare configurations (pre/post) and supports rollback or audit.
If not enabled: Configuration is not backed up. If the Upload Job fails or applies the wrong settings, rollback is impossible unless a prior backup exists.
OS Name
Asset ID
Branch Name
Branch Code
Basic Info
Severity
Event Message
Timestamp
Alarm ID
State
City
District
Country
Parameter Value
NCCM
Job Failure Reason
Startup Changes
Running Changes
Resource
Resource Type
Resource Name
Resource Tag
Bandwidth configured
Link ID
Link Name
Link Mode
ISP Name
Link Bundle Name
Link Bundle Capacity
Label
Action
Description/Example
Name*
Add a name for the trigger.
For example, Severity trigger, Asset-based, etc.
Trigger Type*
Select trigger type - Alert or correlation.
Alert triggers are based on a threshold, whereas correlations are based on multiple events correlated by Infraon.
Label
Action
Description/Example
Business Hour Profile*
Select the business hour profile applicable for the trigger.
Triggers can be configured to be generated during business hours (by selecting a business hour profile). The business hour profile must be pre-defined for this.
Filters
Select filters and conditions for the trigger. The' Add Condition' option can add multiple filters or conditions. Use 'And/Or' to suit requirements.
If you select 'Alarm Message', for 'CPU Utilization' and 'Severity' 'In' 'Critical', Infraon triggers the selected action when both these conditions are met.
Criteria
Label
Action
Description/Example
Notify*
Notify action can be used to send Email/SMS notifications or create an incident.
Add information as requested.
If selected, an email notification is sent to the configured email address.
Add the recipient's email address (use a comma or semicolon as a separator to add multiple addresses and a subject line.
SMS
If selected, an SMS notification is sent to the selected user.
Add the SMS content (Text), and select the user to be notified.
Create a ticket
On selecting this, Infraon creates a ticket, as configured (filters and conditions)
Automatically creates a ticket using the defined filters and macros.
Add Attachment
Click
Upload supporting documents related to the terms (e.g., policy documents, vendor agreements). Multiple files can be added. Example: Upload a vendor agreement PDF or compliance document.
Attachment Actions
Click
Allows users to download or delete uploaded attachments before submission.
Submit
Click
Saves the Terms & Conditions record and makes it available based on the selected module and active status.
Description/ Example
Search
Input
Allows users to search Terms & Conditions using keywords such as title.
Example: Purchase.
Filter
Click
Enables users to apply filters to refine the list based on specific criteria. Displays the count of applied filters.
Fields: Title, Modules, Terms And Conditions, and Is Active.
Conditions: in, not in, equal to, not equal to, contains, and does not contain.
Add
Click
Opens the Add Terms & Conditions form, where users can create a new record by entering a title, selecting a module, adding terms, and uploading attachments.
Title
View
Displays the name of the Terms & Conditions record.
Example: “Purchase Orders (Dell Vendor) T&C”.
Modules
View
Shows the modules where the terms are applicable, such as Purchase Order or Contract.
Is Active
Toggle/View
Indicates whether the term is active or inactive. Active terms are available for selection in PO/Contract forms.
Actions
Edit
Click
Allows users to modify an existing Terms & Conditions record, including title, terms content, or attachment.
Delete
Click
Deletes a Terms & Conditions record. Deletion is restricted if the term is already linked to a PO or Contract.
Label
Action
Description / Example
Title
Input
Enter a unique name for the Terms & Conditions record. This helps identify and select it in Purchase Orders or Contracts. Example: “Purchase Order – Standard Vendor Terms”
Module
Dropdown
Select the module(s) where the terms will be applicable. Multiple modules can be selected based on usage. Options Include: Contract, Purchase Order, Purchase Requisition Example: Select Purchase Order and Contract if the same terms apply to both.
Is Active
Toggle
Enables or disables the Terms & Conditions record. When enabled, the record will be available for selection in relevant modules. When disabled, the record will not be available for new selections, but it remains for existing records.
Terms And Conditions
Rich Text Editor
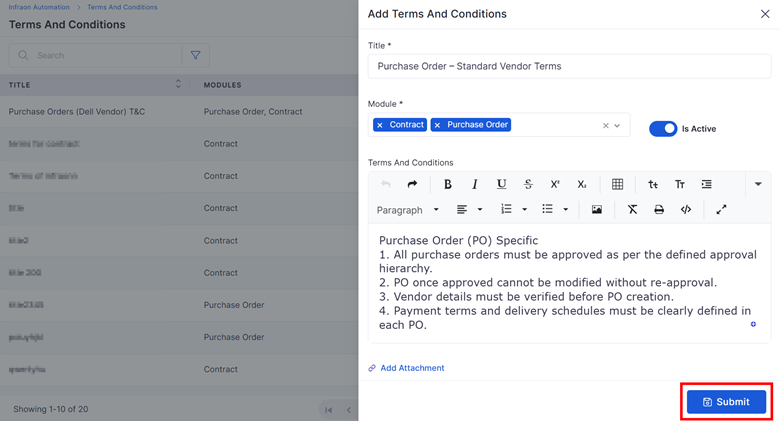
Enter the detailed terms using the editor. Supports formatting such as bold, lists, alignment, and more for structured content. Example: Purchase Order (PO) Specific 1. All purchase orders must be approved as per the defined approval hierarchy. 2. PO once approved cannot be modified without re-approval. 3. Vendor details must be verified before PO creation. 4. Payment terms and delivery schedules must be clearly defined in each PO.
For Example, User One has five tickets, and User Two has three tickets; prospective tickets are automatically assigned to User One even though User Two has fewer tickets.
Go to Infraon Configuration → Infraon Automation → Business Rule.
Click Add.
On the Add Business Rule page, configure the rule using the fields described below.
Rule Name*
Enter a rule name
A unique identifier for the business rule. Example: Auto Assign L1 Tickets.
Module*
Select a module from the dropdown
Specifies the module where the rule is applied. Available options:
Ticket (rules applied to incidents/tickets)
Problem (rules applied to problem records)
Request (rules applied to service requests)
Type*
Select a rule type from the dropdown
Defines the action performed by the rule. Options vary by module:
Assignment Rule: Automatically assigns records to a group based on conditions.
Delayed Assignment Rule: Assigns records after a defined time duration if conditions are met.
Set Value: Updates one or more fields with specified values when conditions match.
The chosen Module determines the available Rule Types, and selecting a Rule Type updates the Rule Setup section to display only applicable fields and options, ensuring accurate and context-specific configurations.
Rule Setup | Condition
When*
Select operand, operator, and value
Defines the condition that triggers the rule. Operand specifies the field, Operator defines the comparison logic, and Value is the condition value.
Priority
Select Priority from the dropdown
Updates the Priority field with the selected value when the defined conditions are met.
Example: Set Priority to High.
Severity
Select Severity from the dropdown
Updates the Severity field with the selected value when the defined conditions are met. Example: Set Severity to Critical.
Rule Setup | Assignment Rule/ Delayed Assignment Rule
Then Assign To*
Select Group, Expertise, Level
Assigns the record to a specific team based on expertise and support level.
After*
Specify time duration
Applicable to delayed assignment rules. Defines when the assignment should occur (Days / Hours / Minutes).
Set Value | Action
Then Value Update To*
Select the field and value
Updates a selected field with a defined value when conditions are met.
Add Field (+)
Add more updates
Allows updating multiple fields in a single rule.
Priority Matrix Rule | Action
The Priority Matrix Rule automatically determines a record's priority based on Urgency–Impact and contextual parameters such as Business, Location, Department, Group, and User.
This rule is available when the selected Module supports priority calculation (for example: Ticket and Request).
Urgency – Impact Matrix
Configure priority mapping
Defines ticket priority based on combinations of urgency and impact parameters such as business, location, department, group, and user.
The matrix allows defining priority values for combinations of Urgency and Impact dimensions.
Urgency Levels
High
Medium
Low
Impact Dimensions
Business
Location
Department
Group
User
Approval Delegation Rules | Action
Delegate From*
Select approver
Specifies the original approver from whom approval is delegated.
Delegate To*
Select approver
Specifies the alternate approver.
Delegate After*
Define duration
Time after which delegation occurs.
After configuring all required fields and labels, click Submit.
While creating a CMDB business rule, you can choose to apply the rule to assets that already exist in the system.
Save and Update Existing Assets
Click to apply the rule to existing assets
Applies the newly created rule to all existing assets that match the defined conditions. A confirmation dialog appears before proceeding.
Submit
Click to save the rule
Saves the rule without applying it to existing assets. The rule will apply only to assets created or modified after its enactment.
The service catalogue is the service offering part of service management. It is the backend of the services provided through the business catalog, i.e., the module where the administrator or catalogue manager defines and manages products or services. These configured items can be viewed, wish-listed, and requested by requesters (internal and external end-users).
A service catalogue is created to maintain a list of components offered as services to the end-user. Components can be used as support to enable services, not as a direct service.
The administrator or catalogue manager uses a service Catalog to define and manage services, add service categories, and more. Other users can authorize and view catalogue information.
Infraon's Service catalogue offers options to create and publish products or services in detail with descriptions to facilitate structured content for the self-service framework.
The Service Catalogue need not necessarily list only the IT components. There are other teams within the organization that provide services to employees, such as HR, Finance, etc. Any request from an end-user can be classified as a service. This includes a request for an email ID, information on HR policy, clarification on Salary Slips, etc.
Service Catalogue comprises
Service
Category of service
Classification and child classification for each category
To define the audience, service owners, cost, and SLAs.
To add a service, the following must be defined.
Catalogue - A branch or department offering the service within the organization. For example, the catalogue can include IT services, asset requests, HR services, admin services, etc.
Category - Multiple categories within each catalog. For example, the IT Services catalogue can be split into categories like Desktop Servicing, Laptop Servicing, Components Servicing, etc.
Classification - Classification for the specific service. For example, classifications can be made based on Desktop Brand or servicing needs such as Memory upgrade, Keyboard replacement, software requirement, and so on within the' Desktop Servicing' category.
Click 'Save.' It is recommended that you keep the service in the 'New' state and 'Draft' status for as long as necessary to define, review, and refine it to describe all service/product aspects to suit requirements.
Click on the 'Add Service' button at the top right corner. The 'Add Service' page has four tabs. For information, refer to the table.
Basic Information | Advanced Information | Ownership | Test
Once all the parameters are added, click 'Next' to add advanced information.
Basic Information | Advanced Information | Ownership | Test
Once all the parameters are added, click 'Next' to define ownership. The ownership tab determines service ownership and visibility.
Basic Information| Advanced Information | Ownership | Test
Once all the parameters are added, click 'Next' to define the incident template. Templates ensure information consistency and enable requesters to include all relevant information and create incidents quickly.
Basic Information| Advanced Information | Ownership | Service Template
Once all the parameters are added, click 'Submit.' The service is added under the selected category within Infraon. Service view can be switched between cards and grids to suit requirements. To see all catalogues within a category, click on the category name on the left. Catalogues, categories, and services can be edited and deleted using the respective icons.
Navigate to the Feedback Templates section under Infraon Automation.
Click Add Template and choose whether to create a Customer Feedback Template or a Peer Review Template.
Customer Feedback | Basic Details
After entering the details, click Next to proceed.
Peer Review | Basic Details
After entering the details, click Next to proceed.
This page allows you to design the structure of your feedback form by adding different field types that define what information you want to capture from the requester/ peer.
Create Form | Basic Details
Click on the configure option to make changes to a specific catalogue.
Once done, click “Save” to add the template.
The Peer Review Assignment enables ITSM users to assign specific incidents for review by a designated team or member. Only closed or resolved incidents are systematically evaluated, and organizations can maintain service quality, verify resolutions, and identify opportunities for improvement.
The Assign Peer Review option is available only when an incident is in one of the following states:
Review
Resolved
Closed
Advanced configurations in workflow include:
Field Constraints - Used to define role-based privileges on the incident components. Fields can be hidden or made mandatory for selected statuses and roles. Worklog can be made mandatory for roles and statuses. For example, for the role of an IT Support Operator, while the incident status is 'Working (In Progress), all closure-related fields (Closure Note, Closed By, Close Type, Agreed Closure Date, and Actual Closure Date) can be hidden, and fields like Diagnosis and Note can be made mandatory. Multiple constraints can be added to define limitations for all roles.
Permissions - This enables or disables role-based permissions for Incident actions. Actions like commenting on the wall, KB searches, adding attachments, adding tasks, defining relations, and escalating can be customized. For example, an API user can be restricted from adding attachments or tasks.
You can see the following details on the screen:
Title
Description
Created On
State
Services
Action
Go to Infraon Configuration -> Workflow
Click the Add New Workflow -> Incident
After adding respective details, click Create. There are two tabs here.
Build Form | Configure Workflow
Before adding the build form, you need to know its components:
Build Form has five sections: Add Content Here, General Section, Assignment Section, Resolution Section, and Closure Section. Please note that the contents of the build form can be used in any of the four sections of the incident workflow.
'Add Content Here' consists of drag-and-drop HTML elements that can be inserted into any of the four sections mentioned above.
After inserting any HTML elements, the 'Properties' column appears with two tabs: 'General' and 'Editor.' Details added in the 'General' tab are updated in the 'Editor' tab in HTML. Additionally, there are three toggle buttons;
Mandatory - Enable to mark the field mandatory
Show on add page - displays the field on the 'Add Incident' page.
Click the 'Save' button to save the Properties.
Reopen: This state allows users to bring back tickets, incidents, or requests that were previously marked as resolved or closed. Items requiring additional attention, further investigation, or follow-up actions can be re-initiated without creating new records.
In the realm of software and application security, two key concepts arise: blacklisting and whitelisting. Though seemingly opposite, these methods play crucial roles in safeguarding your system from unwanted programs and vulnerabilities.
Blacklisting operates on the principle of exclusion. A blacklist is a curated list of programs deemed undesirable, malicious, or unauthorized. Software identified on the blacklist is then blocked from installation or execution on a system.
Here are some common reasons why software might be blacklisted:
Known malware or viruses: These programs are designed to harm your system, steal data, or disrupt operations.
Unwanted applications: Some software might be disruptive or inappropriate for certain environments.
Pirated software: Using illegal copies of software can be harmful and is often blacklisted.
Vulnerable applications: Programs with known security flaws pose a risk and might be blacklisted until patched.
Whitelisting, on the other hand, takes the opposite approach. Instead of listing what's bad, it defines what's good. A whitelist is a curated list of programs explicitly permitted to be installed or run on a system. Any software not on the whitelist is automatically restricted.
Whitelisting offers several advantages:
Enhanced security: Only authorized and vetted software can run, significantly reducing the risk of malware and unauthorized access.
Simplified management: Administrators have complete control over what software is allowed, making it easier to maintain a secure environment.
Improved compliance: Whitelisting can help organizations comply with specific security regulations or internal policies.
Go to Infraon Portal -> Infraon Configuration -> IT Operations -> Blacklist and Whitelist.
On the top right corner of the page, navigate to the ‘Add’ button to add a new configuration.
Enter the below details in the respective dialog boxes.
The Task Workflow defines the lifecycle of a task in Infraon Infinity ITSM. Each task moves through a series of states and statuses, ensuring visibility, accountability, and automation at every step.
Each task has two levels of tracking:
State → The high-level stage of the task (fixed).
Status → A sub-level indicator within the state (configurable, names and colors can be customized).
The Docker Swarm page allows you to configure and initiate discovery for Docker Swarm environments using the configured IP address, device credentials, and Data Collector details.
There are three sections on the Docker Swarm Discovery page: Discovery Details, Filters, and Schedule.
The Discovery Details section provides the discovery profile, device information, credentials, agent details, and data collector details settings.
Discovery | Profile and Discovery Information
The Schedule section determines when the Docker Swarm Discovery should be initiated. You can start the discovery immediately using Discover Now or configure a Discovery Schedule to run it at a specified date and time. To learn more, .
Discover the deployed trails and circuits from the Network. This enhances the network's overall functionality, performance, and connectivity.
This module allows organizations to configure and publish their helpdesk contact details, operating hours, and other support-related information. Once configured, this information is displayed in the Self-Service Portal (SSP) under the Help section, ensuring that end users (requesters) can easily access relevant support contacts.
Supports rich text formatting for clear, professional presentation of details.
Click on the rich text editor field to enter helpdesk details such as operating hours, phone numbers, and email addresses.
Use available text formatting options (bold, italics, headings) for clarity.
Rich Text Editor | Basic Details
This module is part of the Automation framework in Infraon ITSM. It provides administrators and privileged users with the ability to define how fields behave across various ITSM modules, including Tickets, Requests, Problems, Changes, and Releases.
Field configurations determine whether a field is visible, mandatory, or disabled for a specific role at a particular stage in the workflow. Safeguarding every role, from requesters and technicians to managers and approvers, only interacts with the fields relevant to their responsibilities.
Additionally, any changes made here are also reflected in the Self-Service Portal (SSP), ensuring consistency between the admin console and the end-user interface.
The page provides an overview of all configurations created within the platform. From this screen, administrators can:
Add new configurations using the + Add Field Configuration button.
Bots can be used to assist in real-time problem-solving AI. Admins can leverage pre-built AI bots for common queries based on various departments, including Finance, HR, IT, Legal, and Operations, or create custom bots tailored to particular needs across various departments.
Default bots with their functionalities are stated below:
Bots | Fields
The escalation process and automatic assignment mechanism are employed in support ticket resolution. When a ticket is raised, it is initially assigned to an L1 user, if L1 cannot resolve the ticket, it is escalated to the appropriate escalation team. The escalation occurs from L1 to L2 and L3 in descending order. Automatic escalation is triggered in L1, with the system selecting a user for escalation. The escalated team provides a response time for ticket resolution, such as 50 minutes for L1 and 30 minutes for L2, allowing multiple scheduled attempts to resolve the ticket within the given time frame.
Go to Infraon Configuration> Infraon Automation> Escalation
Click the ‘Add’ Button
To the ‘Escalation’ page. Refer to the table for information.
This module oversees and monitors background tasks that operate independently from the main application flow. Built on the Celery framework, an asynchronous task/job queue based on distributed message passing, it focuses on real-time operations while supporting scheduling.
For instance, when a baseline scheduler is created, a corresponding task is automatically generated, which can be monitored and managed within the Asynchronous Task Manager. This ensures that tasks can run asynchronously in the background or synchronously, depending on the requirements.
This module allows administrators to define how attendance is recorded for users. It provides controls to automate attendance tracking and enforce location-based validation using geo-fencing.
This configuration is primarily used for field users (technicians), in which attendance is validated against GPS location and predefined work boundaries. Attendance records generated based on these settings are stored and can be accessed for monitoring, reporting, and audit purposes.
Attendance behavior is governed by two configuration options:
Force Geo-Fence Restriction ensures that users can mark attendance only within a defined range.
Auto Clock-In / Clock-Out allows the system to automatically record attendance based on user location.
Departments are created within Infraon to group users logically to suit the organization's requirements. Assigning departments to help align teams to workflows, assigning tickets and tasks, and prioritizing work.
In short, departments are added for efficient work assignment and team management.
Users can be part of multiple departments at the same time.
Click on the 'Add Department' button in the top right corner. Provide a department name, select a department head and a prime user, and save.
*Department Head - Can be managers or business owners who are decision-makers or otherwise known as high-level approvers.
*Prime User - can be team leads or a senior member of the team who is in charge of the allocation of work. They are the primary responsibility owners and have basic approval privileges too.
Go to Infraon Configuration -> User Management -> Department
Displays leave details of the logged-in user. Users can view multiple categories of leaves available within the organization, apply for leave and check available leave balance as on date.
Leave categories with information on the number of leaves available vs. the number of leaves taken.
Use the 'Apply Leave(s)' button to apply for leave(s). Select date or date range, leave type, and specify a reason. Click 'Apply.'
Leave Type must be pre-defined by the administrator.
Go to Infraon Configuration -> User Management -> Leaves
Click on the Apply Leave(s) button.
The Call Manager page allows you to configure and initiate discovery for Call Manager environments. It enables Infraon to discover Call Manager resources using the selected scanning mechanism, IP address, device credentials, and Data Collector details.
Initiate Call Manager Discovery
There are three tabs on the Call Manager page: Discovery Details, Filters, and Schedule.
The Discovery Details section provides the discovery profile, device information, credentials, agent details, and data collector details settings.
Discovery Details | Profile and Discovery Information
Show on the customer portal - displays the field on the customer portal.
Label
Action
Name*
Add a name for the workflow.
Description
Add a brief description of the workflow.
Operand
Select the service catalogue from the drop-down menu.
Value
Select a value from the drop-down menu. These values are derived from the 'Service Catalogue' and must be pre-defined.
Label
Action
Description/Example
Leave Date*
Choose a date or range of dates you want to apply for leave.
Leave days are auto-calculated based on the selection.
Leave Type
Select leave type using the dropdown menu.
Leave type must be pre-configured by the administrator.
Reason*
Add a reason for leave.
The reason is a mandatory field.
Click 'Submit.' Leave requests are submitted to the reporting manager for approval. Users can edit leave requests as long as they are not approved.
Close
Closed
The final state where the task is officially closed. Once in this state, editing is disabled.
Example: HR onboarding task marked fully closed.
Open
To Do
When a task is created, it starts in the Open state. An email notification is automatically sent to the assignee. Example: “Provision Laptop” task created for IT.
In Progress
Ongoing
The assignee begins working on the task, and the status reflects active progress.Example: Technician starts installing the required software.
On Hold
Blocked
The task is paused due to dependencies or external issues. Work cannot proceed until it is resolved. Example: Waiting for vendor confirmation.
Close
Done
The task is completed, and an email notification is sent to the assignee or requester confirming closure. Example: VPN setup is finished; an email has been sent to the user.

Once all the above parameters are defined, click on the 'Add Service' button at the top right corner. The 'Add Service' form has four tabs.
Basic Information - Add basic service information like name, code, description, etc. Align the service to an existing catalogue or choose to add a new Catalogue, Category, or Classification.
Advanced Information - Add advanced information like cost, tag, overview, features, etc. Information added here enhances the user experience within the self-service portal.
Ownership - Assign service/business owners, reviewers, approvers, and service team. Define the audience by keeping the service open to all or limiting it to selected requesters/requester tags.
Service Template - Create a service template to ease the request for service.
Service Classification
Add service classification.
Based on the type of service, add service classification. Within the 'Desktop Servicing' category, classifications can be made based on Desktop Brand or servicing needs such as Memory upgrade, Keyboard replacement, software requirement, etc.
Service Description
Add a brief description of the service.
It is recommended to include a detailed description of the service to enhance the end-user's self-service experience.
Status
Select the status of the service
While adding a service, status can be selected as 'Definition - Open' till the service is ready to be published. The status must be moved to 'Published - Operational' to make it active.
Criticality
Select criticality of the status
Based on how critical the service is to the business, select the criticality level - 1 being business-critical and four low.
Tag
Add tags for better classification.
Refer to the 'Tags' module for details.
Overview
Add an overview of the service/product.
The overview can include size, product measurements, version, or service descriptions.
Key Feature
Add key features of the product or service.
Key features can include the unique qualities of your product/service.
ServiceAvailability
Add details about the availability of service, if any.
Availability can be quality, time, or rating based on the service's performance, maintenance, security, and reliability.
For products, availability can be the delivery time, performance capabilities, etc.
Additional Fields
Add details in the following fields: Product/Service Information, Value Proposition, Service Commitment, Training, Target Audience, Turnaround Time, and Business Processes Supported.
Additional details help requesters get a thorough understanding of the service/product listed.
User Tags
Select user tags, as applicable.
User tags are used as filters to control service availability. If HR services
Subscription List(s)
Subscribed All Requesters
Select this option to make the service available to all requesters.
To enable service for all requesters.
Requester Tag(s)
Select requester tag(s) to limit service availability
For example, HR services can be restricted to internal users by selecting the relevant tag. Or Region-based tags can be used to filter region-based services.
Requester(s)
Select tag(s) to limit service availability to selected requesters
This helps restrict service for selected users.
Label
Action
Description/Example
Product Image*
Add an image of the product or an icon to denote service.
You can add an image using the drag & drop option or upload files in PNG, JPG, or JPEG formats.
Service Name*
Add a name for the service.
For example, Laptop Setup, MS Office installation, Mouse, etc.
Service Code
Add a service code.
The service code is used as an identifier. This can be defined based on organizational norms. For example, MS_Install, AntiV-Install, HR_Serv_001, E-Fin-01, etc.
Catalogue*
Select a catalogue to group the service.
Label
Action
Description/Example
Currency
Select currency (for cost) of the service/product.
Choose the currency (INR or USD) for the service/product cost.
Cost
Add the price of the service or product. Services must have an established cost, even if it is not charged to the requester.
If the cost entered is 100 and the currency is selected as USD, the cost of the service/product is taken as USD 100.
Purchase Required
Select if the selected service involves a purchase of a product
Select if the request involves purchasing a product (from the business side), i.e., if the request is for a keyboard and the technician must buy the same to fulfill the request.
Shipping Required
Select if the service involves the shipping of a product.
Label
Action
Description/Example
Service Visibility Section
Service Owner
Select an owner for the service or product.
The service owner is usually the person in charge of the service design.
Business Owners
Select an owner for the business offering the specified service or product.
Business owners are usually the decision-makers behind the service.
IT Owners
Select an IT owner for the specified service or product.
Label
Action
Description/Example
Incident Summary Owner
Add a summary of the incident.
The incident summary acts as the mail subject when an incident is raised.
Incident Description
Add a brief description of the incident.
Include information that is mandatory to work on the incident.
Based on the type of service, select catalogue - IT, HR, Finance, etc. Use the 'New Catalogue' option to create a new catalogue.
Select if the request involves the shipping of a product, i.e., Select if the request is for a keyboard and the technician is required to ship it to the requester.
IT Owners are users from the IT team in charge of fulfilling the product or service deliverables selected.
Whitelist
Select the appropriate from the drop-down box below.
Label
Action
Description
Type
Select the appropriate from the drop-down box below.
Example – Software, etc.
Profile
Enter a profile name to the configuration.
Description
Enter a brief description about the configuration.
Blacklist
Select the appropriate from the drop-down box below.
No actions can be taken. This field is for viewing purposes only.
Displays the Celery worker process name assigned to the task.
Example: "Infraon"
Description
No actions can be taken. This field is for viewing purposes only.
Provides detailed information about the task's purpose and functionality
Queue Name
No actions can be taken. This field is for viewing purposes only.
Indicates the Celery message queue associated with the task.
Example: "upload_jobs"
Status
No actions can be taken. This field is for viewing purposes only.
Reflects the current operational state of the task (e.g., "running" or "stopped")
Last Heartbeat
No actions can be taken. This field is for viewing purposes only.
Timestamp of the most recent communication between the worker and the Celery broker.
Example: "38 seconds ago"
Action Icons
Resync Worker
Users can click to initiate the resync process. A validation step is required to confirm the action.
Initiates a resynchronization process between the Celery worker and the broker. Requires confirmation
Stop Worker
Users can click to stop the worker process. A validation step is required to confirm the action.
Terminates the Celery worker process, halting task execution. Requires confirmation
Label
Action
Description/ Example
Task Name
No actions can be taken. This field is for viewing purposes only.
Identifies the specific Celery task.
Example: "Start Configmgmt Uploadjob"
Worker Name
The IT Assistance Bot provides instant access to information and support for essential policies and procedures, including security, data protection, network access, backup & recovery, equipment acquisition, BYOD, and remote work. Boost your productivity by getting quick answers and streamlining IT processes.
Legal Assistance
The Legal Assistance Bot provides instant access to all your company's legal documents and policies, including incorporation agreements, shareholder agreements, ethics code, contract management, intellectual property, litigation, regulatory compliance, confidentiality agreements, recordkeeping, and employment law. Get quick answers and avoid legal confusion.
OPs Assistance
The Operations Assistance Bot provides instant info on all your company's operational policies and procedures, including inventory management, quality control, data privacy, supply chain & vendor management, and facilities management. Get quick answers and streamline your day-to-day operations.
Navigate to Infraon configuration -> Bots -> Bots Assistance.
At the top right corner of the page, click on “Create New Bot.”
Add the necessary details.
Bots Configuration | Fields
Label
Description/ Example
Bot Name
Add a suitable to the respective created bot.
Description
Add a brief description of the bot.
Topics
Expand the bot's understanding by adding diverse and relevant topics to its content library. This will enable it to provide more accurate and informative responses.
Click on Validate to continue.
Ensure the compliance of at least five bot responses by conducting a thorough review.
Click to create the respective bot successfully.
Navigate to any one of the default bot assistance and select on “Click to Initiate” option.
Now attach the related content for the respective predefined topics. (This will enable Bot to provide more accurate and informative responses.)
Click on Validate to continue.
Ensure the compliance of at least five bot responses by conducting a thorough review.
Click to initiate the respective bot successfully.
Label
Description
Finance
Offers instant access to comprehensive information topics on company policies and procedures, including financial management, expense reimbursements, accounts payable/receivable, credit & collection, cash handling & management, purchasing & procurement, financial reporting & compliance, tax Assistance, and even payroll.
HR Assistant
The HR Assistance Bot provides instant access to all your company's HR policies and procedures, including the Employee Handbook, EEO policy, anti-harassment and anti-discrimination policies, code of conduct, workplace safety, attendance, leave, performance management, compensation, privacy, social media, termination, training, remote work, travel, expenses, and even dress code topics.
IT Assistance
Label
Action
Description/Example
Escalation Name
Add your Escalation name
The process of automatically routing or notifying higher-level authorities or individuals when certain conditions or thresholds are met, ensuring timely attention to critical issues or tasks.
Priority
Select the priority from the dropdown
Prioritize the ticket, critical, high, or medium also you can select all
Team Name
Select the team from the dropdown
Team Name refers to the designated identifier given to a specific team or group responsible for handling escalated issues or tasks within the system.
When
Select from the dropdown
The ticket not resolved option is available and the user should select the option while creating the escalation.
Click the ‘Submit’ button.
Profile Name*
Enter a profile name
Specifies the name of the Docker Swarm discovery profile.
Provide Profile Details
Enter profile details
Provides the required details for the Docker Swarm discovery profile.
IP Address*
Enter an IP address
Specifies the IP address of the Docker Swarm environment to be discovered.
Device Credentials
Select credentials
Create an application credential before performing Docker Swarm Discovery. Select an Application credential configured with the required Docker Swarm connection and authentication details. The selected credential enables IMS to communicate with the Docker Swarm environment and collect cluster and container information.
Data Collector Details*
Select details
Select the Data Collector to be used for the Docker Swarm discovery process. The Data Collector is installed within the customer's network and communicates with the target environment using the configured protocols and credentials. It collects the required inventory, availability, and performance information and sends the data to Infraon for monitoring.
Rating Criteria
Add the aspects you want rated (drag & drop to reorder)
e.g., “Timeliness”, “Communication”, “Resolution Quality”
Schedule Mode
Select whether the feedback should be sent once or at recurring intervals
Options: Once (single time) or Every (repeat after defined duration)
Select conditions that trigger the peer review assignment
Options include Impact Service (e.g., Network Services, Antivirus Service) and Priority (e.g., Critical, High)
Rule Setup – Then Assign To *
Define who the review should be assigned to once conditions are met
Example: Auto Assign Ticket → Creed
Add Rule
Add additional conditions for triggering peer reviews
Example: Add another Impact Service _+_Priority rule combination
Next
Proceed to the next step of form creation.
Takes you to the form design page where review questions/fields are configured
Contact Number
Drag into the form to add a phone number field.
Captures the requester’s contact details.
Text
Drag into the form to add a single-line input.
Used for short responses (e.g., “Your name” or “Ticket ID”).
Star Rating
Drag into the form to add a rating scale (1–5 stars).
Allows users to rate satisfaction, performance, or service quality.
Number
Drag into the form to add a numeric input.
Useful for quantitative responses (e.g., “Resolution time in minutes”).
Dropdown
Drag into the form to add a dropdown list.
Provides a list of predefined options for users to select from.
Text Area
Drag into the form to add a multi-line input.
Ideal for detailed feedback, comments, or suggestions.
Checkbox
Drag into the form to add multiple selectable options.
Let users choose one or more items from a list (e.g., issues faced).
Radio
Drag into the form to add radio buttons.
Enables users to select only one option from a set.
Date
Drag into the form to add a date field.
Allows users to provide a specific date (e.g., incident date).
Date & Time
Drag into the form to add a date & time selector.
Collects both date and time information in one field.
Divider
Drag into the form to insert a visual divider line.
Helps separate sections in the form for better organization.
If a peer review is already assigned to the incident (pending or completed), the option will not be available.
Basic Details
Feedback Name
Enter a name for the template
e.g., “Incident Feedback”, “Service Satisfaction Survey”
Description
Provide a summary of what this template is for
e.g., “Collects info on how the requester felt about ticket resolution time and support quality.”
Services
Select relevant services from the dropdown.
Choose the service(s) this template will apply to. If needed, add missing services via the Service Catalogue.
Link Expires In (Days)
Set how many days the feedback link remains valid for the requester
Choose a number between 1 and 99 days.
E.g., “14 days” to give the requester enough time to respond
Default Star Rating
Choose the initial star rating that the requester sees
Feedback Name *
Enter the name of the peer review template
Example: Default Peer Review, Critical Service Review
Description
Provide a short explanation of the template’s purpose
Example: Used for reviewing incidents related to critical services
Auto Submit After (Days)
Specify after how many days the review should be automatically submitted
Example: 3 – Review will auto-submit after 3 days if not completed
Headings
Drag into the form to add a section heading.
Used to create titles or divide sections in the form for better readability.
Paragraph
Drag into the form to add explanatory text.
Helps provide instructions or context for users filling the form.
Drag into the form to add an email field.
Collects the requester’s email address.
e.g., 1 star, 3 stars — so the rating is not blank by default
Rule Setup – When
CMDB (rules applied to configuration items and assets).
The selected module controls the available rule types and rule setup fields.
Duration-Based Delegation: Delegates approvals after a defined duration with optional reminders.
Asset records are updated accordingly.
Precedence*
Select priority level
Determines the order in which rules are evaluated when multiple rules match. Options: High, Medium, Low. Higher precedence rules are executed first.
Description
Enter rule description
Short explanation of the rule’s purpose. Example: Assign network tickets to the L1 team.
Is Enable
Enable or disable the rule
Controls whether the rule is active. Disabled rules are not executed.
Override Existing Rule
Enable if required
Allows this rule to override existing matching rules.
Impact Service
Select Impact Service from the dropdown
Updates the Impact Service field with the selected service when the defined conditions are met. This allows different Impact Services to be assigned automatically based on conditions such as the requester.
Example: Set Impact Service to Email Service.
Add Condition (+)
Add additional conditions
Allows multiple conditions to be combined for rule evaluation.
Remind Before Delegation*
Define reminder time
Sends a reminder before the delegation is triggered.
Click to add a new Circuit Discovery.
Follow the below steps to add a new Circuit Discovery.
Profile Name
Indicates the Name of the Profile assigned.
Technology
Indicates the type of technology (SDH, PDH, VSAT, IP/MPLS).
Circuit Type
Indicates the circuit type (E1, Ethernet, Data, etc.).
Schedule Type
Run Immediately or Schedule for an hour, week, etc.
Current Status
Displays the current status of the Profile.
Last Action
Indicates the date and time of the last discovery.
Next Action
Indicates the date and time of the next discovery.
Actions
Audit
Click on the Audit button to view the Circuit Discovery Result.
Top of Form
Iteration, Iteration ID, Next Iteration, Start Time, End Time, Duration, and selected discovery options.
Edit
Click on the Edit button.
Make changes to your Circuit Discovery.
Delete
Click on the Delete button.
Click this button to delete the selected Circuit Discovery permanently. (Use a trash can icon)
Rescan
Click on the Rescan button.
This option can be used to rescan the Circuit Discovery tab.
Go to Infraon Infinity portal -> Infraon Configuration -> IT Operations -> Circuit Discovery.
Navigate and click on the ‘Add’ button at the top right corner of the page.
Enter the respective dialog boxes.
Label
Action
Description/ Example
Profile Name
Add a Profile Name to your Circuit Discovery.
Test, Run, etc.
Technology
Select from the drop-box below.
SDH or PDH.
Circuit Type
Select from the drop-box below.
E1, Ethernet, STM, Voice or Data.
Discovery Schedule
Once entering all the credentials, click ‘Submit’ to save the Circuit Discovery.
Label
Action
Description/ Example
Search
Search for the required Discovery.
Filter
Filter can be added based on the field and condition from the drop-down box below.
Field – Circuit Type, Profile Name, Technology.
Condition – in, not in, equal to, not equal to, contains, not contains.
Add
Label
Description / Example
Styles
To ensure proper formatting and hierarchy, choose the desired text style for the content, such as Heading 1, Heading 2, or Paragraph.
Bold (B)
Makes selected text bold for emphasis.
Example: Helpdesk Hours.
Italic (I)
Italicizes selected text for subtle emphasis.
Example: Operating Hours.
Underline (U)
Underlines text to highlight important details. Example: Contact Number.
Strikethrough (S)
It adds a line through text and is helpful for outdated info.
Example: Old Email.
Bullet List
Click Save to publish the details.
Once saved, the SSP displays a Help icon. Clicking it opens a read-only slider showing the configured details.
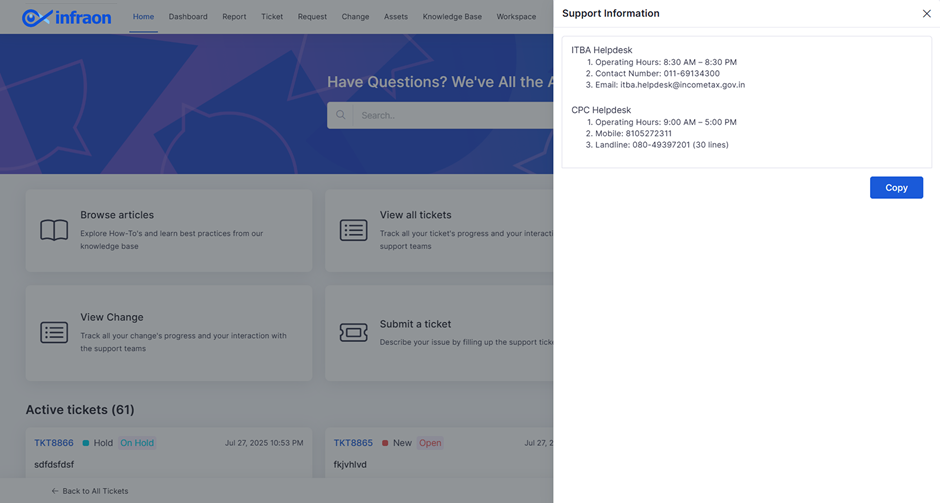
ITBA Helpdesk
Operating Hours: 8:30 AM – 8:30 PM
Contact Number: 011-69134300
Email: itba.helpdesk@incometax.gov.in
CPC Helpdesk
Operating Hours: 9:00 AM – 5:00 PM
Mobile: 8105272311
Landline: 080-49397201 (30 lines) Switch between card view and grid view for better visualization.
To create a new field configuration, navigate to the top-right corner of the page and click on the + Add Field Configuration button.
Add Field Configuration | Basic Details
Module
Select from the drop-down.
Defines the ITSM module to which the configuration applies. Options include:
Ticket
Service Request
Problem
Change
Workflow
Select from the drop-down.
Refers to the workflow process associated with the selected module. Each module can have one or more workflows (e.g., Ticket Workflow, Request Workflow, Change Approval Workflow).
Example: If Request__Workflow is selected, the configuration will be tied to that specific request lifecycle.
Type
Select from the drop-down.
Defines the type of configuration being created: Field Configuration: Allows admins to control how fields behave within the workflow. Example:
View: Field is visible but not editable.
Disable: The Field is greyed out and cannot be interacted with.
Mandatory: Field must be filled before moving to the next status.
Notification Configuration: Controls when and how system notifications are triggered for the selected module and role.Example: Sending an approval email when a ticket moves to the Approval status.
Once the basic details (Module, Workflow, Type, Role Name, and Status) are selected, admins can define how each field should behave for the chosen workflow stage and role.
You can configure system-provided General Fields (such as Status, Impact Service, Team, Assignee, Subject, Urgency, Impact, Priority) as well as custom fields created in the workflow. Additionally, fields like Reported By can also be included in the configuration.
For each field, admins can set one of the following actions:
View: Field is visible but cannot be modified.
Disable: Field is completely disabled for the role at the selected status.
Mandatory: Field must be filled in before progressing to the next workflow stage.
Admins can click the respective action icons to confirm the field’s configuration.
Once all field rules have been defined, click Submit to save the configuration.
If both are disabled → users can mark attendance manually without restrictions
If geo-fencing is enabled → attendance is restricted based on location
If auto clock-in/out is enabled → attendance is recorded automatically
If both are enabled → attendance is fully automated and location-controlled
If a user attempts to mark attendance outside the allowed location, the system may trigger an approval workflow before confirming the entry.
Force Geo-Fence Restriction
Toggle enable/disable
Restricts users from marking attendance outside the defined radius of the work location. When enabled, attendance is allowed only within the configured geo-fence boundary. Example: User must be within 50 meters of the assigned location to mark attendance.
Auto Clock-In / Clock-Out
Toggle enable/disable
Automatically records attendance when users enter or exit the defined work location. Eliminates the need for manual clock-in and clock-out actions. Example: Attendance is automatically recorded when the user reaches the office.
Click on the 'Add Department' button.
Label
Action
Description/Example
Department Name*
Give a name to your Department's password policy.
Incident Management, Finance, HR, etc.
Department Head
Select a user using the dropdown menu to make them the department's head.
Department Heads can be managers or business owners who are decision-makers. They are otherwise known as high-level approvers.
Prime User
Select user(s) using the dropdown menu to make them the department's head.
Prime User(s) can be team leads or a senior member of the team who is in charge of allocating work.
They are the primary responsibility owners and have basic approval privileges too.
Description
Add a brief description of the department.
Once all the parameters are added, click 'Submit' to save the department.
Repeat the process to add multiple departments. Departments can be edited or deleted using the respective icons.
Profile Name*
Enter a profile name
Specifies the name of the Call Manager discovery profile.
Discovery Options
Select an option
Allows you to select Discover only Inventory Information for the discovery process.
Provide Profile Details
Enter profile details
Provides the required details for the Call Manager discovery profile.
Type*
Select a type
Specifies the type of scanning mechanism to be used for discovery.
Custom Scanning Mechanism
Select a scanning mechanism
Allows you to select the required custom scanning mechanism for Call Manager discovery.
IP Address*
Enter an IP address
The Schedule section determines when the Call Manager Discovery should be initiated. You can start the discovery immediately using Discover Now or configure a Discovery Schedule to run it at a specified date and time. To learn more, .
Users are organization members with access to Infraon. Administrators can create, invite, import, and manage users, assigning predefined roles and privileges based on their responsibilities.
The Users module allows administrators to manage user information, roles, access status, work details, and user-to-asset associations.
The Users module provides multiple ways to create and manage users in Infraon.
Add User – Create a user by entering their personal, work, and address details.
Add Customer User – Create users associated with a customer or sub-client organization.
Import Users – Create multiple users by uploading user details through a CSV file.
Invite User(s) – Send an invitation to users through their email address. The user can register using the invitation link.
Update Users – Update multiple users using a CSV file.
Edit or Delete Users – Modify or remove existing users from the user list.
Enable or Disable Users – Control whether a user can access Infraon.
When a user's Is Active status changes from True to False, the system automatically removes the user from all associated assets.
This applies when the user is assigned as:
Owner
Managed By
Used By
Requester
The change is recorded in the Asset Activity Log.
This behavior is supported for:
Manual updates
Grid updates
Bulk CSV updates
Infraon also applies license limits when it synchronizes users and requesters.
New users/requesters cannot be created when the available license capacity is reached.
Existing users/requesters can continue to be updated.
A warning is displayed when a sync operation exceeds the available license limit.
The system prevents inconsistent or partial user creation.
Go to Infraon Configuration → User Management → Users.
The Users page lets you search, filter, view, export, and manage users.
The Users page provides:
Users | Basic Options
The button next to Invite User(s) allows you to switch between:
List View
Card View
Both views display user information and available actions.
The page displays user information such as:
Users | User List
The Users module provides multiple options for creating and managing users in Infraon. Administrators can create users individually, create customer users, import users in bulk, invite users through email, or update existing users using a CSV file.
The available options are:
Add User
Add Customer User
Import User
Invite User(s)
The Add User option allows administrators to create a user by entering the required user, work, and address information.
Click Add User to open the user creation page.
The page contains three sections:
User
Work
Address
Add User | User
After entering the required details, click Next to continue to the Work Details section or click Submit to create a new user.
Add User | Work
Add User | Address
After entering the required details, submit the form to create the user.
The Add Customer User option lets administrators create users associated with a specific customer or sub-client organization.
A customer organization may manage multiple sub-client organizations within Infraon. For example, a service provider managing IT services for multiple clients can use Add Customer User to create a user for a specific customer or sub-client. The administrator can associate the user with the appropriate customer, assign a role, and provide access based on the user's responsibilities and privileges.
This ensures users can access and manage information relevant to their assigned customer organization.
The Import User option lets administrators create multiple users by uploading their details via a CSV file.
Go to Infraon Configuration → User Management → Users → Add User.
Select Import User.
Download the sample CSV file using Download sample CSV file here.
Enter the user details in the CSV file.
The Import CSV option allows you to download a sample CSV file and upload your completed CSV file. It also provides details about the required CSV format and field requirements.
After uploading the CSV and clicking Next, Infraon validates the uploaded data and separates the records into Valid and Invalid data. For invalid records, click Download to download the failed data. Click Show Fields to view the specific fields that contain errors.
The Invite User(s) option lets administrators invite users to access Infraon via email.
You can add multiple users and different roles in a single invitation process.
Go to Infraon Configuration → User Management → Users → Add User.
Click Invite User(s).
Enter the user's email address.
Select a role from the Role dropdown.
Multiple users can be invited in a single instance.
Different roles can be assigned to different users.
Roles must be predefined before sending invitations.
The invitation link expires after 36 hours by default.
The Update Users option allows administrators to update multiple users in bulk using a CSV file.
It can also be used to deactivate users and automatically remove them from associated assets.
Go to Infraon Configuration → User Management → Users.
Click Update Users.
Select the required Role, if applicable.
Download the sample file using Download Sample.
The CSV must follow the required user-data format.
Full Name, Username, Email, Password, and Role are mandatory.
The specified Role must exist in Roles & Privileges.
Phone Number must include the country code and follow the required format.
Is Active must be set to true or false.
If Is Active is changed from True to False through the update process:
The user is deactivated.
The user is automatically removed from associated assets.
This applies to Owner, Managed By, Used By, and Requester assignments.
The changes are recorded in the Asset Activity Log.
After uploading the CSV, click Next to open the validation page and review the valid and invalid records.
The Download Agent option allows users to download the appropriate Data Collector package for the required operating system. The Data Collector collects inventory, availability, and performance metrics from servers and network devices.
When users click Download Agent, the Download Data Collector panel opens, displaying the agent package details, download option, Agent Token, endpoint availability status, and token management options.
To download the Data Collector:
Click Download Agent on the Data Collector page.
The Download Data Collector panel opens.
Review the available agent package details, including the operating system, agent version, and build number.
Click Download to download the agent package.
Extract the downloaded package on the required server.
Proceed with the agent installation and configuration.
Example: Data Collector Agent (Oracle Linux), Version 7.5.3, Build 20261104.
The Agent Token is generated specifically for your organization and is required for manual agent installation and configuration. It allows the Data Collector to register with Infraon.
Locate the Agent Token section.
Click Copy to copy the generated token.
Use the token during agent installation and configuration.
Once the agent is successfully registered using the token, it is automatically added to Infraon.
The downloaded agent package contains a configuration file.
This file includes organization identification and agent configuration parameters required for registration and connectivity.
The configuration file contains the following parameters:
Download Agent | Configuration
Download Data Collector | Field Description
Service Management, also known as ITSM, is an essential part of the lives of service-oriented businesses and organizations. ITSM, traditionally used to deliver technology solutions effectively, has now evolved into service management, which provides business values. Service management can help organizations simplify processes within other teams that rely on technology, such as HR, administration, finance, legal, etc.
Service Management is an essential module of Infraon that helps organizations follow ITIL or other compliance-related practices while delivering consistent care and attention. A service-driven organization aims to support strategic business objectives with the support of ITIL.
While ITIL V3 defined 26 processes across the service lifecycle, in ITIL 4, these 26 processes were replaced by 34 "practices." The noticeable change in ITIL 4 is its definition of service as a means to co-create value by facilitating customer-desired outcomes without undergoing related costs or risks. To achieve this, the ITIL Service Value System (SVS) has been introduced in ITIL 4 to replace the service lifecycle from ITIL v3. In addition to this, ITIL 4 has also introduced four dimensions replacing the 4 Ps of ITILv3:
Organizations and People
Information and Technology,
Partners and Suppliers
Value Streams and Processes
Organizations looking to implement ITIL must know that ITIL defines two types of catalogues for IT Services. Why do we need two separate catalogues?
A catalogue is a compilation of items for end-users to select from to simplify their daily requests. Articles from the catalogue can include:
The organization's IT services include email creation, login credentials, laptop servicing, etc.
Non-IT services include HR (Onboarding, letters, relieving), finance (Pay Slips, tax forms), and admin (Access cards, cupboard keys).
Asset requests for active assets like keyboard, monitor, laptop, etc.
Asset requests for fixed assets like chairs, boards, pedestals, etc.,
Service management has two sides: service offering and service requesting. Services are offered using a service catalogue and requested using the business catalogue. Organizations can target a smooth workflow regarding assignments, approvals, and SLAs by having two separate catalogs and simultaneously enhance user experience.
Configuring a service catalogue enables consolidation of services offered and improved productivity levels, thereby enhancing service experience. A Service Catalog is often integrated with a Configuration Management DataBase (CMDB), a database of assets or CIs (Configurable Items) owned by the business. Infraon's CMDB is referred to as Assets.
An effective service catalogue must fulfill user requirements, ease technicians' load, and adhere to SLAs. It must also be defined to facilitate self-service.
Step 1: Understand user needs
Step 2: Define service offerings
Step 3: Keep the details crisp, clear, and user-friendly
Step 4: Align offerings with the right audience
Step 5: Setup the right service team
Step 6: Define owners, approvers, and permissions
Step 7: Refine offerings periodically
Add on: Keep an incident template handy.
Demo data for ITSM module services for new Org
Knowledge Base Modules! Explore added knowledge articles to understand the functionality and purpose of KB modules.
The Apache Tomcat page allows you to configure and initiate discovery for Apache Tomcat environments using the Application protocol. It enables Infraon to collect Apache Tomcat inventory information from the configured environment.
There are two sections on the Apache Tomcat Discovery page: Discovery Details and Schedule.
The Discovery Details section provides the discovery profile, device information, credentials, agent details, and data collector details settings.
Discovery | Profile and Discovery Information
Click Next to proceed to the Schedule section.
The Schedule section determines when the Apache Tomcat Discovery should be initiated. You can start the discovery immediately using Discover Now or configure a Discovery Schedule to run it at a specified date and time. To learn more, .
The Feedback Templates module allows you to design and manage standardized templates for collecting feedback within the platform. It provides two template options:
Customer Feedback Template – used to gather customer satisfaction and service-related feedback.
Peer Review Template – used to assign peer reviews, either individually or in bulk, to team members.
A Customer Feedback Template is used to gather structured input from requesters after a service or ticket has been completed. These templates include details such as:
Feedback name and description
Associated services
Expiry duration for the feedback link
Default star rating
Schedule options for sending the feedback
Reminders to prompt requesters who have not yet submitted their feedback.
A Peer Review Template is designed to support internal collaboration and quality checks within teams. It allows managers or administrators to assign peer reviews to either a single user or multiple users in bulk.
While creating a Peer Review Template, you can define:
Conditions: such as Impact Service and Priority Tag.
Team: the team responsible for conducting the review.
Assigned To: specific team members selected for the peer review.
The system also prevents duplicate peer review templates from being created with the same combination of Impact Service and Priority. Templates can be edited, deleted, or filtered by type (Peer Review or Customer Feedback), and each Peer Review Template is clearly tagged for easy identification.
Feedback Template | Basic Details
Feedback Templates are used to collect Customer Satisfaction (CSAT) responses for supported modules such as Ticket and Request. These templates help organizations capture user feedback after service delivery or issue resolution.
Feedback Templates are configured through workflow email notifications using the feedback_url macro.
To enable feedback collection:
Navigate to the required Ticket or Request workflow.
Add or edit the email generation step in the Resolved or Closed state.
Include the feedback_url macro in the email template.
Save the workflow configuration.
When the Ticket or Request reaches the configured state, the system automatically sends a feedback email to the requester with a link to the feedback form.
The Docker page allows you to configure and initiate discovery for Docker environments using the configured IP address, device credentials, and Data Collector details.
There are three sections on the Docker Discovery page: Discovery Details, Filters, and Schedule.
The Discovery Details section provides the discovery profile, device information, credentials, agent details, and data collector details settings.
Discovery | Profile and Discovery Information
The Schedule section determines when Docker Discovery should start. You can start the discovery immediately using Discover Now or configure a Discovery Schedule to run it at a specified date and time. To learn more, .
The Kafka page allows you to configure and initiate discovery for Kafka environments using the Application protocol. It enables Infraon to collect Kafka information from the configured endpoint and monitor the discovered environment based on the configured discovery settings.
There are two sections on the Kafka Discovery page: Discovery Details, Filters, and Schedule.
The Discovery Details section provides the discovery profile, device information, credentials, agent details, and data collector details settings.
Discovery | Profile and Discovery Information
Click Next to proceed to the Schedule section.
The Schedule section determines when the Kafka Discovery should be initiated. You can start the discovery immediately using Discover Now or configure a Discovery Schedule to run it at a specified date and time. To learn more, .
The MSSQL page allows you to configure and initiate discovery for Microsoft SQL Server databases using the Application protocol. It enables Infraon to collect MSSQL database information and monitor inventory, availability, and performance based on the selected discovery option.
There are two sections on the MSSQL Discovery page: Discovery Details and Schedule.
The Discovery Details section provides the discovery profile, device information, credentials, agent details, and data collector details settings.
Discovery | Profile and Discovery Information
Click Next to proceed to the Schedule section.
The Schedule section determines when the MSSQL Discovery should be initiated. You can start the discovery immediately using Discover Now or configure a Discovery Schedule to run it at a specified date and time. To learn more, .
Custom Field allows users to create additional fields for supported modules based on business requirements. These fields help capture organization-specific information that is not available in the default form. Users can configure field types such as text, dropdown, number, date, email, phone, and text area, then apply them to selected sections within a module.
Custom fields can currently be created for:
This allows administrators to create and manage shift schedules for teams within the organization. It helps define shift timings, working days, business hours, effective periods, team allocation, and shift-based ticket assignment workflows.
Shift configurations are used to organize operational coverage, distribute workload across teams, and automate ticket assignment based on configured shift schedules and availability.
The Shift Configuration page displays configured teams and their assigned shift schedules. Users can view shift timings, team details, and manage shifts using the timeline view.
The left panel displays available teams, while the main section displays configured shifts with options to add, edit, or delete shift configurations.
Shift Configuration | Basic Details
Advanced resource configuration" refers to customizing and fine-tuning various settings and parameters of a resource beyond the basic or default options, allowing for more specialized and optimized utilization in a particular context.
Click the ‘Bulk resource Tag / Untag’ button from the top right panel.
Two steps to be followed. Refer to the table below for reference.
Upload | Validation
Upon creating a ticket/change/problem/request, the default status is 'Open,' situated at the top of the status hierarchy. Additional statuses can be arranged below 'Open' through drag-and-drop functionality. The final status will typically be either 'Closed' or 'Resolved.'
Build Form | Configure Windows
Configure Windows has three sections: State, Actions, and If Conditions. To complete the workflow, these drag-and-drop HTML elements are placed in the 'Configure Windows' area.
State | Actions | If Conditions
The Business Unit Management module allows administrators to create and maintain Business Units that are used within the budget. A Business Unit represents an organizational entity that can later be referenced during budget planning, budget allocation, and reporting.
Administrators can create Business Units by providing the required organizational information. Once created, the Business Units become available for selection when creating Business Unit Budgets and in other budgeting workflows. The module also allows administrators to view, edit, and delete existing Business Units.
Administrators can view the list of Business Units created in the system.
The Cassandra page allows you to configure and initiate discovery for Cassandra database instances using the Application protocol. It enables Infraon to collect Cassandra database information and monitor inventory, availability, and performance based on the selected discovery option.
There are two sections on the Cassandra Discovery page: Discovery Details and Schedule.
The Discovery Details section provides the discovery profile, device information, credentials, agent details, and data collector details settings.
Discovery | Profile and Discovery Information
Run Immediately
Click to select Run Immediately.
Selecting this, Circuit Discovery will create it immediately.
Schedule Immediately
Click the schedule mode at once, every, daily, weekly, or monthly at a specific chosen time.
Selecting this Circuit Discovery will create it immediately, but the scan will happen at a scheduled time.
Creates a bulleted list for multiple contact numbers or instructions.
Numbered List
Creates a numbered sequence that is proper for step-by-step support procedures.
Insert Link
Converts text into a clickable hyperlink.
Insert Image
Allows adding images, such as a support team logo or working hours chart.
Embed Video
Insert an external video link so that the video plays directly within the information box.
Formula
Add mathematical or logical formulas directly into the information box for apparent reference.
Code Block
Insert a code block to neatly display code snippets or technical details.
Font Color
Changes text color for emphasis (e.g., red for urgent contact numbers).
Handles tickets, Manages payroll and taxation, For new hire onboarding, etc.
Specifies the IP address of the Call Manager environment to be discovered.
Device Credentials
Select device credentials
Selects the credentials required to connect to the Call Manager environment.
Select Device Credentials
Select credentials
Select the configured device credential profile to be used for discovery.
Data Collector Details*
Select details
Select the Data Collector to be used for the Call Manager discovery process. The Data Collector is installed within the customer's network and communicates with the target environment using the configured protocols and credentials. It collects the required inventory, availability, and performance information and sends the data to Infraon for monitoring.
Profile Name*
Enter a profile name
Specifies the name of the Docker discovery profile.
Provide Profile Details
Enter profile details
Provides the required details for the Docker discovery profile.
IP Address*
Enter an IP address
Specifies the IP address of the Docker environment to be discovered.
Device Credentials*
Select device credentials
Create an application credential before performing Docker Discovery. Select an Application credential configured with the required Docker connection and authentication details. The selected credential enables IMS to communicate with the Docker environment and collect container and host information.
Data Collector Details*
Select details
Select the Data Collector to be used for the Docker discovery process. The Data Collector is installed within the customer's network and communicates with the target environment using the configured protocols and credentials. It collects the required inventory, availability, and performance information and sends the data to Infraon for monitoring.
Profile Name*
Enter a profile name
Specifies the name of the Kafka discovery profile.
Provide Profile Details
Enter profile information
Provides additional information required for the Kafka discovery profile.
IP Address*
Enter an IP address
Specifies the IP address of the Kafka environment to be discovered.
Device Credentials
Select a credential profile
Create an application credential before performing Kafka Discovery. Select an Application credential configured with the required Kafka authentication and connection details. The selected credential enables IMS to establish connectivity with the Kafka environment and collect the required monitoring information.
Data Collector Details*
Select details
Select the Data Collector to be used for the Kafka discovery process. The Data Collector is installed within the customer's network and communicates with the target environment using the configured protocols and credentials. It collects the required inventory, availability, and performance information and sends the data to Infraon for monitoring.
Gateway Agent Port
Gateway Agent Details
Specifies the port number of the Gateway Agent, if configured.
Agent ID
Agent Identification
Stores the unique identifier assigned to the agent.
Displays the API, WSS, and Kafka endpoints retrieved by decrypting the Agent Token.
API
Endpoint Status
Displays the API endpoint address and its availability status.
WSS
Endpoint Status
Displays the WebSocket Secure endpoint address and its availability status.
Kafka
Endpoint Status
Displays the Kafka endpoint address and its availability status.
Application Environment Endpoint Status
View
Displays the endpoint details fetched from the application environment configuration. These details are used when generating or regenerating the Agent Token.
Refresh
Refresh Endpoint Status
Refreshes the availability status of the configured endpoints.
Reset Agent Token
Reset
Regenerates the Agent Token using the application environment configuration.
Label
Action
Description/Example
Organization Key
Agent Configuration
Identifies the organization to which the Data Collector belongs.
Proxy HTTP URL
Proxy Server
Specifies the HTTP proxy URL, if a proxy server is configured.
Proxy HTTPS URL
Proxy Server
Specifies the HTTPS proxy URL, if a proxy server is configured.
Gateway Agent IP
Gateway Agent Details
Label
Action
Description/Example
Data Collector Agent
Download
Displays the available Data Collector package for the selected operating system, such as Oracle Linux.
Download
Download
Downloads the selected Data Collector package.
Agent Token
Copy
Displays the generated Agent Token required for manual installation and configuration. Copies the generated Agent Token to the clipboard.
Decrypted Agent Token Endpoint Status

Specifies the IP address of the Gateway Agent, if configured.
View
Consumables like batteries, printer cartridges, stationeries, forms, etc.
Label
Service Catalogue
Business Catalogue
The audience
Meant for the IT or other respective teams to define categories, subcategories, and services to be listed in Business Catalogue.
Meant for end users. Lists out offered products and services as a catalogue, making it readily available for selection by users.
Service Perspectives
Contains infrastructure components used to fulfill all listed services like backup, storage, Assets, HR forms, maintenance tools, etc.
Contains user-facing services like Email fixes, IT servicing requests, services for provisioning, products like Mouse, Laptop, etc.
Information
Lists out Items and components in detail in addition to teams/individuals available to support these services.
Lists out products/services with descriptions, making it easy for users to select.
Value
Facilitates delivery of services in the business catalog in compliance with SLAs.
Facilitates timely access to services enabling user experience.
Data Collector Details*
Select details
Select the Data Collector to be used for the Apache Tomcat discovery process. The Data Collector is installed within the customer's network and communicates with the target environment using the configured protocols and credentials. It collects the required inventory, availability, and performance information and sends the data to Infraon for monitoring.
Profile Name*
Enter a profile name
Specifies the name of the Apache Tomcat discovery profile.
Discovery Options
Select a discovery option
Determines the type of information to be collected during Apache Tomcat discovery.
Discover only Inventory Information
Select the option
Discovers Apache Tomcat inventory information without enabling additional availability or performance monitoring.
Provide Profile Details
Enter profile information
Provides additional information required for the Apache Tomcat discovery profile.
IP Address*
Enter an IP address
Specifies the IP address of the Apache Tomcat environment to be discovered.
Device Credentials
Select a credential profile

Create an application credential before performing Apache Tomcat Discovery. Select an Application credential configured with the required Tomcat authentication and connection details. The selected credential enables IMS to connect to the Tomcat environment and collect application server information.
Data Collector Details*
Select details
Select the Data Collector to be used for the MSSQL discovery process. The Data Collector is installed within the customer's network and communicates with the target environment using the configured protocols and credentials. It collects the required inventory, availability, and performance information and sends the data to Infraon for monitoring.
Profile Name*
Enter a profile name
Specifies the name of the MSSQL discovery profile.
Discovery Options
Select a discovery option
Determines the level of information and monitoring to be enabled for the discovered MSSQL database.
Discover inventory with availability and performance monitoring
Select the option
Discovers MSSQL inventory information and enables both availability and performance monitoring.
Provide Profile Details
Enter profile information
Provides additional information required for the MSSQL discovery profile.
IP Address
Enter IP details
Enter an IP address, IP range, or subnet to be discovered.
Device Credentials
Select a credential profile

Create an application credential before performing MSSQL Discovery. Select an Application credential configured with the required MSSQL authentication and connection details. The selected credential enables IMS to connect to the database and collect the required monitoring information.
Click to view pending invitations.
Displays invitations that have been sent but not yet accepted.
Add User
Click Add User.
Creates a new user by entering user, work, and address details.
Add Customer User
Click Add Customer User.
Creates a user associated with a customer or sub-client organization.
Import User
Click Import User.
Creates multiple users by uploading user information through a CSV file.
Invite User(s)
Click Invite User(s).
Sends an email invitation to one or more users to register and access Infraon.
Update Users
Click Update Users
Updates multiple users in bulk by uploading a CSV file.
Enable or disable the user.
Indicates whether the user is active or inactive.
Last Login Time
View the last login time.
Displays the user's most recent login time.
Action
Edit or delete the user.
Provides options to edit or delete the user.
Customer Name
Select a customer from the dropdown list.
Select the applicable customer.
Role
Select a predefined role from the dropdown list.
Administrator
Password
Enter a password for the user.
Enter a valid password.
Timezone
Select the user's timezone.
Select the applicable timezone.
Phone Number
Enter the user's phone number.
+919988776655
Landline
Enter the user's landline number, if applicable.
Enter the landline number.
Gender
Select the user's gender.
Male / Female / Other
Enable Temporary User Account Access
Enable or disable the toggle.
Allows temporary access to the user account.
Email Two Factor Authentication (2FA)
Enable or disable the toggle.
Enables email-based two-factor authentication.
Configure Allowed Client IP Address
Enter the permitted IP addresses.
Restricts access to specified client IP addresses.
Is Active
Enable or disable the toggle.
Determines whether the user can log in to Infraon.
Disable Technician Access
Enable or disable the toggle.
Prevents the user from accessing technician-specific functionality.
Reporting Manager
Select the user's reporting manager.
Select a manager.
Employee ID
Enter the employee ID.
EMP001
Experience Years
Enter years of experience.
3
Experience Months
Enter additional months of experience.
6
Skills
Enter the user's skills.
Technical Writing, Documentation
User Tag
Select applicable tags.
Select tags.
Asset Tags
Select applicable asset tags.
Select tags.
Resource Tag
Select the applicable resource tag.
Select a tag.
Notify Email
Enter an email address for notifications.
Notify Phone No(s)
Enter phone number(s) for notifications.
+919988776655
Site Engineer Requester(s)
Select applicable site engineer requesters.
Select requester(s).
Device Group
Select a device group.
All
Business Entity
Select the applicable business entity.
Select an entity.
Business Segment
Select the applicable business segment.
Select a segment.
Partner Name
Select or enter the partner name.
Select a partner.
Subsidiary
Select the applicable subsidiary.
Select a subsidiary.
Click Next to proceed to validation.
Review the valid and invalid records displayed on the validation page.
Correct any invalid records and re-upload the file, if required.
Phone Number
Must include the country code and be enclosed in single quotes. Example: '919988776655'
Is Active
Must be set to true or false.
Gender
Must be Male, Female, or Other.
Notify Phone Nos
Multiple numbers must be separated using semicolons. Example: +919988776655;+917766554433
Device Group
Can be All or a specific device group.
Allowed Client IP Addresses
Multiple IP addresses must be separated using semicolons. Example: 10.0.4.1;10.0.4.2
Click Invite to send the invitations.
Click to send the invitations.
Sends an invitation email to the specified users.
After an invitation expires, a new invitation must be sent.
If multiple invitations with different roles are sent to the same user, the role associated with the invitation link used for registration first is assigned to the user.
Administrators and privileged users can view pending invitations and resend them using the Pending Invitations option/icon.
Drag and drop the file into the upload area or click Browse.
Click Next.
Review the validation results.
Select the CSV file from your computer.
Select the file to upload.
Next
Click to continue.
Opens the validation page.
Gender must be Male, Female, or Others.
Multiple Notify Phone Nos must be separated using semicolons.
Device Group can be All or a specific device group.
Multiple Allowed Client IP Addresses must be separated using semicolons.
Search
Enter a keyword in the search field.
Searches for users based on the entered information.
Filter
Select the required filter criteria.
Filters users based on available fields such as role, status, or other user details.
Export
Click Export.
Exports the user information for further analysis or record-keeping.
Username
View the username.
Displays the username of the user.
Phone
View the phone number.
Displays the user's phone number.
Role
View the assigned role.
Displays the role assigned to the user.
Full Name
Enter the user's full name.
John Doe
Username
Enter a unique username.
john.doe
Enter the user's email address.
Designation
Enter the user's designation.
Technical Writer
Organization Role
Enter or select the organizational role.
Team Member
Department
Select the user's department.
Base Location
Select the user's base location.
Select a location.
Work Location
Enter or select the user's work location.
Bengaluru
File Format
CSV
Maximum File Size
10 MB
Row Limit
100 rows
Mandatory Fields
Full Name, Username, Email, Password, Role
Role
Download sample CSV file here
Click to download.
Downloads the CSV template for importing users.
Upload
Upload the completed CSV file.
Supported format: CSV
Next
Click to continue.
Opens the validation page.
Enter Email address(es)*
Enter one or more email addresses.
john.doe@company.com; jane.doe@company.com
Select Role
Select a predefined role from the dropdown.
Select the appropriate role.
Add Invite
Click to add another invitation row.
Allows different users to be assigned different roles.
Role
Select a role.
Select the applicable role.
Download Sample
Click to download.
Downloads the sample CSV file.
Upload
Upload the updated CSV file.
Supported format: CSV


Pending Invitations
Is Active
IT
Must already exist in Roles & Privileges.
Invite
Browse
List/grid showing existing templates
Displays all feedback templates with their name, description, active services, etc.
Search
Enter text to search among templates.
Search by name, description, or service to locate a specific feedback template.
Filter
Apply filters based on field & condition.
Choose a field (e.g., “Services”, “Name”) + a condition (e.g., “contains”, “not contains”) to refine results.
Fields: Name, Description, Services, Link Expires In, and Template Type.
Add Template
Button to initiate creating a new template
Click ‘Add Feedback’ to open the new template creation form for Peer Review and Customer Feedback.
Available Templates
Release
Contract Management
Software License
Role Name
Select from the drop-down.
Specifies the roles for which this configuration will apply. Roles represent user groups such as IT Manager, Requester, NOC Operator, Admin, Technician, etc.
Status
Select from the drop-down.
Indicates the workflow stage(s) where the configuration will be enforced. Statuses vary depending on the module and workflow (e.g., New, In Progress, Pending for User Input, Approval, Resolved, Closed). Example: Setting the field as Mandatory in the Approval stage ensures the field must be filled before the record moves forward.
Notify To
Select from the drop-down.
Available only if Type = Notification Configuration. Defines who will receive notifications when the configured rule is triggered.Options include:
Group Email ID: Send notifications to a shared group mailbox.
Team Member: Notify a specific team member.
Team Level Members: Notify all members of the assigned team.
Requester: Notify the requester who raised the ticket or request.
Example: Notify the Requester when a Service Request moves to Resolved
Attendance records generated based on these settings are available in My Profile → Attendance, where users can view their check-in and check-out logs.
These records are also used in attendance reports and dashboard widgets for monitoring and analysis.
and more.
This page displays all configured custom fields across supported modules. You can create new fields, search existing fields, filter by module, and manage available fields from a single location.
Modules
Select a module from the left panel
Displays module-wise custom field count. Selecting a module filters the list to show only fields created for that module. Example: Contract, Purchase Order, Purchase Requisition, and Software License.
Search
Enter a keyword in the search box
Searches custom fields by label, property, field type, or module name.
Filter
Click the filter icon
Apply advanced filters to narrow the custom field list.
Custom fields can be added to selected sections of the form and configured with field-specific validations, default rules, contract conditions, and customer visibility settings.
To add a custom field:
Field Configuration | Add Custom Field
Module*
Select from the dropdown
Choose the module where the custom field will be created. Supported modules include Purchase Order, Purchase Requisition, and Contract.
Property*
Select from the dropdown
Select the section in which the field should appear. Example: Basic Details, Terms and Conditions, Line Items Fields.
Field Type*
Select from the dropdown
Choose the type of field to create. Options Include:
Text
Number
Phone Number
Validation Rules | Add Custom Field
Validation Rules
Review or modify values
Validation rules are applied automatically based on the selected field type. Users can update them as required.
Regex
Enter or modify expression
Used to validate the format of entered values. Example: Email format, numbers only, specific character patterns.
Error Text
Enter message
Message displayed when the entered value does not satisfy the validation rule. Example: Please enter a valid email.
Default Rules | Add Custom Field
Mandatory
Enable toggle
Makes the custom field compulsory while submitting the form.
Unique
Enable toggle
Prevents duplicate values for the field across records.
Disable
Enable toggle
Displays the field as disabled or read-only in the form.
Contract Rules | Add Custom Field
Use this section to set when the custom field appears in Contract Management, based on categories or specific conditions, ensuring relevant information is captured efficiently.
Contract Rules
Configure rules
Available for the Contract module to define field applicability based on selected conditions.
Add
Click to add a rule row
Adds additional rule conditions for contract field visibility or usage.
Category
Select from the dropdown
Select the contract category for which the field should apply.
Customer Access | Add Custom Field
Use this section to control customer access to the custom field and manage visibility in multi-customer environments.
Customer
Search and select customers
Select customers for whom the custom field will be available.
Search
Enter keyword
Search and locate customers quickly from the list.
Selected Count
View count
Displays the number of selected customers. Example: 0 Selected, 3 Selected.
Teams
View configured teams
Displays the list of available teams configured for shift management.
Team List
Select team
Allows users to select a team and view its configured shift schedules.
Shift Timeline
View shift schedule
Displays configured shift timings and schedule duration for the selected team.
Shift Details
View shift information
Displays configured shift name, assigned team, shift duration, and total team members.
Shift Duration
View shift timing
Displays the configured start and end timing of the shift. Example: 09:30 - 15:30
Team Count
View member count
The configured shifts are used for operational scheduling and automatic ticket assignment based on configured shift timings.
Add Shift | Field Descriptions
Select Team*
Select team
Specifies the team for which the shift should be configured. This field is mandatory.
Select Business hours*
Select business hour profile
Associates the shift with a configured business hour profile. This field is mandatory.
Shift Name*
Enter shift name
Specifies the name of the shift. This field is mandatory. Example: Morning Shift
Once the required details are configured, click on Submit to save the shift details and create the shift schedule.
Action
Description/ Example
Import Bulk Resource tag/ Untag list from a CSV
Drag and drop the file or browse it to upload the CSV file.
Ensure to add resource configuration details to the default file before uploading.
Click ‘Next’ to proceed with Validation.
Upload | Validation
The validation tab allows users to validate uploaded CSV files and summarizes valid and invalid records. Additionally, users can download a validation report for further analysis.
Click ‘Close’ after checking the validation.
Go to IT Operations -> Advanced Resource Configuration.
Click the ‘Add’ button at the top right of the page. For more information on adding the filter resource, refer to the table below.
Label
Description/ Example
Name
Add your filter name.
Category
Select the category from the drop-down.
Condition
As per the selected category select the condition from the drop-down.
Bulk Resource Tag/ Untag categories are mentioned below:
Label
Conditions
Value
Resource Name
Contains, Equal to. Mention the value in the given space.
Resource Description
Contains, Equal to. Mention the value in the given space.
Resource Alias
Contains, Equal to. Mention the value in the given space.
Resource Type
Click ‘Cancel’ to cancel the filter resource created. To save click ‘Save and Proceed’ button.
Go to Infraon Configuration -> IT Operations -> Advanced Resource Configuration.
Click the ‘Configure’ icon under the action tab.
Click the ‘Action’ button on the top right of the page and select the actions from the drop-down such as:
Tag: Select Tag from the drop-down and click the ‘Submit’ button.
Enable Polling: Click ‘Enable polling’ when the pop-up appears.
Disable polling: Click ‘Disable polling’ when the pop-up appears.
Change poll period: Mention the poll period in the given space and click the ‘submit’ button.
Label
In Progress
Drag the in-progress button below the open state.
showsThe In-progress state is added to show that the workflow is in a progressive state. You may add the In-Progress button and define the state and status.
Approval
Drag the Approval button below the 'in-progress' state, 'on-hold' or 'open' state.
Approval shows that the workflow status is in an approval state for acceptance or rejection by the approval team. You may configure the Approval button and define the state and status.
On Hold
Drag the on-hold button below the open or the In-progress state.
On Hold shows that workflow is on hold due to some conditions. You may configure the On Hold button and define the state and status.
Resolved
Drag the resolved button directly after the 'open' or below the 'in-progress' or 'on-hold' state.
Resolved shows that workflow status is being resolved. You may configure the Resolved button and define the state and status.
Close
Drag the Close button after the Resolved state.
Close shows that the workflow status is being closed. You may configure the Close button and define the state and status.
State | Actions | If Conditions
Actions are performed after the state is defined.
Label
Action
Description
Transfer State
Drag Transfer state if you want to change a specific state and status.
It generally comes after the 'If Conditions' button is applied to change or set the original state.
Set Value
Drag the Set value button under any state to set the predefined value.
Set Value has five operands: Priority, Status, Impact, Urgency, and Severity. And, It has three values: High, Medium, and Low. Set any operand to the desired value.
Send Email
Drag Send Email button under any state.
To, Subject, and Description boxes must be added to proceed further. Select one value from the dropdown menu to add the 'To' box, and write on the subject and description box. Click 'Save' to save it.
Send SMS
Drag Send SMS under any state.
Enhanced change management by introducing the "Ask for Change" functionality. This replaces the rejection option and allows changes to be requested during the review process. The transition state is activated upon request for changes, facilitating a seamless transition to the open state for effective change management.
State | Actions | If Conditions
Label
Action
Description
If Conditions
Drag the 'If Conditions' button under any state to implement conditions.
You can later configure conditions by putting correct values. 'If Conditions' has four sections: Operand, Operator, value, and Relation. Based on Operand and Operator selection, Value selection shows varying options. You can add more 'Relation' 'ADD' or 'OR' from the dropdown menu.
Enhanced approval functionality in workflows, such as the ticket workflow. Easily add an approval state with options for approval and rejection. Configure email settings when the approval is accepted, triggering automatic email notifications. This functionality applies to all workflows, ensuring efficient communication and streamlined approval processes.
Label
Action
Description
Open
By default, the state is open and new.
This is the initiation of workflow.
Business Unit Name
View
Identifies each Business Unit.
Example: IT Operations.
Description
View
Displays the description provided for the Business Unit.
Business Unit Head
View
Displays the user assigned as the Business Unit Head.
Action
Select edit or delete
Allows users to delete or edit the Business Unit available.
When creating a Business Unit, the administrator provides the following information:
Business Unit Name
Enter a name
Mandatory field used to identify the Business Unit.
Example: IT Operations.
Description
Enter a description
Optional field used to provide additional information about the Business Unit. Maximum 500 characters.
Example: Handles infrastructure and IT operations.
Business Unit Head
Select a user
Selects the Business Unit Head from the list of existing users.
Example: John Smith.
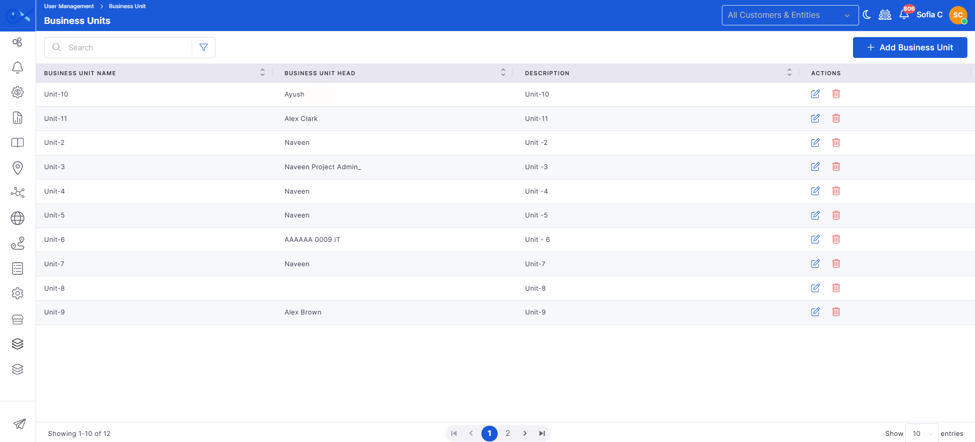
Profile Name*
Enter a profile name
Specifies the name of the Cassandra discovery profile.
Discovery Options
Select a discovery option
Determines the level of information and monitoring to be enabled for the discovered Cassandra database.
Discover inventory with availability and performance monitoring
Select the option
Discovers Cassandra inventory information and enables both availability and performance monitoring.
Provide Profile Details
Enter profile information
Provides additional information required for the Cassandra discovery profile.
IP Address
Enter IP details
Enter an IP address, IP range, or subnet to be discovered.
Device Credentials
Select device credentials
Click Next to proceed to the Schedule section.
The Schedule section determines when the Cassandra Discovery should be initiated. You can start the discovery immediately using Discover Now or configure a Discovery Schedule to run it at a specified date and time. To learn more, click here.
The Network Discovery page allows you to configure and initiate discovery for supported network devices such as routers, switches, hubs, modems, printers, bridges, and access points. The discovery process uses supported network protocols, including SNMP, to identify devices and collect inventory, availability, performance, and monitoring information.
The Network Discovery page has three tabs.
Discovery Details | Filters | Schedule
The Discovery Details section provides the discovery profile, device information, credentials, agent details, and data collector details settings.
Discovery Details | Profile and Discovery Information
Label
Action
Description / Example
Click Next to configure Filters.
The Filters section allows you to control which devices are included or excluded from discovery and which network components are monitored.
The Filters section contains four areas:
Default Filters
Device Filters
Network Component Filters
Port Monitoring
The Filters section is optional. You can click Next without configuring any filters.
Filters | Default Filters
Filters | Device Filters
The filter condition follows:
Include Devices / Exclude Devices → IP Address / Device Type / Device Name → Equals / Contains → Number or Device Name
You can click the + icon to add additional filter conditions.
Network Component Filters
The Network Component Filters section allows you to select the network components and technologies that should be monitored for the discovered devices.
Filters | Network Component Filters
Filters | Port Monitoring
The Schedule section determines when the Network Discovery should be initiated. You can start the discovery immediately using Discover Now or configure a Discovery Schedule to run it at a specified date and time. To learn more, .
This is where you can record your organization's branch offices and vendors' location information.
The default or Head Office address is added based on the address given at the time of registration. Additionally, multiple branch offices can be added. Location information is used to align users, assets, and services.
Go to Infraon Configuration -> Organization-> Address Book
Click on the 'New Address' and select if you are adding a branch office address or a vendor's address
Once all the parameters are added, click 'Submit' to save the location. The respective icons allow you to edit or delete location details.
Go to Infraon Configuration -> Organization -> Address Book and click on Bulk Edit.
Download the CSV file and enter the details required.
Upload the same CSV file and click Next.
Confirm that the selected column matches and click Import.
Go to Infraon Configuration -> Organization -> Address Book and click on Export.
Enter the details in the CSV file.
Navigate to New Address -> Import from CSV.
Upload the same CSV file and click Next.
Once you have added an ARC tag, to integrate AIOps, follow the steps below:
Go to Infraon Configuration -> IT Operations -> Advanced Resource Configuration.
Click the ‘Configure’ icon under the action tab.
Click the ‘Action’ button on the top right of the page and select AIOps from the drop-down.
Users must enter the following parameters in the pop-up window to complete the resource configuration.
AIOps Configuration | Basic Details
1. Download Infraon Agent & copy it in the Network Path as highlighted below.
2. Download the ORCA database table editor and install it on the same server where Infraon Agent is copied. Use the network path used to pass the parameter for the MSI agent.
3. Navigate to the 'Download Inventory Agent' page of Infraon and copy the 'Agent Token' given here. This unique key, also called an Org Key or Organization Key, is generated specifically for your organization.
Now, you are all set to deploy the Infraon agent.
Follow the below steps to enter the ORG_KEY in the MSI agent.
Step 1: Right-click on the Agent. Select Edit with Orca and click Yes to run the ORCA application.
Step 2: Open Orca. From the menu, select Transform -> New Transform.
Step 3: Find the keyword "ORG_KEY" using Ctrl+F.
Step 4: Paste the Organization Key in the target space provided. (Refer to the pre-requisite section for details).
Step 5: Select Transform -> Generate Transform from the menu and save the file in the same network path where Infraon Agent is copied. This time, use a different name.
Step 6: Connect to your AD Server. Open Server Manager -> Tools -> Active Directory Users and Computers
Step 7: Before deploying the agent, it is important to determine whether you are installing it at the computer or user configuration levels within the Group Policy Management editor. This can be determined based on your requirements.
For example, we have taken 'infinity' as an OU (Operation Unit). Under this OU, we have added two users to the Software-Deployment Group, which is bound by the GPO.
Step 8: Navigate to Group Policy Management. Right-click on the selected OU and select 'Create a New GPO in this domain, and Link it here...', add a name for the GPO, and click OK. In this case, we have named it 'Software Deployment'.
Step 9: Go to the "Delegation Tab" in the Group Policy Management window and verify whether the users or computers selected in the previous step have been added.
Step 10: Right-click on the New GPO and click Edit. The new GPO property window will open as shown below:
Step 11: Right-click on the New GPO. Select -> Properties -> Browse and select the Infraon Agent Network Path,". Ensure that "Advanced" is selected for 'New Packages' & "Basic" is selected for the 'Installation user interface option.' Click 'Ok'.
Step 12: Right-click on the new GPO link. Select New -> Package... and map the Infraon Agent in the Network Path.
Step 13: A new Properties window will appear once the file is updated.
a) Navigate to the "Deployment" tab, and select the highlighted options.
b) Next, navigate to the "Modification Tab and click Add.
c) Add the .mst file saved in the network path as shown below, and click OK.
With this, the installation of the Infraon agent in the server is complete.
Step 14: The IT administrators must instruct the users to run the Group Policy Update command & restart the device.
Open command prompt
Type 'gpupdate /force' and enter
Once the process is complete, restart the device.
Step 15: Log in to the device. Open Programs and Features, and verify if "Infraon Agent" is installed.
You have successfully installed the Infraon agent on your device.
The MongoDB page allows you to configure and initiate discovery for MongoDB database instances using the Application protocol. It enables Infraon to discover standalone MongoDB servers and monitor MongoDB replica set environments.
These sections guide you through configuring the MongoDB discovery profile, selecting the devices and credentials, enabling optional replica set monitoring, and choosing when the discovery should run.
There are three tabs on the MongoDB Discovery page: Discovery Details, Filters, and Schedule.
The Discovery Details section provides the discovery profile, device information, credentials, agent details, and data collector details settings.
Discovery | Profile and Discovery Information
Click Next to configure Filters.
The Filters section allows you to configure MongoDB-specific monitoring options.
The Filters section contains:
Monitor Replica Set
Filters | Monitor Replica Set
When enabled, Infraon discovers and monitors all members of the MongoDB replica set, including primary and secondary nodes.
Click Next to configure the Schedule.
The Schedule section determines when the MongoDB Discovery should be initiated. You can start the discovery immediately using Discover Now or configure a Discovery Schedule to run it at a specified date and time. To learn more, .
The Linux Server Discovery feature allows you to discover Linux servers and add them to the Infraon inventory for monitoring. It supports discovery using SSH credentials and allows you to choose whether to collect only inventory information, inventory with availability monitoring, or inventory with both availability and performance monitoring.
The selected Data Collector performs discovery by connecting to the target Linux server using the configured SSH device credentials. After establishing a successful connection, the Data Collector retrieves the required server information and sends it to Infraon. Based on the selected discovery option, the server is added to the inventory with availability and/or performance monitoring enabled.
There are three tabs on the 'Linux Servers' page.
Discovery Details | Filters | Schedule
The Discovery Details section provides the discovery profile, device information, credentials, agent details, and data collector details settings.
Discovery Details | Profile and Discovery Information
Used to identify, analyze, and troubleshoot problems or issues in various systems, devices, or networks.
A method of determining latency or the amount of time it takes for data to travel between two devices or across a network.
Infraon uses the Ping option, a diagnostic tool that checks if your device is reachable. Infraon sends a data packet to the device and, in return, receives a data packet if the connection is complete.
Click ‘Ping’ and enter the following details:
The Checklist module in Infraon Automation ensures that tasks, items, or steps are completed in an organized and thorough manner. It helps assigned technicians remember the mandatory actions required before progressing through workflow stages.
Ensure consistency in task execution across ITSM modules.
Provide a quick reminder of the necessary steps for the technician.
Reduce errors by validating that essential actions are completed before status changes.
Checklists can be configured for the following modules:
SD-WAN allows you to discover and monitor SD-WAN devices using the SD-WAN API. It provides a structured way to configure SD-WAN discovery, collect device information, and enable inventory, availability, and performance monitoring based on the selected discovery options.
There are three tabs on the SD-WAN page: Discovery Details, Filters, and Schedule.
The Discovery Details section provides the discovery profile, device information, credentials, agent details, and data collector details settings.
Discovery | Profile and Discovery Information
Integrate your external emails with Infraon to track and manage your correspondence with Infraon customers. This is achieved by setting up email forwarding from your current email client (or server).
To begin with, we have added instructions for the most popular email clients:
Google Mail
G Suite
Microsoft Outlook
Contact our support team if your email service provider is not listed above. We will help you set it up
Google Mail forwarding can be used in the below scenarios:
The Oracle page allows you to configure and initiate discovery for Oracle databases using the Application protocol. It enables Infraon to discover Oracle database information and configure monitoring based on the selected discovery and query filter options.
There are three tabs on the Oracle page: Discovery Details, Filters, and Schedule.
The Discovery Details section provides the discovery profile, device information, credentials, agent details, and data collector details settings.
Discovery | Profile and Discovery Information
The Redis page allows you to configure and initiate discovery for Redis databases using the Application protocol. It enables Infraon to collect Redis database information and monitor the selected logical databases.
There are three sections on the Redis Discovery page: Discovery Details, Filters, and Schedule.
The Discovery Details section provides the discovery profile, device information, credentials, agent details, and data collector details settings.
Discovery | Profile and Discovery Information
Contains, Equal to, and IN. Mention the value in the given space.
If ‘IN’ is selected, chose the value from the drop-down such as device, disk, Ethernet, Gigabit Ethernet, Hypervisor Host Machine, Hypervisor Snapshot, Hypervisor staorage, Hypervisor virtual machine, Hypervisor virtual machine disk, INode, Interface, Link aggregate, LogicalDisk, Loop back, Memory, Networkinterface, PPP, Processor, Prop Virtaul, system, tunnel and others.
Device IP Address
Contains, Equal to. Mention the value in the given space.
Device Hostname
Contains, Equal to. Mention the value in the given space.
Polling Status
IN. Mention the value in the given space.
Choose the value from the drop-down either active or Inactive.
Resource tag
IN. Mention the value in the given space.
Choose the value from the drop-down such as Device, Node, NOC
Poll profile
Contains, Equal to, and IN. Mention the value in the given space.
If ‘IN’ is selected, choose one or more values from the drop-down such as CiscoDevice.cfg, device.cfg, esxihost.cfg, esxihoststorage.cfg, esxisnapshot.cfg, esxivmdisk.cfg, esxivmstat.cfg, ifmib.cfg, juniperexdevice.cfg, mib2if.cfg, ssgDevice.cfg, ssgDisk.cfg, sshlnode.cfg, sshInterface.cfg, sshMemory.cfg, StatusIf.cfg, wmi_PerfFormattedData_PerFOS_Memory.cfg, wmi_PerFormattedData_PerFOS_Processor.cfg, wmi_PerfFormattedData_PerfOS_system.cfg, wmi_PerfRawData_PerfDisk_LogicalDisk.cfg, wmi_PerfRawData_Tcpip_NetworkInterface.cfg
Asset Tags
IN. Mention the value in the given space.
If ‘IN’ is selected, choose one or more values from the drop-down such as IT- Asset, IT-asset, Samsung, TAG1, Windows, Core, noc, and more.
Add 'To' and Description boxes to proceed further. Select one value from the dropdown menu to add the 'To' box, and write on the description box. Click 'Save' to save it.
Validate the CSV file and click Proceed with valid records.
Validate the CSV file and click Proceed with valid records.
Label
Action
Description/Example
Location Name
Give a name to the branch office or support hub location.
Mumbai Office, Bangalore Branch Support 1, NY Support Hub, etc.
Country
Add the country
India, USA, etc.
State
Add the state
KA, MH, CA, etc.
City
Add the city
Bangalore, Los Angeles, etc.
Pin Code
Add the zip code or pin code of the address.
560078, 90001, etc.,
Landmark
Add a landmark for the address.
Near Laundromat, behind the Hyper-mart, etc.
Flat, House No. Building, Company
Add a detailed address line that includes the flat/house number, building name, or company name, as applicable,
4243 Hill Haven Drive, No.8, Garden Road, etc.
Area, Colony, Street, Sector, Village
Add an address line that includes the area, colony, street, sector, or village as applicable
Bellflower, Westminister Abbey, JP Nagar, etc.
Additional Information
Add any additional information for the address, if available.
First floor, third house on the left, etc.
Submit
Click Submit
Click the Submit button to save the Business Unit.
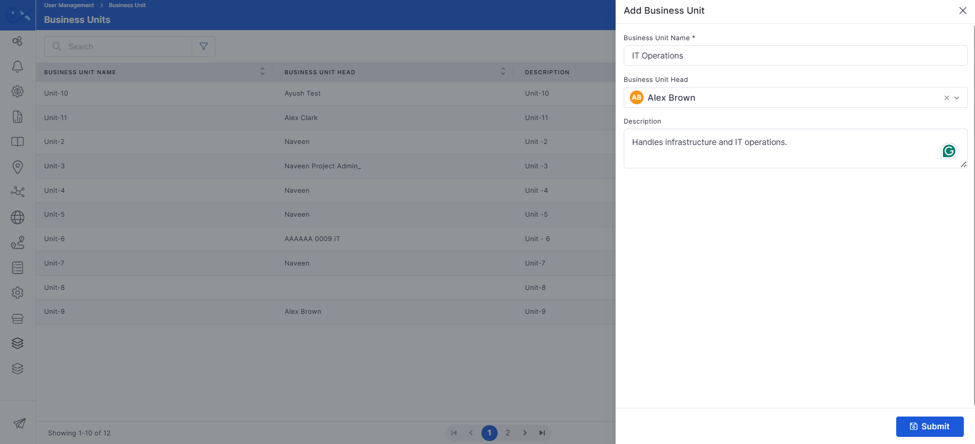
Create an application credential before performing Cassandra Discovery. Select an Application credential configured with the required Cassandra authentication and connection details. The selected credential enables IMS to establish connectivity and collect the required database information.
Data Collector Details*
Select details
Select the Data Collector to be used for the Cassandra discovery process. The Data Collector is installed within the customer's network and communicates with the target environment using the configured protocols and credentials. It collects the required inventory, availability, and performance information and sends the data to Infraon for monitoring.

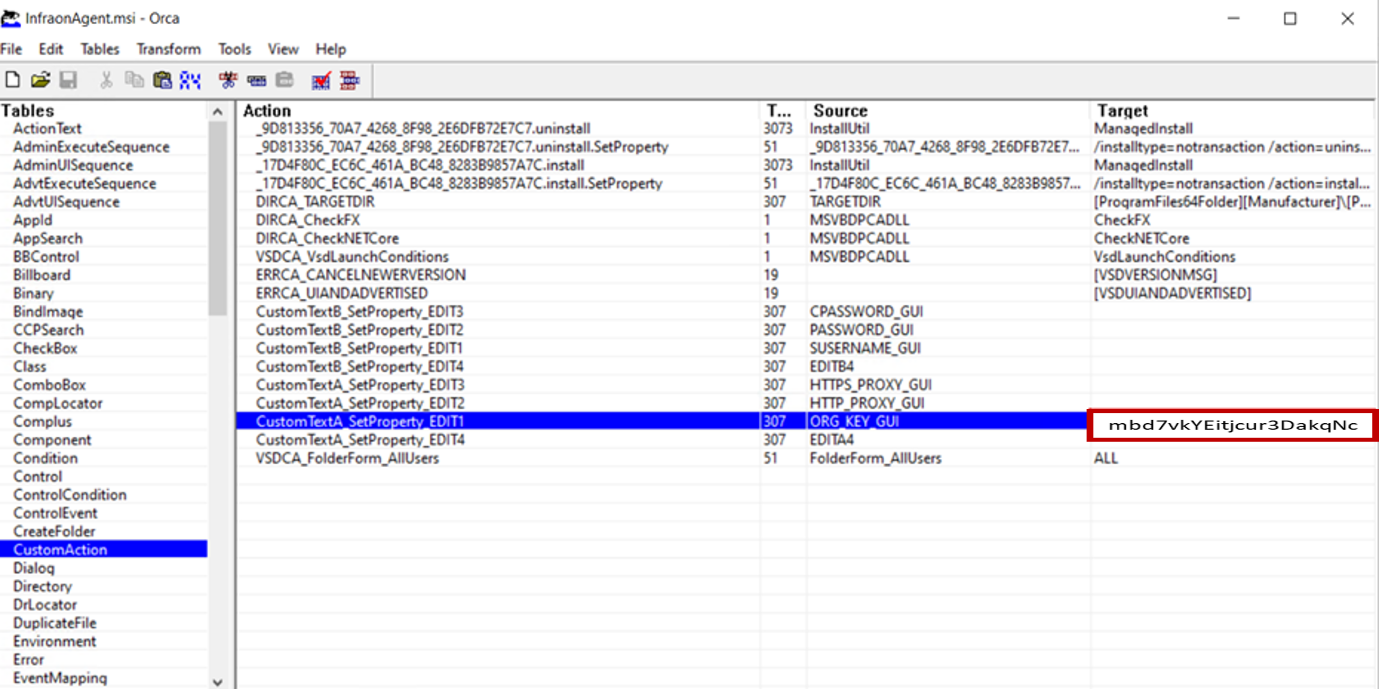
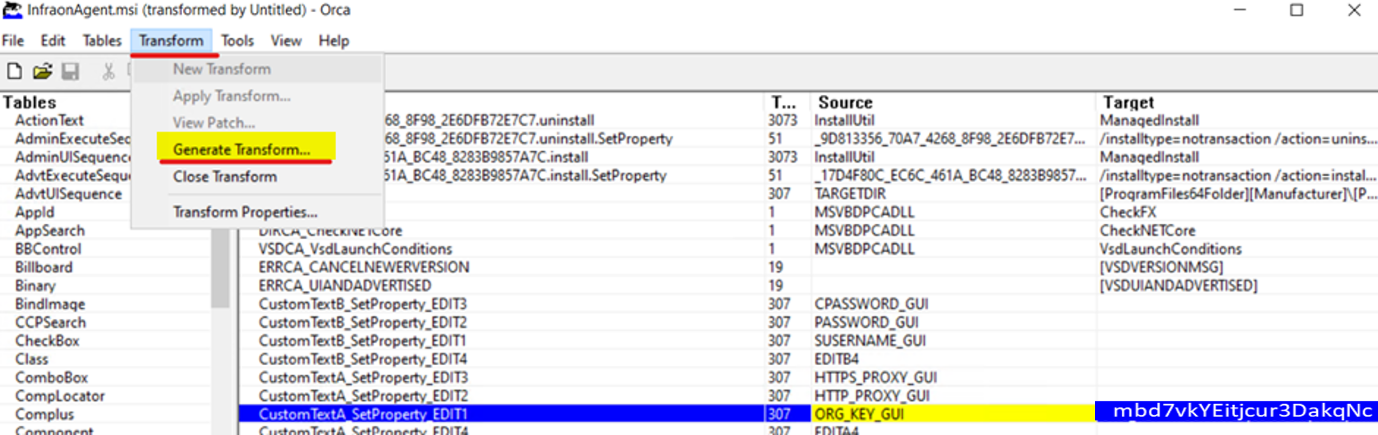
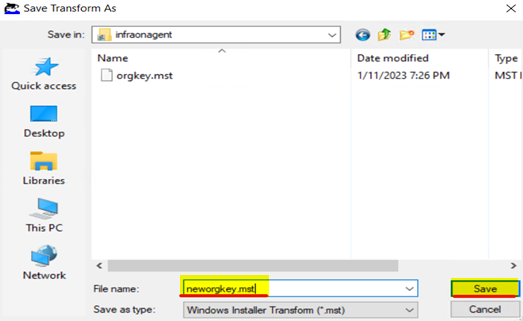
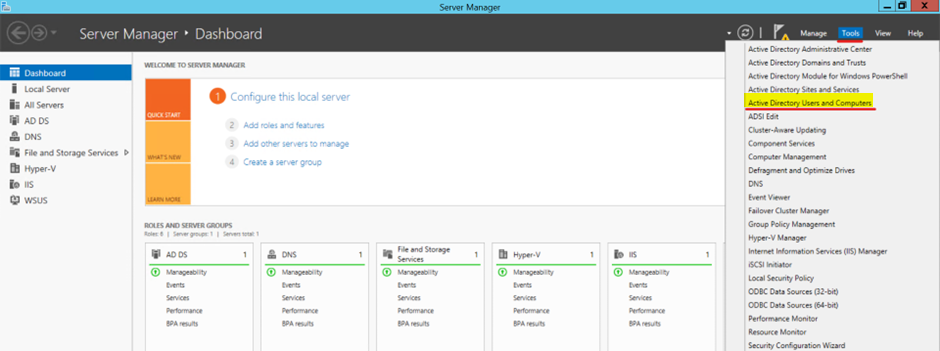
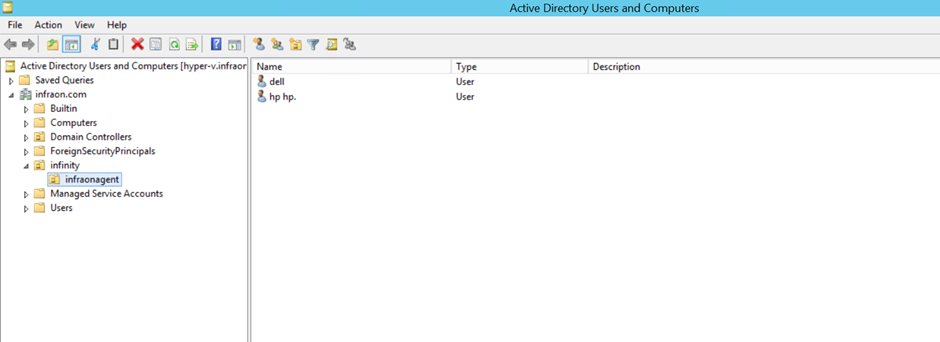
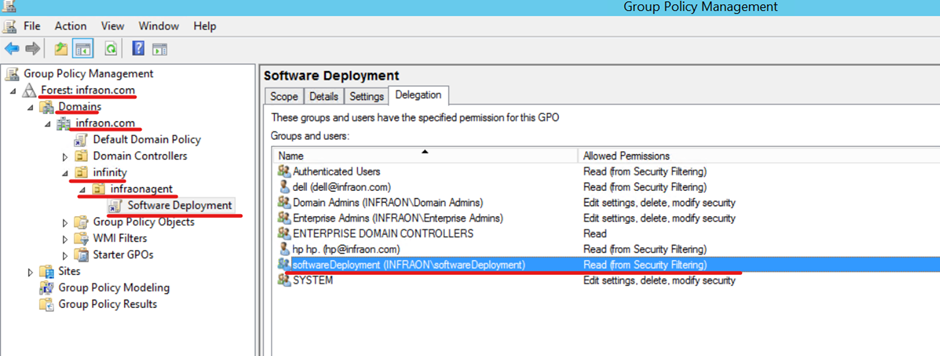
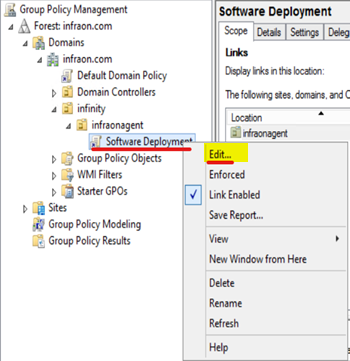
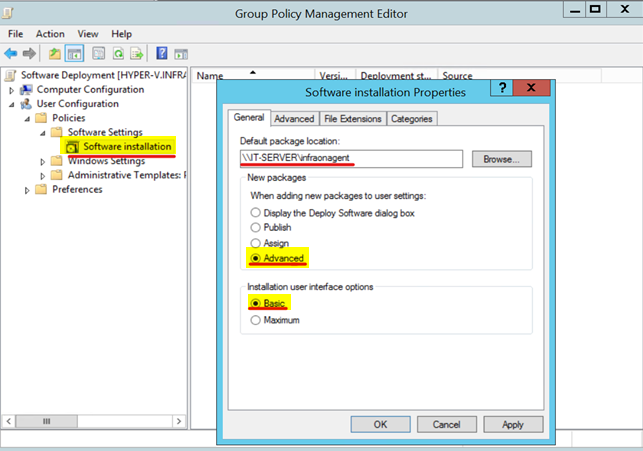
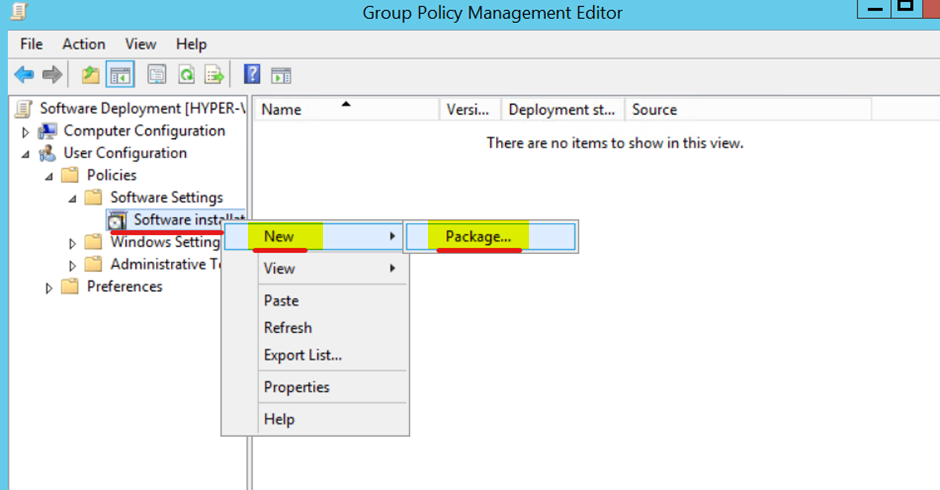
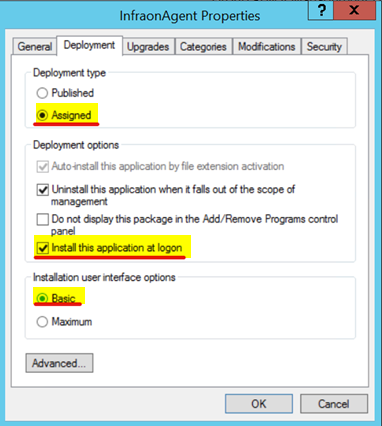
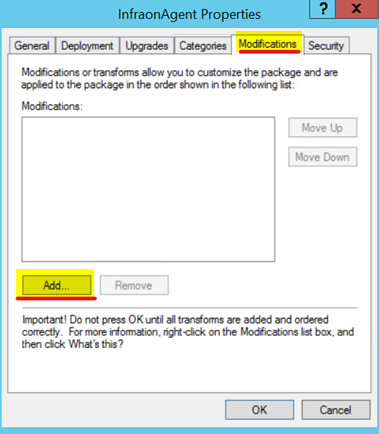
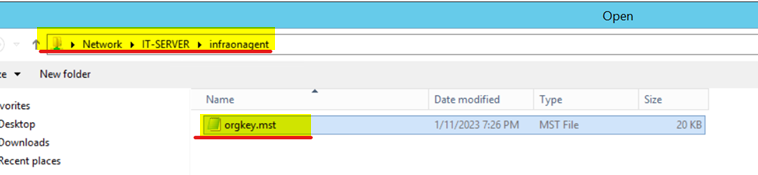
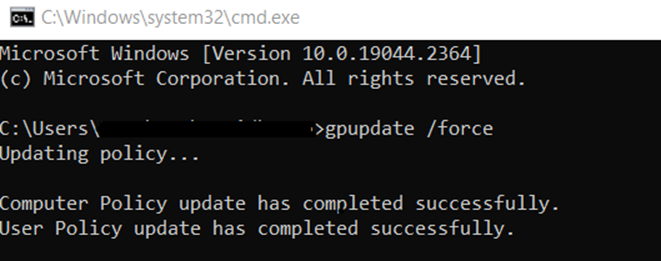
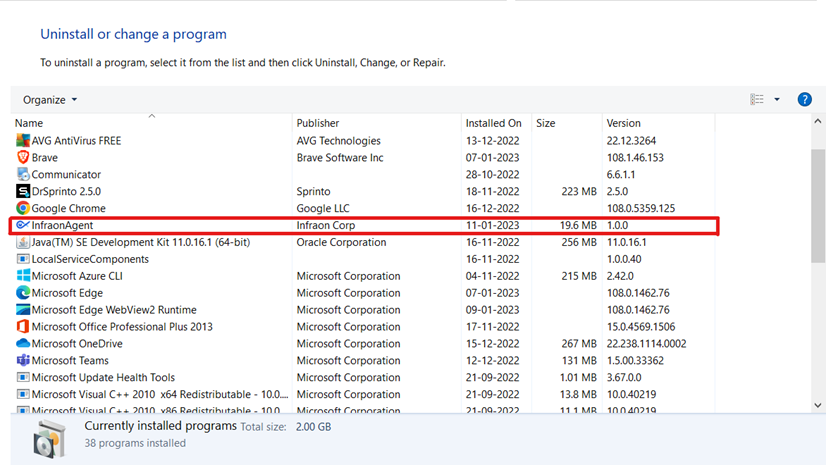
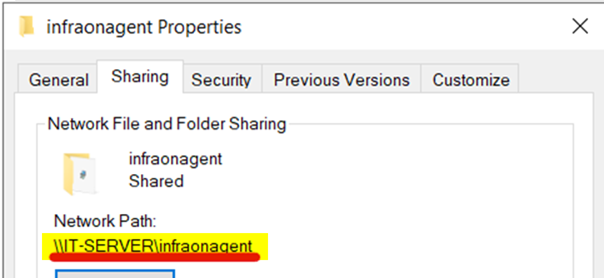
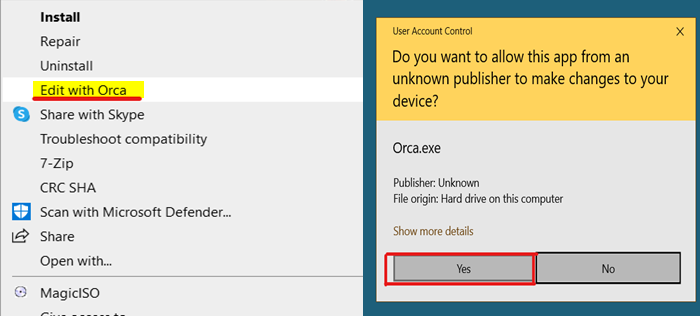
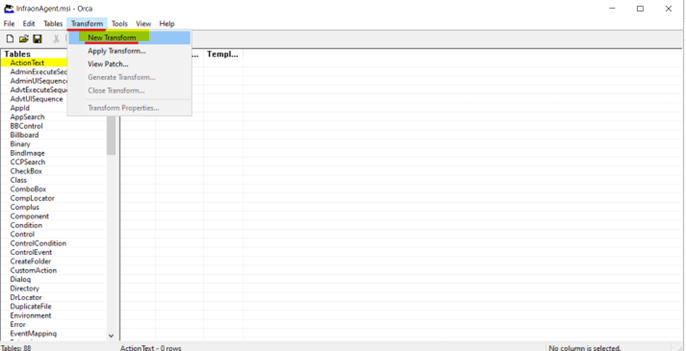
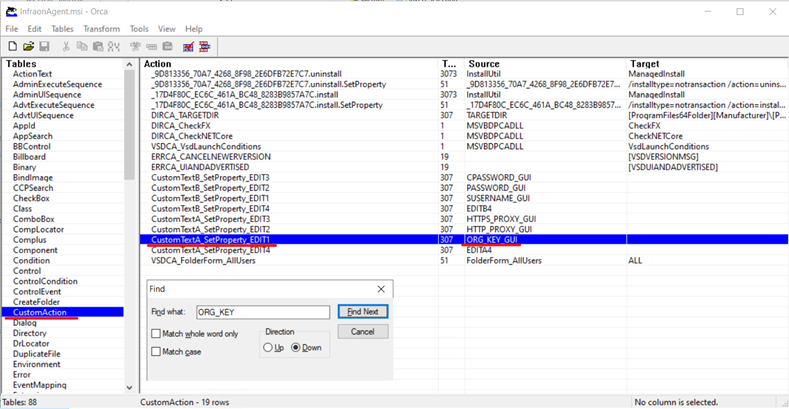
Weekly Seasonality
Click the toggle to enable it.
Considers weekly usage variations (e.g., weekend dips in activity). Helps model longer periodic usage patterns.
Seasonal Event Suppression
Click to enable the toggle button
Enables automatic suppression of recurring events based on past patterns. Events occurring in 80% or more of the same time slots over 90 days are flagged as seasonal and suppressed.
Operational 24x7
Click to enable the toggle button.
When enabled, the resource is treated as continuously operational. No suppression will apply, even during off-hours. When disabled, suppression rules follow the business hour profile.
Event Association Mining
Click to enable the toggle button.
Enables Infraon to analyze historical event patterns and automatically discover relationships between recurring events, helping identify probable root causes across systems.
Confidence (%)
Enter a numeric value
Defines the certainty level of the event relationship. A higher value indicates more confidence that one event is related to another. Example: 80, 90, 100, etc.
Support Value
Enter a numeric value
Specifies the minimum number of times an event pattern must occur to be considered significant. Helps eliminate noise and focus on high-impact correlations. Example: 5, etc.
Statistics
Select the appropriate. Resource from the drop-down.
Choose the specific metric (e.g., CPU Utilization, Memory Usage) to be used for model generation. The selected statistic will be applied on the associated resource for Prediction, Forecast, Event Suppression, or Association.
Label
Action
Description / Example
Prediction
Click the toggle to enable it.
Enables short-term insight (typically 15 days) for anomaly detection. Helps detect unusual patterns like traffic spikes during off-hours. Depends on time-sensitive performance metrics.
Forecast
Click the toggle to enable it.
Enables long-term capacity planning (up to 180 days). Useful for planning infrastructure upgrades or downgrades. Common in telecom, banking, and data center environments.
Change Point Scale
Enter a numeric value (e.g., 0.1)
Adjusts the sensitivity of detecting significant shifts in data trends. Lower values detect minor changes, while higher values catch major trend shifts.
Business Hour Profile
Select from the drop-down menu.
Allows selection of defined business hours. Improves forecast accuracy by aligning model behavior with active operational periods and excluding off-hours or holidays.
Daily Seasonality
Click the toggle to enable it.
Models recurring daily trends (e.g., office hours traffic). Enhances accuracy of anomaly detection by learning from daily behavior cycles.
Forward all mails
Forward specific emails from your inbox
Forwarding emails from the "spam" folder
Open Gmail and click the gear icon in your inbox. Choose "See all settings."
Navigate to the "Forwarding and POP/IMAP" tab.
Click "Add a forwarding address."
Enter your Infraon address (found in Infraon Settings-> Inboxes), click "Next," and "Proceed."
Check Infraon for the verification message. (Use the 'Click here to refresh' option from the 'Setup your Helpdesk Email (Step 2 of Getting Started module) page to get your verification code).
Add the verification code and click "Verify."
Select "Forward a copy of incoming mail to Org@infraon.com."
You can select the action for forwarded messages—keep them in your Gmail Inbox, mark them as "read," archive them, or delete them, depending on your requirements.
Click 'Save Changes.'
Visit https://support.google.com/mail/answer/10957?hl=en for more details.
You can choose to forward selective messages using the filter option. You can filter emails from a specific person, a keyword from the subject line, and so on.
To add a filter:
Open Gmail and click the gear icon in your inbox. Choose "See all settings."
Navigate to the "Filters and Blocked Addresses" tab. Google suggests some filters based on your usage.
Click "Create a new filter."
Choose from the available options to create a filter. There are eight main criteria to select from:
From-select the sender(s)
To select the recipient(s)
Subject-Add a keyword to look for in the subject line.
Has the words-Add keyword to look for in the mail content.
Doesn't have-Add a keyword to look for the absence of the word in the mail content.
Size-select from greater than or less than and add a specific size.
Has attachment-check to select emails with an attachment.
Don't include chats-check to ignore the chat history emails.
Add filters to suit your requirements and click on "Create filter." Alternatively, you can select to import filters.
Google prompts you to select the action for the selected filter.
Select "Forward it" and click 'Add a forwarding address.' Add your Infraon email address.
Click 'Proceed' to confirm. A confirmation pop-up appears.
All your emails meeting the selected filter criteria will be auto-forwarded to Infraon.
Gmail may sort your customer's email as "spam." To avoid missing out on emails, you can configure it to forward them to Infraon.
Before proceeding, disable other filters if applied.
Open Gmail and click the gear icon in your inbox. Choose "See all settings."
Navigate to the "Filters and Blocked Addresses" tab. Google suggests some filters based on your usage.
Click "Create a new filter."
In the 'Has the words' section, add ' delivered to your email address.'
Add filters to suit your requirements and click on "Create filter."
Google prompts you to select the action for the selected filter.
Select "Forward it" and click 'Add a forwarding address. Add your Infraon email address.
Click 'Proceed' to confirm. A confirmation pop-up appears.
Mails from the spam folder meeting the selected filter criteria will be auto-forwarded to Infraon.
If you use Groups in G Suite, include the Infraon forwarding address as an email address in your group.
Follow the below steps to forward emails from Google Groups.
If you use Groups in G Suite, include the Infraon forwarding address as one of the email addresses in your group.
Open the G Suite administrator console. Choose Groups.
All your Google Groups will be visible. Choose the group you wish to add your Infraon address to.
Navigate to the "members" section. Click on the 'Add Members' button.
Add your Infraon email address and select 'Add to Group'.
The Infraon email address has now been added to the group.
Follow the below steps to create a new group:
Go to the Google Groups list and click "Create group."
Fill in group details like name and group email. Choose a group owner.
It is important to enable External "Publish posts" to receive emails from outside your organization. Click on "Create Group."
Click "Done.
Follow the steps from the previous section to add the Infraon email address to this newly created group.
Includes sub-interfaces in monitoring to track their individual status and network activity.
Sub Interface Monitoring
Select an option
Select the required sub-interface monitoring option to specify which sub-interface details should be collected.
STP
Enable or disable
Monitors Spanning Tree Protocol (STP) information, helping track spanning tree status and topology changes in the network.
BGP
Enable or disable
Monitors Border Gateway Protocol (BGP) information, including peer status and routing details exchanged between network devices.
OSPF
Enable or disable
Monitors Open Shortest Path First (OSPF) information, including neighbor status and routing information.
EIGRP
Enable or disable
Monitors Enhanced Interior Gateway Routing Protocol (EIGRP) information, including neighbor relationships and routing details.
QoS
Enable or disable
Monitors Quality of Service (QoS) information to provide visibility into traffic prioritization and network service performance.
Jitter
Enable or disable
Tracks variations in packet delivery time, helping identify network instability that can affect real-time applications.
VRF
Enable or disable
Monitors Virtual Routing and Forwarding (VRF) instances to provide visibility into separate routing tables and their associated network details.
VLAN
Enable or disable
Monitors Virtual Local Area Networks (VLANs), including their configuration and operational details.
IPSec
Enable or disable
Monitors IPSec information, including tunnel status and related details, to help track secure network connections.
Wireless Controller
Enable or disable
Monitors wireless controller information, providing visibility into controller status and associated wireless network components.
VPC & VDC
Enable or disable
Monitors Virtual Private Cloud (VPC) and Virtual Data Center (VDC) information to provide visibility into their associated network resources.
Host
Enable or disable
Monitors host-related information, including host status and associated resource details.
Profile Name*
Enter a name
Enter a name for the Discovery Profile. The profile name helps identify and track the discovery configuration.
Data Collector Details
Configure details
Select the Data Collector to be used for the Network discovery process.
The Data Collector is installed within the customer's network and communicates with the target environment using the configured protocols and credentials.
It collects the required inventory, availability, and performance information and sends the data to Infraon for monitoring.
Discovery Options
Select an option
Discover inventory with availability and performance monitoring.
Discover only Inventory Information.
Discover inventory with availability and performance monitoring.
Discover only Inventory Information
Select an option
Discovers and collects basic inventory information about the selected devices or resources, such as device details, configuration, and hardware/software information. Availability and performance monitoring are not enabled.
Discover inventory with availability monitoring
Select an option
Discovers inventory information and enables availability monitoring to check whether the device or resource is reachable and operational.
Discover inventory with availability and performance monitoring
Select an option
Discovers inventory information and enables both availability and performance monitoring.
IMS checks device availability and collects performance metrics for ongoing monitoring.
Provide Profile Details
Enter details
Add a brief description of the discovery profile.
Example: For network devices, Routers & Switches only.
IP Address*
Enter IP details
Enter an IP address, IP range, or subnet to be discovered.
Import from CSV
Import a file
Import a device list from a CSV file instead of manually entering the IP address, IP range, or subnet. This option is optional.
Device Credentials
Select a credential
Create device credentials before performing Network Discovery.
The credential contains the authentication and connection details IMS needs to communicate with network devices during discovery.
Select a credential that matches the protocol supported by the target device.
For Network Discovery, the supported protocols are SNMP, SSH, and TELNET. The selected credential establishes connectivity and enables IMS to discover and collect information from network devices.
Label
Action
Description / Example
Default Filters
View selected filters
Displays the default filters selected for the discovery process.
Example: 2 filters selected.
Filter By Ping
Enable or disable
Filters devices based on their response to a ping check.
Ping Monitor
Enable or disable
Uses ping monitoring to check whether a device is reachable.
Label
Action
Description / Example
Device Filters
Select a condition
Configure conditions to include or exclude devices from discovery.
Include Devices / Exclude Devices
Select an option
Specify whether matching devices should be included in or excluded from discovery.
Equals / Contains
Select an operator
Select the operator used to match the specified value.
Number or Device Name
Enter a value
Label
Action
Description / Example
Interface
Enable or disable
Enables monitoring of network interfaces to view interface status and monitor network traffic, including incoming and outgoing data.
Interface Type
Select an option
Select the interface category to be monitored from the available dropdown options.
Interface Name
Select an option
Choose the specific network interface for which monitoring needs to be configured.
Sub Interface
Label
Action
Description / Example
Port
Enable or disable
Enables monitoring of specific network ports during the discovery process. When enabled, IMS checks the configured ports to verify whether the associated services are reachable and available on the discovered device.
Port Monitoring
Select or enter the port to monitor
Specifies the network port that IMS should monitor for the selected device or service. The selected port is checked during discovery to determine whether the corresponding service is reachable.
Example: Port 80 for HTTP, 443 for HTTPS, or 22 for SSH.


Enter the value used to identify the devices.
Enable or disable
Profile Name*
Enter a name
Enter a name for the Discovery Profile. Discovery Profiles are used to save discovery preferences and identify profiles for tracking and periodic discovery.
Provide Profile Details
Enter details
Add a brief description of the discovery profile and the MongoDB instances to be discovered. Example: Production MongoDB Cluster.
IP Address
Enter IP details
Enter an IP address, IP range, or subnet to be discovered.
Import from CSV
Import a file
Import a list of MongoDB server IP addresses from a CSV file instead of manually entering IP details. This option is optional.
Device Credentials
Select a credential
Create an application credential before performing MongoDB Discovery. Select an Application credential configured with the required MongoDB authentication and connection details. The selected credential enables IMS to connect to MongoDB and collect the required database information.
Data Collector Details*
Select details
Monitor Replica Set
Enable or disable
Enables monitoring for the complete MongoDB replica set environment. This option is available only when replica set or cluster information is detected during the discovery process.


Select the Data Collector to be used for the MongoDB discovery process. The Data Collector is installed within the customer's network and communicates with the target environment using the configured protocols and credentials. It collects the required inventory, availability, and performance information and sends the data to Infraon for monitoring.
Dropdown
Text Area
Checkbox
Radio
Date
DateTime
Add Field
Click Add Field
Opens the field creation page to configure a new custom field for the selected module.
Label
View field name
Displays the custom field name shown in the form. Example: Renewal Type, Contract Region.
Property
View section name
Displays the form section where the field is mapped. Example: Basic Details, Terms and Conditions, Line Items Fields.
Field Type
View field type
Shows the configured input type for the field. Example: Dropdown, Email, Phone, Number, Date.
Module
View mapped module
Displays the module in which the custom field is used.
Actions
Edit
Click the edit icon
Modify the selected custom field configuration.
Delete
Click the delete icon
Removes the selected custom field from the module.
Label*
Enter field name
Defines the display name of the custom field shown in the form.Example: Vendor Email, Renewal Date.
Placeholder*
Enter placeholder text
Displays helper text inside the field before data is entered. Example: Enter your email.
Mandatory
Enable toggle
Makes the field mandatory for the selected contract rule.
Unique
Enable toggle
Prevents duplicate values under the selected contract rule.
Disable
Enable toggle
Disables the field for the selected contract condition.
Action
Description / Example
Profile Name*
Enter a name
Enter a name for the Discovery Profile. Discovery Profiles are used to save discovery preferences and identify profiles for tracking and periodic discovery.
Data Collector Details
Configure details
Select the Data Collector to be used for the Linux Servers discovery process.
The Data Collector is installed within the customer's network and communicates with the target environment using the configured protocols and credentials.
It collects the required inventory, availability, and performance information and sends the data to Infraon for monitoring.
Discovery Options
Select an option
Discover inventory with availability and performance monitoring.
Discover only Inventory Information.
Discover inventory with availability and performance monitoring.
Discover only Inventory Information
Select an option
Discovers and collects basic inventory information about the selected devices or resources, such as device details, configuration, and hardware/software information.
Availability and performance monitoring are not enabled.
Discover inventory with availability monitoring
Select an option
Discovers inventory information and enables availability monitoring to check whether the device or resource is reachable and operational.
Discover inventory with availability and performance monitoring
Select an option
Discovers inventory information and enables both availability and performance monitoring.
IMS checks device availability and collects performance metrics for ongoing monitoring.
Provide Profile Details
Enter details
Add a brief description of the discovery profile and the Linux servers to be discovered.
Example: Linux Servers or H.O Servers.
IP Address*
Enter IP details
Enter an IP address, IP range, or subnet to be discovered.
Import from CSV
Import a file
Import a device list from a CSV file instead of manually entering the IP address, IP range, or subnet. This option is optional.
Device Credentials
Select a credential
Create device credentials before discovering Linux Servers.
Select an SSH credential containing the authentication and connection details required to communicate with the Linux server.
The selected credential allows IMS to establish a secure connection and collect server inventory, availability, and performance information.
Click Next to configure Filters.
The Filters section allows you to control which Linux servers are included or excluded from discovery and configure server component monitoring.
The Filters section contains three areas:
Default Filters
Device Filters
Server Component Filters
The Filters section is optional. You can click Next without configuring any filters.
Filters | Default Filters
Label
Action
Description / Example
Filter By Ping
Enable or disable
Filters Linux servers based on their response to a ping check.
Ping Monitor
Enable or disable
Enables ping monitoring to check whether the Linux server is reachable.
Filters | Device Filters
Label
Action
Description / Example
Device Filters
Select a condition
Configure conditions to include or exclude specific Linux servers from discovery.
Include Devices / Exclude Devices
Select an option
Specify whether matching devices should be included in or excluded from discovery.
IP Address / Device Type / Device Name
Select an option
Select the device attribute to use for filtering. Additional conditions can be added using the + icon.
Equals / Contains
Select an operator
The filter condition follows:
Include Devices / Exclude Devices → IP Address / Device Type / Device Name → Equals / Contains → Number or Device Name
You can add additional filter conditions using the + icon.
Filters | Server Component Filters
Label
Action
Description / Example
Process
Enable or disable
Enables or disables Process monitoring.
Process Name
Select an option
Appears when Process monitoring is enabled. Select the required process name from the dropdown.
Server Flavour
Select an option
Select the required Linux server flavour from the dropdown.
Click Next to configure the Schedule.
The Schedule section determines when the Linux Server Discovery should be initiated. You can start the discovery immediately using Discover Now or configure a Discovery Schedule to run it at a specified date and time. To learn more, .
Label
Count
Select the count preferred.
Packet Size
Select the required one in either of 16/32/64…
Timeout
The number of seconds post which Infraon stops attempting to reach the device.
Click ‘Test’. The test results will be displayed in real time.
Utilized to oversee and control network devices interconnected via an IP network.
Infraon uses SNMP, an application that queries the network for a tree of information about a selected device.
Click ‘SNMP Walk’ and enter the following details:
Label
Description/ Example
IP Address
A unique number identifying your device.
Data Collector
Select from the drop-down box.
OIDS
Object Identifiers
Port
The default value is auto-populated. This, however, can be changed.
Version
Select the required version.
Click ‘Test’. The test results will be displayed in real time.
A communication protocol for computer networks that facilitates data exchange and interaction between two computers.
Click ‘SSH Check’ and enter the following details:
Label
Description/ Example
IP Address
A unique number identifying your device.
Data Collector
Select from the drop-down box.
Port
The default value is auto-populated. This, however, can be changed.
Login Name
Enter your selected login name.
Password
Enter the password.
Click ‘Test’. The test results will be displayed in real time.
Microsoft's specifications for centralized management of devices and applications in Windows networks.
Click ‘WMI Check’ and enter the following details:
Label
Description/ Example
IP Address
A unique number identifying your device.
Data Collector
Select from the drop-down box.
Login Name
Enter your selected login name.
Password
Enter the password.
Timeout
The number of seconds post which Infraon stops attempting to reach the device.
Click ‘Test’. The test results will be displayed in real time.
Label
Description/ Example
IP Address
A unique number identifying your device.
Data Collector
Select from the drop-down box.
Incident
Request
Problem
Change
Release
Task
When an assignee changes the status of any applicable module, a Checklist pop-up is triggered.
The pop-up displays the predefined checklist items configured in the workflow.
The technician can review and confirm the required work items before proceeding.
Only after acknowledging or completing the checklist can the workflow move to the next stage.
The page displays all the checklists configured across modules and their associated workflows.
View Checklist | Basic Details
Label
Action
Description / Example
Search
Click to input text
Enter text to quickly search and navigate through the list.
Filter
Click to input text
Apply filters based on fields (Module or Name) and select the required condition from the drop-down.
Checklist Name
View only
Displays the name of the checklist. No actions can be performed.
Module
View only
Click on the Add button in the top-right corner of the page.
Fill in the required fields in the Add Checklist configuration window.
Add Checklist | Basic Details
Label
Action
Description / Example
Checklist Name*
Click to input text
Enter a representational name for the checklist.
Example: Basic Incident Validation.
Module*
Select from the drop-down
Select the ITSM module where this checklist applies. Options Include: Incident, Request, Problem, Release, Change, Task.
Workflow*
Select from the drop-down
Choose the workflow in which the checklist should appear. Example: Ticket Workflow.
Status*
Select from the drop-down
1. Review incident logs for data errors.
2. Confirm user impact (applications, services, or teams affected).
3. Validate if recent changes or patches caused the issue.
4. Test migration steps in staging before applying them in production.
5. Escalate to L2 support if data inconsistency is found.
Profile Name*
Enter a name
Enter a name for the Discovery Profile. Discovery Profiles are used to save discovery preferences and identify profiles for tracking and periodic discovery.
Discovery Options
Select an option
Discover inventory with availability and performance monitoring.
Discover only Inventory Information.
Discover inventory with availability and performance monitoring.
Discover only Inventory Information
Select an option
Discovers and collects basic inventory information about the selected devices or resources, such as device details, configuration, and hardware/software information. Availability and performance monitoring are not enabled.
Discover inventory with availability monitoring
Select an option
Discovers inventory information and enables availability monitoring to check whether the device or resource is reachable and operational.
Discover inventory with availability and performance monitoring
Select an option
Discovers inventory information and enables both availability and performance monitoring. IMS checks device availability and collects performance metrics for ongoing monitoring.
Provide Profile Details
Enter details
Click Next to configure Filters.
The Filters section allows you to control which SD-WAN devices are included or excluded from discovery.
The Filters section contains two areas:
Default Filters
Device Filters
Filters | Default Filters
Filter By Ping
Enable or disable
Filters SD-WAN devices based on their response to a ping check.
Ping Monitor
Enable or disable
Enables ping monitoring to check whether the SD-WAN device is reachable.
Filters | Device Filters
Filter
Select a filter
Select the filter to be applied to the SD-WAN devices.
Type
Select a type
Select the required filter type.
Conditions
Select a condition
Select the condition used to define how the filter value should be matched.
You can configure the required filter criteria based on the available Filter, Type, Conditions, and Value options.
Click Next to configure the Schedule.
The Schedule section determines when the SD-WAN Discovery should be initiated. You can start the discovery immediately using Discover Now or configure a Discovery Schedule to run it at a specified date and time. To learn more, .
Profile Name*
Enter the profile name.
Specifies the name of the Oracle discovery profile.
Provide Profile Details
Enter the required profile information.
Provides the details required to configure the Oracle discovery profile.
IP Address*
Enter IP details
Enter an IP address, IP range, or subnet to be discovered.
SID*
Enter the Oracle SID.
Specifies the Oracle System Identifier (SID) used to identify the database instance.
Device Credentials
Select the configured credential profile.
Create an application credential before performing Oracle Discovery. Select an Application credential configured with the required Oracle authentication and connection details. The selected credential enables IMS to connect to the Oracle database and collect the required database information for monitoring.
Data Collector Details*
Select details.
Click Next to configure Filters.
The Filters section allows you to configure query-based monitoring criteria for the Oracle database.
Filters | Slow Queries
Slow Queries
Configure slow-query parameters.
Defines the criteria used to identify and monitor slow-running queries.
Select Pollperiod
Select the polling period.
Specifies how frequently slow-query information is collected.
Select Top
Select the number of queries.
Specifies the number of top slow queries to display or monitor.
Filters | Big Queries
Big Queries
Configure big-query parameters.
Defines the criteria used to identify and monitor queries that process a large number of rows.
Select Pollperiod
Select the polling period.
Specifies how frequently big-query information is collected.
Select Top
Select the number of queries.
Specifies the number of top big queries to display or monitor.
Click Next to configure the Schedule.
The Schedule section determines when the Oracle Discovery should be initiated. You can start the discovery immediately using Discover Now or configure a Discovery Schedule to run it at a specified date and time. To learn more, .
Profile Name*
Enter a profile name
Specifies the name of the Redis discovery profile.
Provide Profile Details
Enter profile information
Provides additional information required for the Redis discovery profile.
IP Address*
Enter an IP address
Specifies the IP address of the Redis database to be discovered.
Device Credentials
Select device credentials
Create an application credential before performing Redis Discovery. Select an Application credential configured with the required Redis authentication and connection details. The selected credential enables IMS to establish connectivity and collect the required Redis monitoring information.
Data Collector Details*
Select details
Select the Data Collector to be used for the Redis discovery process. The Data Collector is installed within the customer's network and communicates with the target environment using the configured protocols and credentials. It collects the required inventory, availability, and performance information and sends the data to Infraon for monitoring.
Click Next to proceed to the Filters section.
The Filters section allows you to select the logical databases that should be included for Redis monitoring.
Select Logical Databases
Select the required logical databases
Allows you to select the Redis logical databases to be monitored.
Click Next to proceed to the Schedule section.
The Schedule section determines when the Redis Discovery should be initiated. You can start the discovery immediately using Discover Now or configure a Discovery Schedule to run it at a specified date and time. To learn more, click here.
Displays the total number of users assigned to the shift team.
Timeline View
View schedule timeline
Displays shift schedules in a timeline-based format for easier visibility of operational coverage.
Actions
Edit
Modify shift
Allows users to edit the selected shift configuration.
Delete
Remove shift
Deletes the selected shift configuration after confirmation.
Shift Code
Enter shift code
Defines a unique code or identifier for the shift. Example: MORN-01
Min. Team Size*
Enter minimum team size
Specifies the minimum number of users required for the shift. This field is mandatory.
Team color*
Select color
Defines the color used to visually represent the shift in the schedule timeline.
Effective From*
Select effective start date
Specifies the date from which the shift configuration becomes active. This field is mandatory.
Effective Till*
Select effective end date
Specifies the date until which the shift configuration remains active.
Shift does not have an end date
Enable/disable checkbox
Allows the shift to remain active without configuring an end date.
Add a note
Add additional note
Allows users to attach notes or comments related to the shift configuration.
KVM Monitoring allows you to discover and monitor KVM-based virtualization environments using the SSH protocol. It connects to the configured KVM host, collects the available environment information, and enables inventory, availability, and performance monitoring based on the selected discovery options.
There are three tabs on the KVM Monitoring page:
Discovery Details | Filters | Schedule
The Discovery Details section provides the discovery profile, device information, credentials, agent details, and data collector details settings.
Discovery Details | Profile and Discovery Information
Label
Action
Description / Example
Click Next to configure Filters.
The Filters section allows you to control which KVM devices are included or excluded from discovery.
The Filters section contains three areas:
Default Filters
Device Filters
Server Component Filters
The Filters section is optional. You can click Next without configuring any filters.
Filters | Default Filters
Filters | Device Filters
The filter condition follows:
Include Devices / Exclude Devices → IP Address / Device Type / Device Name → Equals / Contains → Number or Device Name
You can add additional filter conditions as required.
Filters | Server Component Filters
Click Next to configure the Schedule.
The Schedule section determines when the KVM Discovery should be initiated. You can start the discovery immediately using Discover Now or configure a Discovery Schedule to run it at a specified date and time. To learn more, .
The device Credentials module of Infraon is used by the administrator or authorized user to configure and store Device/Account information such as login credentials (user name, password, and other protocol-relevant parameters) for a specific connection protocol. Device Credentials are used in ‘Discovery‘ and are mandatory for discovering devices for monitoring and management.
Appropriate device communication protocol must be selected while configuring device credentials to build successful connectivity.
Each device shall be associated with a device credential at the time of discovery. Subsequent monitoring is done using these stored credentials. Should the login credentials (password) change, the administrator must update them to ensure seamless monitoring.
At this point, Infraon supports SNMP, WMI, SSH, and HTTP protocols below. Refer to the table below for details.
The PostgreSQL page allows you to configure and initiate discovery for PostgreSQL databases using the Application protocol. It enables Infraon to collect PostgreSQL database information and monitor inventory, availability, and performance based on the selected discovery configuration.
There are three sections on the PostgreSQL Discovery page: Discovery Details, Filters, and Schedule.
The Discovery Details section provides the discovery profile, device information, credentials, agent details, and data collector details settings.
Discovery | Profile and Discovery Information
Read Community
Enter the confidential credential.
Write Community
Enter the confidential credential.
Get Bulk
Selecting this would configure for all the items.
Get
Selecting this would configure for one single item.
Retries
Selecting this would automatically repeat an action until it succeeds.
Login Prompt
Enter the login Prompt.
Enable Password
Enter the Enable Password.
Enable Prompt
Enter the Enable Prompt.
Timeout
The number of seconds post which Infraon stops attempting to reach the device.
Retries
Selecting this would automatically repeat an action until it succeeds.
Hash Key
Input the required Hash Key for authentication.
WinRM
Windows Remote Management
WMIC
Windows Management Instrumentation
Authentication Type
Select from the given drop-down box.
Transport Method
Select from the given drop-down box.
WinRM Port
Enter the WinRM Port details.
Authentication Level
Select from the given drop-down box.
Impersonation Level
Select from the given drop-down box.
Select the operator used to match the specified value.
Number or Device Name
Enter a value
Enter the value used to identify the Linux servers.


Displays the module (Incident, Request, Problem, Change, Release, Task) associated with the checklist.
Service Catalogue
View only
Displays the related service catalog item, if applicable.
Workflow
View only
Displays the workflow in which the checklist is configured.
Status
View only
Displays the status of the checklist (e.g., Active/Inactive).
Edit
Click to action
Modify an existing checklist or update its configuration.
Delete
Click to action
Remove the selected checklist from the inventory.
Define the workflow status where the checklist should trigger.
Example: Analysis (Incident status).
Service Catalogue*
Select from the drop-down
Select the service(s) for which the checklist is relevant. Multiple services can be added.
Example: Data Migration, Data Recovery.
Add
Click to perform action
Add the specific checklist items that technicians must review before moving to the next stage.
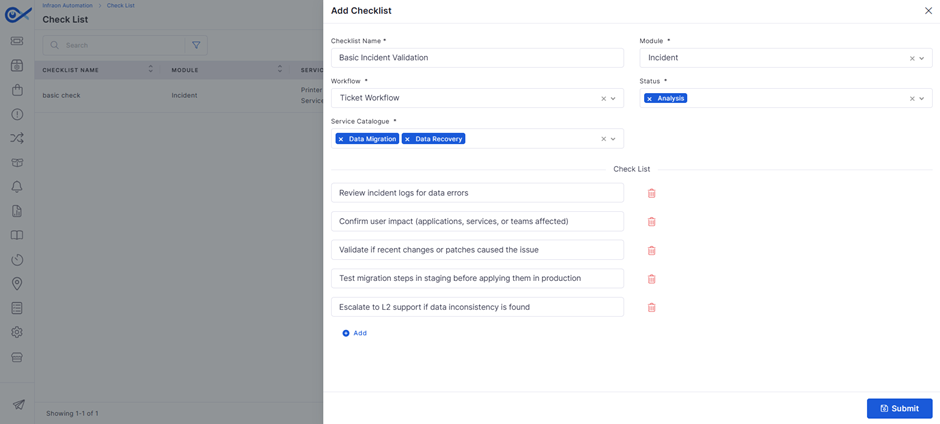
Add a brief description of the discovery profile and the SD-WAN devices to be discovered.
Vendor
Select a vendor
Select the vendor of the SD-WAN environment. Example: Cisco.
Primary IP Address*
Enter an IP address
Enter the primary IP address of the SD-WAN device or environment to be discovered.
Secondary IP Address
Enter an IP address
Enter the secondary IP address, if applicable, for the SD-WAN device or environment.
Device Credentials
Select device credentials
Create device credentials before performing SD-WAN Discovery. Select an HTTP credential containing the authentication and connection details required to communicate with the SD-WAN platform. The selected credential enables IMS to establish connectivity and collect the required network information.
Data Collector Details*
Select details
Select the required Data Collector details for the discovery process. The Infraon Agent collects data from devices configured for discovery and can support protocols such as SNMP and WMI.
Value
Enter or select a value
Enter the value to be used for the selected filter and condition.


Select the Data Collector to be used for the Oracle discovery process. The Data Collector is installed within the customer's network and communicates with the target environment using the configured protocols and credentials. It collects the required inventory, availability, and performance information and sends the data to Infraon for monitoring.
Duration (ms)
Enter or configure the duration.
Specifies the query duration, in milliseconds, used for slow-query monitoring.
Threshold (ms)
Enter or configure the threshold.
Specifies the duration threshold, in milliseconds, above which a query is considered slow.
Rows of Big Query
Enter or configure the row count.
Specifies the number of rows processed by a query for big-query monitoring.
Threshold (row)
Enter or configure the threshold.
Specifies the row-count threshold above which a query is considered a big query.


Exchange
Enable or disable
Enables or disables Exchange Core Monitoring.
SharePoint
Enable or disable
Enables or disables SharePoint Core Monitoring.
Active Directory
Enable or disable
Enables or disables Active Directory Monitoring.
IIS
Enable or disable
Enables or disables IIS Monitoring.
Profile Name*
Enter a name
Enter a name for the Discovery Profile. Discovery Profiles are used to save discovery preferences and identify profiles for tracking and periodic discovery.
Data Collector Details
Configure details
Select the Data Collector to be used for the KVM discovery process.
The Data Collector is installed within the customer's network and communicates with the target environment using the configured protocols and credentials.
It collects the required inventory, availability, and performance information and sends the data to Infraon for monitoring.
Discovery Options
Select an optio
Discover inventory with availability and performance monitoring.
Discover only Inventory Information.
Discover inventory with availability and performance monitoring.
Discover only Inventory Information
Select an option
Discovers and collects basic inventory information about the selected devices or resources, such as device details, configuration, and hardware/software information.
Availability and performance monitoring are not enabled.
Discover inventory with availability monitoring
Select an option
Discovers inventory information and enables availability monitoring to check whether the device or resource is reachable and operational.
Discover inventory with availability and performance monitoring
Select an option
Discovers inventory information and enables both availability and performance monitoring.
IMS checks device availability and collects performance metrics for ongoing monitoring.
Provide Discovery Profile Details
Enter details
Add a brief description of the discovery profile and the KVM devices to be discovered. Example: KVM Production Servers.
IP Address*
Enter IP details
Enter an IP address, IP range, or subnet to be discovered.
Import from CSV
Import a file
Import a device list from a CSV file instead of manually entering the IP address, IP range, or subnet. This option is optional.
Device Credentials
Select a credential
Create device credentials before performing KVM Discovery.
Select an SSH credential containing the authentication and connection details required to communicate with the KVM environment.
The selected credential enables IMS to establish connectivity and collect the required virtualization information.
Label
Action
Description / Example
Filter By Ping
Enable or disable
Filters KVM devices based on their response to a ping check.
Ping Monitor
Enable or disable
Enables ping monitoring to check whether the KVM device is reachable.
Label
Action
Description / Example
Device Filters
Select a condition
Configure conditions to include or exclude specific KVM devices from discovery.
Include Devices / Exclude Devices
Select an option
Specify whether matching devices should be included in or excluded from discovery.
Equals / Contains
Select an operator
Select the operator used to match the specified value.
Number or Device Name
Enter a value
Label
Action
Description / Example
Process
Enable or disable
Enables or disables Process monitoring.
Service
Enable or disable
Enables or disables Service monitoring.
SQL
Enable or disable
Enables or disables SQL Core Monitoring.
DotNet
Enable or disable


Enter the value used to identify the KVM devices.
Enables or disables DotNet Core Monitoring.
SNMP
SNMP v1 and v2c versions use community-based security models and user read& Write Community for access. SNMP v3 version uses an enhanced user-based security model and uses authentication and encryption. If v3 is selected, related parameters need to be configured. Refer ’SNMP v3 Parameters’ section for details.
Most Network devices, Servers, and other SNMP-supported devices.
SNMP v1 and v2c: Read & Write Community, Port, Timeout, and Retries.
SNMP v3: Username, Security Level, Authentication Type, SNM V3 Password, Privacy Type & Privacy Password.
SSH
SSH or Secure Shell protocol establishes an encrypted connection between network devices.
CLI Option for network devices, Linux, Unix-based servers, and Xen servers.
Login Name, Login Prompt, Password Port, SH Key File, Connection Command, Timeout, and Retries.
WMI
WMI commonly uses CIM conceptual model to represent various components of windows devices.
Windows Servers
Domain Name/user Name, Password, Authentication Level, Impersonation level, Timeout, and Retries.
HTTP
HTTP acts as the foundation of data exchange on the web.
vCenter, VMware API, CUCM cluster
Username and Password
Click 'Test and Save' to test the credentials for authenticity before saving and proceeding to discovery.
The device credentials page can be used to add, edit, and delete device credentials for SNMP, SSH, WMI, and HTTP.
Using the respective icon, the device credential view can be toggled between the card view and the list view.
Go to Infraon Configuration -> IT Operations-> Device Credentials.
Click on 'Add' and select 'Protocol' as desired.
There are two tabs on the 'Add Credential' page. Refer to the table for information.
Configuration | Test
Few fields vary based on the protocol selected. Refer to the 'Description' column for details.
Label
Action
Description/Example
Profile Name*
Add a name for the credential.
Applicable for all protocols. A name is usually used as an identifier.
Description
Add a brief description of the profile.
Applicable for all protocols.
Port
The default value is auto-populated. This, however, can be changed.
Applicable for SNMP and SSH.
Timeout (Seconds)
The default value is auto-populated. This, however, can be changed.
Once all the parameters are defined, click ‘Submit’ to save the credentials or click 'Test & Save' to test the credentials before saving.
Configuration | Test
Label
Action
Description/Example
IP Address*
Add an IP address to test the credential.
Applicable for all protocols.
Agent*
Select agent to test.
Applicable for all protocols
Click 'Test.'
Saved credentials can be edited or deleted by using the respective action icons.
Protocols
Description
Supported Devices
Protocol Parameters
Profile Name*
Enter a profile name
Specifies the name of the PostgreSQL discovery profile.
Provide Profile Details
Enter profile information
Provides additional information required for the PostgreSQL discovery profile.
IP Address*
Enter an IP address
Specifies the IP address of the PostgreSQL database to be discovered.
Device Credentials
Select a credential profile
Create an application credential before performing PostgreSQL Discovery. Select an Application credential configured with the required PostgreSQL authentication and connection details. The selected credential enables IMS to connect to the database and collect the required monitoring information.
Data Collector Details*
Select details
Select the Data Collector to be used for the PostgreSQL discovery process. The Data Collector is installed within the customer's network and communicates with the target environment using the configured protocols and credentials. It collects the required inventory, availability, and performance information and sends the data to Infraon for monitoring.
Click Next to proceed to the Filters section.
The Filters section allows you to configure which PostgreSQL databases, tables, jobs, and queries are monitored.
Filters | Database and Table Filters
All Databases and Tables
Select or configure
Allows all available PostgreSQL databases and tables to be included for monitoring.
All Databases and Tables Selected
View selection
Indicates that all available databases and tables are selected for monitoring.
Filters | Job Filters
All Jobs
Select or configure
Allows all available PostgreSQL jobs to be included for monitoring.
All Jobs Selected
View selection
Indicates that all available jobs are selected for monitoring.
Filters | Slow Queries
Slow Queries
Configure slow-query parameters
Defines the criteria used to identify and monitor slow-running PostgreSQL queries.
Select Pollperiod
Select the polling period
Specifies how frequently slow-query information is collected.
Select Top
Select the number of queries
Specifies the number of top slow queries to display or monitor.
Filters | Big Queries
Big Queries
Configure big-query parameters
Defines the criteria used to identify and monitor queries that process a large number of rows.
Select Pollperiod
Select the polling period
Specifies how frequently big-query information is collected.
Select Top
Select the number of queries
Specifies the number of top big queries to display or monitor.
Click Next to proceed to the Schedule section.
The Schedule section determines when the PostgreSQL Discovery should be initiated. You can start the discovery immediately using Discover Now or configure a Discovery Schedule to run it at a specified date and time. To learn more, click here.
On the Infraon platform, a team consists of users grouped together. Teams can be categorized based on a reporting manager, technical skills, support level (L1, L2), role, etc. These are the foundations for managing user groups responsible for handling various ITSM operations such as approvals, ticket resolutions, change implementations, and release activities.
Users are assigned to multiple teams, and teams are assigned to specific modules.
The Teams page lists all existing teams and offers options to filter, search, add, or manage teams individually or in bulk. From this page, you can view, add, edit, and delete existing pages.
Teams | Basic Details
Label
Action
Description / Example
Bulk CSV Update
To add a new team, navigate to the Teams page and click the Add Team button at the top right corner. This opens the Create Team window, where team information and functional attributes can be defined.
Create Team | Basic Details
Team types define the role the team plays across various modules and workflows. When creating or editing a team, select the appropriate team type.
Team Type | Add Teams
Users can associate the team with a specific location. This helps in aligning team responsibilities based on regional or site-specific operations.
The section contains two dropdown fields:
Service Request/ Ticket Location Mapping
How It Works
Admin configures teams with appropriate location categories and values (e.g., Region: South, Location: Bangalore).
When a user raises a service request or ticket, their default or selected location is matched against team configurations.
The system automatically assigns the request to the team mapped to that location.
The team receives the ticket for further action without requiring manual routing.
Example Use Case
A user from “Mumbai – Tower A – 2nd Floor” requests printer support.
The system detects their location (requester) and checks against team mappings.
That location is mapped to the “Facility Support – West” team.
The service request is instantly routed to the correct team, ensuring minimal resolution delays.
While creating a team, admins must configure the team members who will be part of that group. The Staff Selection section offers two configuration tabs to define how staff are added.
This configuration helps identify the team’s core skills and areas of specialization (such as ITAM, NMS, NCCM, Log Management, etc). It also allows you to establish a hierarchy of support staff members who will receive notifications and assist in resolving module-specific tasks.
An approval team is a group of designated staff members responsible for reviewing and approving requests. Team members are added as staff and can be assigned a specific approval sequence to ensure requests follow a structured approval flow.
The Request Signature option allows organizations to define digital signature requirements for approval teams. Team members who have already configured their signature in can be added to the signature sequence. Signatures are collected in the configured order and can be displayed in documents after approvals are completed.
Percentage-Based Approval Sequence
In enterprise environments where actions require team approvals, waiting for unanimous consent can delay critical operations. The Infraon platform makes this process more flexible, configurable, and scalable for team sizes and business needs.
What is Minimum Approval Percentage?
The Minimum Approval Percentage setting defines the minimum percentage of team members who must approve a request or action for it to proceed.
How Does It Work?
When a request (like a change, ticket, or service approval) is sent to an approval team:
The system checks the total number of approvers in the team.
Based on the configured percentage (e.g., 60%, 80%), it calculates how many approvals are needed.
If that number of users approves, the action is automatically accepted, even if other members have not responded.
This mechanism enables faster decision-making and reduces bottlenecks in workflows.
1. Response Required (Toggle Switch)
Enabled (ON):
The system will wait for all team members to respond before proceeding. This is suited for highly sensitive workflows where a unanimous or whole team review is mandatory.
Disabled (OFF):
The system only waits until the minimum percentage of approvals is received. Once that condition is met, the action is approved and executed, even if other members haven’t responded.
2. Minimum Approval Percentage
This dropdown field allows you to choose the threshold (e.g., 50%, 60%, 80%, 100%). You can set values based on your organization's comfort level with partial consensus.
Example Breakdown:
Team Size: 5 Approvers
Minimum Approval: 60%
Required Approvals: 3 (rounded from 60% of 5)
If three members approve the action, the system considers it valid, even if the remaining two have not taken any action.
The UI will display:
“Minimum 3 from 5 users' approval needed to complete the action” — updated dynamically.
Background
Infraon uses Infraon Infinity to manage internal change requests for production systems. Its Change Advisory Board (CAB) includes 10 infrastructure, security, development, and QA team members.
Challenge
Usually, only 3–4 core members actively participate in reviews. Waiting for all 10 members to approve often delays release cycles.
Solution
Using the Percentage-Based Approval feature, Infraon configures:
Minimum Approval Percentage: 70%
Response Required: OFF
Result
The system only needs 7 out of 10 members to approve.
Even if the remaining three do not respond, the change is processed promptly.
This reduces approval cycle times from 3 days to under 1 day.
It aligns with their internal governance policy without slowing down DevOps.
Notes
Security-sensitive requests still follow a 100% response policy (Response Required = ON).
Infraon uses different thresholds for different teams using team-specific configurations.
Set lower percentages for large and cross-functional teams to streamline decisions.
Set higher thresholds or turn on "Response Required" for high-risk or compliance-critical workflows.
This configuration tab is enabled when adding an Operation and Technical Team.
Operation and Technical Team - Used to configure auto-assignment of tickets.
What is Auto Assignment?
An alert is raised when a ticket lands in the service desk queue. Either a technician self-assigns it, or a team leader assigns it to the team. With manual intervention, tickets may be picked based on ease of resolution, making it unfair for other technicians. New tickets may also be in the queue for too long while waiting to be assigned, impacting the SLAs. Auto assignment of tickets removes manual intervention, ensuring fairness and timely assignment. Infraon offers three methods to define auto-assignment.
Round Robin
Round Robin is the simplest way of assigning tickets, where tickets are assigned equally to active technicians in a circular order. It is recommended for businesses where tickets are raised to follow up on orders, requests, etc. Using this to auto-assign tickets helps save time on the manual assignment of tickets.
Use-case - An e-commerce business where tickets are raised to know order status, delays in delivery, or refund status, etc. Since these are information-based tickets and no troubleshooting is required, the time spent on each ticket is minimal. Using the Round Robin method ensures that tickets are assigned equally and orderly.
Load Balancer
The load-balanced method assigns tickets based on the technician's load and is recommended for businesses offering a wide range of services, where the resolution time is different for each. Using the Load-Balanced method ensures that the technicians have a balanced workload while working on a ticket. When a new ticket is raised, the technician with the least load is auto-assigned. Tickets are assigned based on the ticket queue's SLA, priority, and criticality. Thresholds must be defined to select this method.
Use-case - A technical support center for a product that offers 24/7 support where tickets are raised throughout the day. Some tickets may be inquiries, while others might have a long resolution. A round-robin method may not make sense here. The load balancer method checks the technician's current load before assigning new tickets. This way, technicians are not burdened with work.
Skill Based
The skill-based method is used when the organization offers multiple categories/levels of support. It is recommended for organizations providing support globally or across a wide range of products/services. Skill-based assignment ensures that the right technician assigns the tickets by matching their skill and level.
Use-case - A business that offers support or services on multiple products, regions, and time zones, offering multi-lingual support. Here, tickets must be assigned based on the skill of the technician. The technician must be skilled in the language selected by the customer, know about the product chosen, etc. A skill-based allocation is best platformed for this.
Delegate Configuration
This tab allows administrators to set up backup approvers or staff in case the primary team members are unavailable. Delegation ensures continuity of operations by routing approvals or tasks to alternate users.
Level Enforcement
Level Enforcement controls the initial assignment of tickets and requests to technicians based on their support level. When enabled for a team, only Level 1 technicians can be selected for the initial assignment. Tickets can be escalated to Level 2 or Level 3 technicians when further expertise is required.
Administrators can enable or disable the Level Enforcement toggle according to the team's support process. The toggle is disabled by default.
For existing tickets assigned to Level 2 or Level 3 technicians, editing the ticket does not change the current assignment. To apply Level Enforcement to an existing ticket, clear the current assignment and assign the ticket to the team again.
Once all fields are added, click Submit to finalize the team setup.
AIX Monitoring allows you to discover and monitor AIX servers using the SSH protocol. It connects to the configured AIX server, collects the available server information, and enables inventory, availability, and performance monitoring based on the selected discovery options.
There are three tabs on the AIX Monitoring page:
Discovery Details | Filters | Schedule
The Discovery Details section provides the discovery profile, device information, credentials, agent details, and data collector details settings.
Discovery Details | Profile and Discovery Information
Label
Action
Description / Example
Click Next to configure Filters.
The Filters section allows you to control which AIX servers are included or excluded from discovery.
The Filters section contains three areas:
Default Filters
Device Filters
Server Component Filter
The Filters section is optional. You can click Next without configuring any filters.
Filters | Default Filters
Filters | Device Filters
The filter condition follows:
Include Devices / Exclude Devices → IP Address / Device Type / Device Name → Equals / Contains → Number or Device Name
Filters | Server Component Filter
You can add additional filter conditions as required.
Click Next to configure the Schedule.
The Schedule section determines when the AIX Monitoring Discovery should be initiated. You can start the discovery immediately using Discover Now or configure a Discovery Schedule to run it at a specified date and time. To learn more, .
The Kafka Connection module allows users to configure and manage connections to external Kafka brokers. These connections are used to publish data from Infraon workflows to Kafka topics.
This module serves as the foundation for Kafka-based integrations, enabling workflow events to trigger real-time data publishing to external systems.
List of configured Kafka connections
Columns:
Name – Identifier of the Kafka connection
Bootstrap Servers – Kafka broker endpoint(s)
Security Protocol – Connection type (e.g., SASL, SSL)
Status – Active / Inactive
Creation Time – Timestamp of creation
Action – Edit / Delete options
Add the Kafka Connection button to create a new connection
A Kafka connection is created by providing:
Broker details (Bootstrap Servers)
Security configuration (SSL, SASL, etc.)
Authentication credentials (if required)
The connection can be:
Tested to verify connectivity
Activated or deactivated
Once active, the connection becomes available in the Workflow module.
In workflows:
A Kafka Integration action is added
The user selects the Kafka connection
Available topics are fetched dynamically
When the workflow is executed:
Data is published to the selected Kafka topic(s)
External systems consume this data
System tracks:
Success or failure of message publishing
Logs in workflow execution and recent activities
To create a new Kafka connection, click Add Kafka Connection located at the top right corner of the page.
This opens the Add Kafka Connection panel, where you can configure broker details, security settings, and authentication required to establish communication with the Kafka cluster.
Configuration Details | Kafka Connection
The fields displayed in the configuration form change dynamically based on the selected Security Type. This ensures that only relevant authentication details are required.
Field Behavior | Security Type
Click Test to validate the Kafka connection using the provided configuration details. The system attempts to establish a connection with the Kafka broker and verifies credentials, security settings, and network accessibility.
Click Save to store the Kafka connection configuration. Once saved:
The connection becomes available in workflow actions (if marked Active)
It can be selected in the Kafka Integration workflow card
Configuration changes are tracked in audit logs
The RabbitMQ page allows you to configure and initiate discovery for RabbitMQ environments using the Exporter protocol. It enables Infraon to collect RabbitMQ information and monitor queues based on the configured discovery and queue selection settings.
There are three sections on the RabbitMQ Discovery page: Discovery Details, Filters, and Schedule.
The Discovery Details section provides the discovery profile, device information, credentials, agent details, and data collector details settings.
Discovery | Profile and Discovery Information
Click Next to proceed to the Filters section.
The Filters section allows you to control the scope of RabbitMQ queue monitoring.
Filters | Queue Selection Scope
Click Next to proceed to the Schedule section.
The Schedule section determines when the RabbitMQ Discovery should be initiated. You can start the discovery immediately using Discover Now or configure a Discovery Schedule to run it at a specified date and time. To learn more, .
The Windows Servers page allows you to configure and initiate discovery of Windows servers using the WMI protocol. It enables you to discover Windows server inventory and configure availability and performance monitoring based on the selected discovery option.
The selected Data Collector connects to the target Windows server using the configured WMI device credentials. After successful authentication and WMI communication, the Data Collector retrieves information such as the server's operating system, hardware, network, and other inventory details, then sends the collected data to Infraon. Based on the selected discovery option, you can also configure the server for availability and performance monitoring.
There are three tabs on the Windows Servers page:
Discovery Details | Filters | Schedule
The Discovery Details section provides the discovery profile, device information, credentials, agent details, and data collector details settings.
Discovery Details | Profile and Discovery Information
The Agent Control Policy allows administrators to define rules and actions to manage agent behavior in the system. A policy can be configured to specify the conditions under which actions should be performed on agents, including performance monitoring, event-based controls, and license-based event controls.
This helps automate agent management based on defined criteria and supports consistent agent performance and reliability.
The Agent Control Policy page displays the existing policies configured in the system.
Agent Control Policy | Basic Details
The MySQL page allows you to configure and initiate discovery for MySQL databases using the Application protocol. It enables Infraon to collect MySQL database information and monitor inventory, availability, and performance based on the selected discovery option.
There are two sections on the MySQL Discovery page: Discovery Details and Schedule.
The Discovery Details section provides the discovery profile, device information, credentials, agent details, and data collector details settings.
Discovery | Profile and Discovery Information
The VMware Discovery feature allows you to discover VMware virtualization environments and add the discovered VMware infrastructure to the Infraon inventory. Infraon communicates with the VMware environment using the HTTP/HTTPS-based VMware API and can collect information about VMware hosts, virtual machines, and related virtualization resources.
The VMware module allows you to configure and initiate discovery for VMware environments. The discovery process uses the configured VMware credentials and agent details to identify and collect information from the specified VMware environment.
There are three tabs on the VMware page.
Discovery Details | Filters | Schedule
The Discovery Details section provides the discovery profile, device information, credentials, agent details, and data collector details settings.
Discovery Details | Profile and Discovery Information
Applicable for all protocols.
The number of seconds post which Infraon stops attempting to reach the device.
Retries
The default value is auto-populated. This, however, can be changed.
Applicable for all protocols.
The number of instances Infraon tries to reach the device.
For SNMP
Select the SNMP version, as applicable. Based on the selection, additional fields appear.
Applicable for SNMP only
V1 - Read Community*, Write Community
v2c - Read Community*, Write Community, Scan Requests
v3 - User Name, Context Name, Security Level, Authentication Protocol, Authentication Password*, Privacy Protocol, Privacy Password*, Scan Requests
For SSH
Select between Credential, and Public Key, as applicable. Based on the selection, additional fields appear.
Applicable for SSH only
Credential - Login Name*, Password, Login Prompt, Enable Password, Enable Prompt
Public Key - Hash Key*
v3 - User Name, Context Name, Security Level, Authentication Protocol, Authentication Password*, Privacy Protocol, Privacy Password*, Scan Requests.
For WMI
Select between WMIC, and WinRM, as applicable. Based on the selection, additional fields appear.
Applicable for WMI only
Login Name* and Password* are standard fields for WMIC and WinRM.
WMIC - Authentication
WinRM - WinRM Authentication Level, Protocol, WinRM Port, WinRM Certificate Validation, WinRM Certificate File, WinRM Public Key.
For HTTP
Select between HTTP, and HTTPS, as applicable. Based on the selection, additional fields appear.
Applicable for HTTP/HTTPS only
HTTP - Username*, Password*
HTTPS - Username*, Password*,
Duration (ms)
Enter or configure the duration
Specifies the query duration, in milliseconds, used for slow-query monitoring.
Threshold (ms)
Enter or configure the threshold
Specifies the duration threshold, in milliseconds, for slow-query monitoring.
Rows of Big Query
Enter or configure the row count
Specifies the number of rows processed by a query for big-query monitoring.
Threshold (row)
Enter or configure the threshold
Specifies the row-count threshold above which a query is considered a big query.


Profile Name*
Enter a profile name
Specifies the name of the RabbitMQ discovery profile.
Provide Profile Details
Enter profile information
Provides additional information required for the RabbitMQ discovery profile.
IP Address*
Enter an IP address
Specifies the IP address of the RabbitMQ server to be discovered.
Port*
Enter the port number
Specifies the port used to connect to the RabbitMQ server.
Device Credentials
Select a credential profile
Create an application credential before performing RabbitMQ Discovery. Select an Application credential configured with the required RabbitMQ authentication and connection details. The selected credential enables IMS to connect to the message broker and collect the required monitoring information.
Data Collector Details*
Select details
Queue Selection Scope
Enable or disable
Controls how RabbitMQ selects queues for monitoring. When enabled, it selects all queues across all configured IP addresses. When disabled, you can select specific queues for each IP address.
RabbitMQ Queue List
Select required queues
Available when Queue Selection Scope is disabled. Allows you to select the specific RabbitMQ queues to be monitored.
Select Required Queues
Select queues
Select the required queues from the RabbitMQ Queue List for monitoring.


Select the Data Collector to be used for the RabbitMQ discovery process. The Data Collector is installed within the customer's network and communicates with the target environment using the configured protocols and credentials. It collects the required inventory, availability, and performance information and sends the data to Infraon for monitoring.
Profile Name*
Enter a name
Enter a name for the Discovery Profile. Discovery Profiles are used to save discovery preferences and identify profiles for tracking and periodic discovery.
Data Collector Details
Configure details
Select the Data Collector to be used for the AIX Monitoring discovery process.
The Data Collector is installed within the customer's network and communicates with the target environment using the configured protocols and credentials.
It collects the required inventory, availability, and performance information and sends the data to Infraon for monitoring.
Discovery Options
Select an option
Discover inventory with availability and performance monitoring.
Discover only Inventory Information.
Discover inventory with availability and performance monitoring.
Discover only Inventory Information
Select an option
Discovers and collects basic inventory information about the selected devices or resources, such as device details, configuration, and hardware/software information.
Availability and performance monitoring are not enabled.
Discover inventory with availability monitoring
Select an option
Discovers inventory information and enables availability monitoring to check whether the device or resource is reachable and operational.
Discover inventory with availability and performance monitoring
Select an option
Discovers inventory information and enables both availability and performance monitoring.
IMS checks device availability and collects performance metrics for ongoing monitoring.
Provide Discovery Profile Details
Enter details
Add a brief description of the discovery profile and the AIX servers to be discovered.
Example: AIX Production Servers.
IP Address*
Enter IP details
Enter an IP address, IP range, or subnet to be discovered.
Import from CSV
Import a file
Import a device list from a CSV file instead of manually entering the IP address, IP range, or subnet. This option is optional.
Device Credentials
Select a credential
Create device credentials before discovering AIX systems.
Select an SSH credential containing the authentication and connection details required to communicate with the AIX system.
The selected credential enables IMS to establish connectivity and collect system information for discovery and monitoring.
Label
Action
Description / Example
Filter By Ping
Enable or disable
Filters AIX servers based on their response to a ping check.
Ping Monitor
Enable or disable
Enables ping monitoring to check whether the AIX server is reachable.
Label
Action
Description / Example
Device Filters
Select a condition
Configure conditions to include or exclude specific AIX servers from discovery.
Include Devices / Exclude Devices
Select an option
Specify whether matching devices should be included in or excluded from discovery.
Equals / Contains
Select an operator
Select the operator used to match the specified value.
Number or Device Name
Enter a value
Label
Action
Description / Example
Server Component Filters
Configure component filters
Allows you to filter and monitor specific components or characteristics of the AIX server.
Process
Enable or disable
Enables or disables Process monitoring for the AIX server.
Service
Enable or disable
Enables or disables Service monitoring for the AIX server.
Server Flavour
Select an option


Enter the value used to identify the AIX servers.
Select the server flavour to specify the type of AIX server configuration to be monitored.
Team Type*
Select from the dropdown
Choose the type of team from the available classifications. See the Team Type Tab below for more details.
Owners of the Team*
Select responsible users
Mandatory. These users manage the team’s structure, approvals, and visibility rules.
Department
Select from the dropdown
Assign the team to a specific business department. Example: IT, Facilities, Procurement.
Business Hour Profile
Select applicable time profile
Maps the team’s operating hours, which impact SLAs and ticket routing. Example: 24x7, Weekdays 9 AM–6 PM.
CAB
The Change Advisory Board is responsible for reviewing and approving regular changes.
Used in Change Management for predefined change approval workflows.
Expert
Subject matter experts performing advanced-level configurations or troubleshooting.
Ideal for complex issue resolution in Change, Problem, or Release.
ECAB
Emergency CAB for urgent changes requiring immediate approvals.
Critical for fast-track Emergency Changes in Change Management.
Description
Enter a short explanation (optional)
Provide additional information about the expertise.
Example: Handles hardware asset tracking.
Add Users
Select users for the support hierarchy level.
Choose users to notify or assign responsibilities within a level.
(+) Icon
Add another hierarchy level
Add multiple levels of escalation or expertise-specific staff.
Example: Add Level 2 with different users.
Add
Click to add another expertise mapping.
Configure support hierarchy for multiple expertise tags (e.g., ITAM and NCCM).
Select users for each additional signature
Choose the next user required to sign after the previous signature is completed. Signatures follow the configured order. Example: Signature 2 – Carter Cooper, Signature 3 – Finance Manager
Delete
Click the delete icon
Removes the selected signature row from the sequence.
Communicate the approval logic to team members to avoid confusion or delays.
Add
Click the add (+) button
Adds the selected delegation pair to the team configuration. You can define multiple delegation rules.
Click to download/upload template
Enables mass editing or creation of teams. Steps:
Click Bulk CSV Update
Download the CSV template
Fill in the required team data
Upload the modified CSV to apply changes
Add Team
Click to open the team creation form.
It opens the "Add Team" configuration page, where you can manually create a new team by selecting a module, team type, and members.
Team Name
View only
Displays the name of the configured team.
Example: Default Approval Team.
Module
View only
Indicates the module the team is associated with, for example, ticket, change, and contract management.
Type
View only
Specifies the team's functional role, such as Approval, CAB, Technical, or Servicedesk.
Description
View only
Displays an internal note about the team’s purpose or assignment scope.
Example: All changes will be visible to this team.
Edit
Click to modify the existing team.
Opens the edit screen to update the module, team members, type, or description.
Delete
Click to remove a team
Deletes the selected team from the inventory.
Label
Action
Description / Example
Team Name*
Enter the team name.
Mandatory field. A unique identifier for the team.
Example: IT Service Desk – L1, Network Change Review Board.
Group Email ID
Enter shared group email (optional)
Used to send email notifications to multiple members.
Example: infraon-support@company.com. This should be a distribution group.
Description*
Enter description
Add notes or context about the team. Example: Handles all L1 ticket escalations for the Bangalore region.
Module*
Select from the dropdown
Team Type
Purpose
Usage Example
Approval
Users are responsible for reviewing and approving requests, changes, or releases.
Used in Request, Change, or Release modules as part of approval chains or thresholds.
Operational and Technical
Users who execute operational tasks, such as troubleshooting or maintenance.
Assigned to incident resolution, asset handling, or technical tasks in Ticket, Problem, or Project.
Servicedesk
Frontline users who log, categorize, assign, and respond to service tickets.
Typically used in Ticket or Live Chat modules.
Review
Users involved in periodic review processes, compliance checks, or validations.
Label
Action
Description / Example
Location Category
Select a location category from the dropdown
Defines the category under which the location falls.
Example: Country, Region, State, etc.
Select Value
Choose the value based on the selected category
Displays location options based on the chosen category. Example: India, USA, Bangalore.
Label
Action
Description / Example
Staff Selection
Choose between User Tags or Users
Determines how team members are assigned. User Tags: Automatically includes users who are tagged with the selected criteria. Users: Allows manual selection from all active users in the system.
Staff
Select from the dropdown.
Choose the appropriate user tags or individual users from the list based on the selected method. Example (User Tags): L1 Support, Network, Linux Admin Example (Users): John Smith, Anita Rao
Label
Action
Description / Example
Expertise
Select from the dropdown or enter to add a new expertise
Identify the domain or technical skills for the team.
Example: ITAM, NCCM, Log Management.
Add Tag
Enter the tag name and select the type.
When adding new expertise, input the tag name (e.g., log management), select the Type as Group, and then click Submit.
Enable send notifications to additional internal/external users
Toggle to activate
When enabled, notifications can be sent to selected support staff even if they are not directly assigned to the task.
Select Expertise
Choose an expertise tag from the dropdown.
Label
Action
Description / Example
Approval Sequence
Click the toggle button to enable
Activates the option to define multiple levels of approval. Once enabled, you can add users in the order in which approvals are to be received.
Sequence 1
Select from the dropdown
Choose the first-level approvers for the team. These users will be prompted for approval first. Example: Abdul, Abhirup, Alex Carry
Add
Click to add additional sequence rows.
This option allows adding second-level (or more) approval steps. The approval request will move to the following sequence only after the prior sequence is completed.
Sequence 2, 3...
Select users for each additional sequence
Request Signature
Click the toggle button to enable
Activates digital signature configuration for the selected team. Once enabled, signature rows can be added to define who must sign the document.
Signature 1
Select from the dropdown
Choose the first user required to provide a signature. This user will be prompted first during the signing process. Example: Alex Alexander
Add
Click to add additional signature rows
Adds more signature levels to the configuration. Use this option when multiple users must sign the document in sequence.
Label
Action
Description / Example
Delegate To Owner
Toggle to enable
This allows the delegation of approval or responsibility to the team owner. When enabled, tasks are redirected to the team owner.
Delegate To Staff Member
Toggle to enable
Enables delegation to a specific staff member. Useful when designated approvers or team members are unavailable.
Delegate From
Select a user from the dropdown
Choose the user whose tasks or approvals will be delegated. Example: Select John Smith (Team Approver)
Delegate To
Select an alternate user from the dropdown
Label
Action
Description/Example
Enabled
Enable the Level Enforcement toggle for the team.
Only Level 1 technicians from the selected team are available in the assignee dropdown during the initial assignment of a ticket or request. Once assigned, the ticket can be escalated to Level 2 or Level 3 as required. Existing assignments to higher-level technicians remain unchanged when the ticket is edited.
Example: A new ticket is assigned to a Level 1 technician. If the issue requires further investigation, it can be escalated to a Level 2 or Level 3 technician.
Disabled
Disable the Level Enforcement toggle for the team.
Technicians from all support levels—Level 1, Level 2, and Level 3—are available in the assignee dropdown during the initial assignment. The assignment follows the existing behavior without restricting technician selection by support level.
Example: An organization receives a complex technical issue that requires specialized expertise. The ticket can be assigned directly to a Level 2 or Level 3 technician based on the issue's requirements.
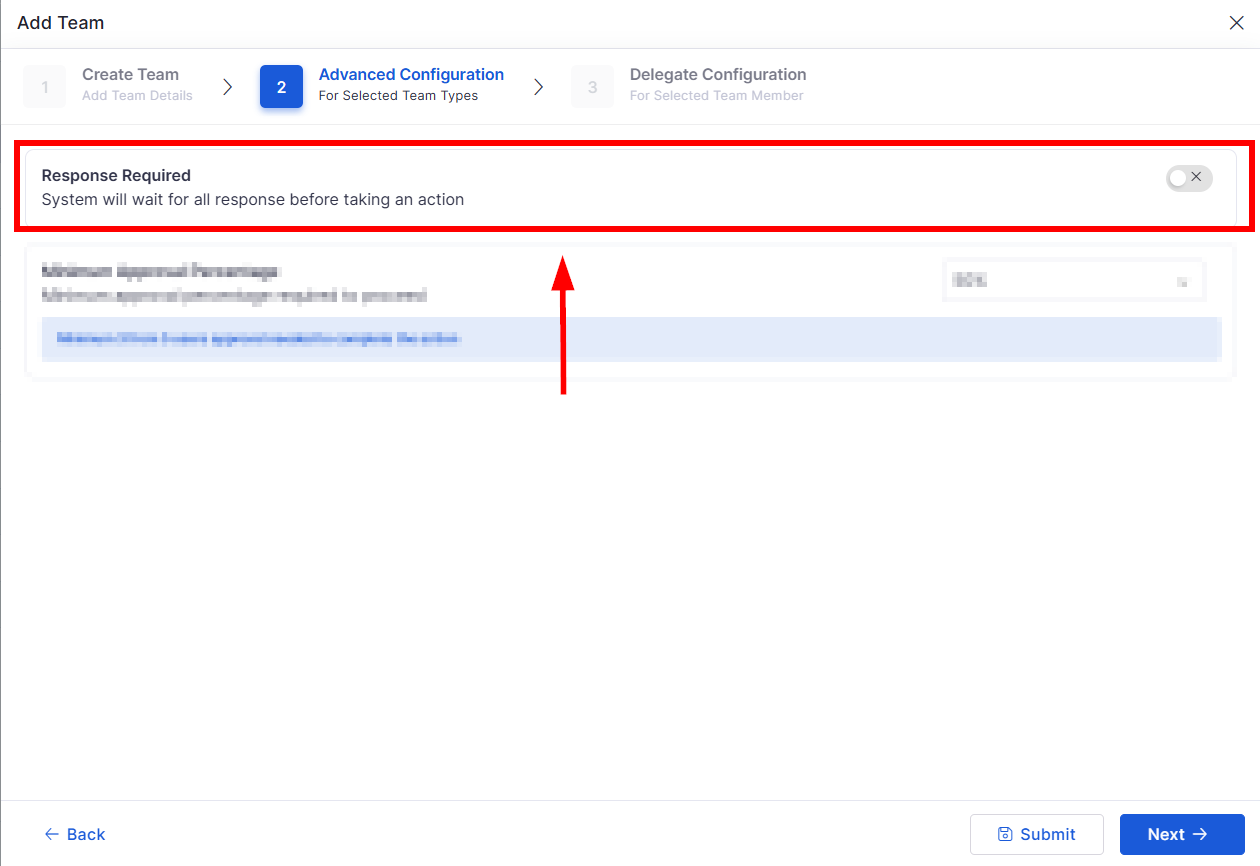
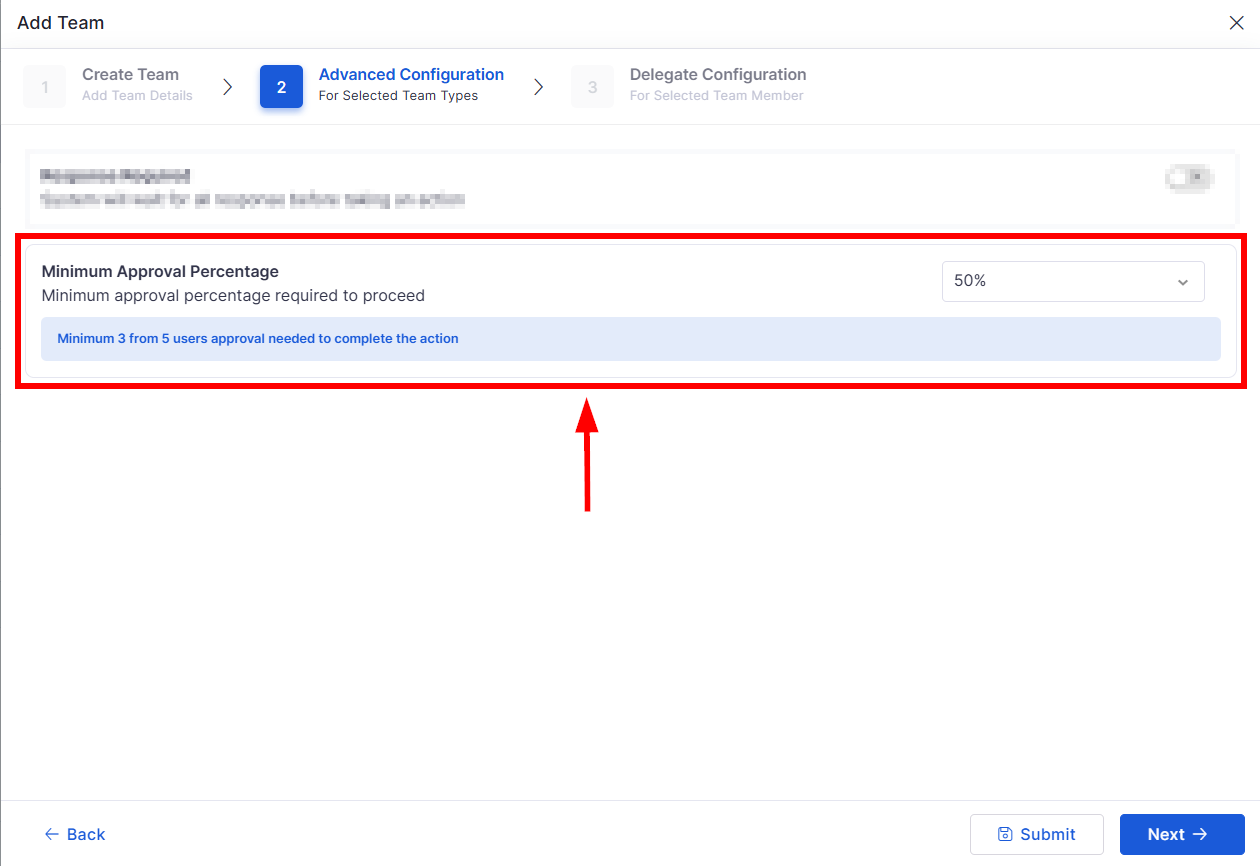

Choose the module to which the team belongs. Example options include: Ticket, Change, Problem, Service Request, Release, Live Chat, etc.
Used in Knowledge Base, Change Management, or Problem for formal assessments.
Determines the expertise area being configured for the support hierarchy.
Example: ITAM.
Define second-level or third-level approvers as needed. Example: Sequence 2 – John Doe, Sequence 3 – Team Lead
Signature 2, 3...
Choose the delegate who will take over the responsibilities. Example: Delegate to Jane Doe (Alternate Approver)
Select option
Defines the communication protocol and authentication mechanism used to connect with the Kafka cluster. This selection dynamically controls which additional fields are required (such as credentials or certificates). Available options include:
None
Plaintext
SASL (Plaintext)
Username, Password
Enables SASL-based authentication without encryption. Credentials are required to authenticate with the Kafka broker, but communication is not encrypted.
SASL (SSL)
Username, Password, Certificate
Provides both authentication and encryption. Requires valid credentials (username/password) along with an SSL certificate. This is the most secure option and recommended for production environments.
Connection Name *
Enter value
Specify a unique and identifiable name for the Kafka connection. Example: Ticket_Event_Stream, Production_Kafka
Brokers *
Enter value
Enter the Kafka broker endpoint(s) in “host: port” format. These brokers act as entry points to the Kafka cluster and are used to establish the connection. Multiple brokers can be provided (comma-separated) to ensure high availability and fault tolerance. Example: 192.168.1.10:9092, kafka-prod:9092
Status
Toggle on/off
Enables or disables the Kafka connection. When enabled (Active), the connection becomes available for selection in workflow actions. When disabled (Inactive), it is hidden from workflow configuration but remains saved in the system.
None
None
No authentication or encryption is applied. The connection is established without any security layer. Suitable only for trusted internal environments without enforced security.
Plaintext
None
Similar to “None”, but explicitly indicates communication over an unencrypted channel. Data is transmitted as plain text without encryption or authentication.
SSL
Certificate
Enables encrypted communication between Infraon and Kafka using SSL/TLS. A valid certificate key must be provided to establish a secure connection. No username/password authentication is required.
Security Type *
SASL (Plaintext)
Action
Description / Example
Profile Name*
Enter a name
Enter a name for the Discovery Profile. Discovery Profiles are used to save discovery preferences and identify profiles for tracking and periodic discovery.
Data Collector Details
Configure details
Select the Data Collector to be used for the Windows Servers discovery process.
The Data Collector is installed within the customer's network and communicates with the target environment using the configured protocols and credentials.
It collects the required inventory, availability, and performance information and sends the data to Infraon for monitoring.
Discovery Options
Select an option
Discover inventory with availability and performance monitoring.
Discover only Inventory Information.
Discover inventory with availability and performance monitoring.
Discover only Inventory Information
Select an option
Discovers and collects basic inventory information about the selected devices or resources, such as device details, configuration, and hardware/software information. Availability and performance monitoring are not enabled.
Discover inventory with availability monitoring
Select an option
Discovers inventory information and enables availability monitoring to check whether the device or resource is reachable and operational.
Discover inventory with availability and performance monitoring
Select an option
Discovers inventory information and enables both availability and performance monitoring. IMS checks device availability and collects performance metrics for ongoing monitoring.
Provide Profile Details
Enter details
Add a brief description of the discovery profile and the Windows servers to be discovered.
Example: Windows Production Servers.
IP Address*
Enter IP details
Enter an IP address, IP range, or subnet to be discovered.
Import from CSV
Import a file
Import a device list from a CSV file instead of manually entering the IP address, IP range, or subnet. This option is optional.
Device Credentials
Select a credential
Create device credentials before discovering Windows Servers.
Select a WMI credential containing the authentication and connection details required to communicate with the Windows server.
The selected credential allows IMS to establish connectivity and collect server inventory, availability, and performance information.
Click Next to configure Filters.
The Filters section allows you to control which Windows servers are included or excluded from discovery and select the server components to be monitored.
The Filters section contains three areas:
Default Filters
Device Filters
Server Component Filters
Filters | Default Filters
Label
Action
Description / Example
Filter By Ping
Enable or disable
Filters Windows servers based on their response to a ping check.
Ping Monitor
Enable or disable
Enables ping monitoring to check whether the Windows server is reachable.
Filters | Device Filters
Label
Action
Description / Example
Device Filters
Select a condition
Configure conditions to include or exclude specific Windows servers from discovery.
Include Devices / Exclude Devices
Select an option
Specify whether matching devices should be included in or excluded from discovery.
Equals / Contains
Select an operator
Select the operator used to match the specified value.
Number or Device Name
Enter a value
The filter condition follows:
Include Devices / Exclude Devices → IP Address / Device Type / Device Name → Equals / Contains → Number or Device Name
You can add additional filter conditions as required.
Filters | Server Component Filters
Label
Action
Description / Example
Process
Enable or disable Process monitoring
Monitors running processes on the server and provides information about their status and activity.
Service
Enable or disable Service monitoring
Tracks server services and provides visibility into their operational status.
SQL
Enable or disable SQL Core Monitoring
Provides monitoring information for SQL database components and their performance.
DotNet
Enable or disable DotNet Core Monitoring
Click Next to configure the Schedule.
The Schedule section determines when the Windows Server Discovery should be initiated. You can start the discovery immediately using Discover Now or configure a Discovery Schedule to run it at a specified date and time. To learn more, .
Label
Filter by Policy Name
Enter a policy name or keyword.
Filters the policy list based on the policy name.
Example: Enter Enterprise Agent Policy to locate the policy.
Name
View the policy name.
Displays the name assigned to the Agent Control Policy.
Agents
View the agent count.
Displays the number of agents associated with the policy.
To create a new Agent Control Policy, select Add Policy from the Agent Control Policy page.
The policy is configured through the following steps:
The Configuration step defines the configuration details and rules for the selected agents. After completing Agent Details, click Next to proceed to Configuration. The configuration defined in this step determines the agent behaviour governed by the policy.
The Configuration section allows administrators to define how the agent communicates with the system, what performance information it collects, and which events and software-related information it manages.
Configuration | Basic Details
The Schedule step is used to define when the configured Agent Control Policy should be applied. After completing the configuration, proceed to Schedule to specify the required schedule options.
The Schedule section allows you to define when the agent inventory should be synchronized with the system. Select a schedule mode and specify the required date and time.
Profile Name*
Enter a profile name
Specifies the name of the MySQL discovery profile.
Discovery Options
Select a discovery option
Determines the level of information and monitoring to be enabled for the discovered MySQL database.
Discover inventory with availability and performance monitoring
Select the option
Discovers MySQL inventory information and enables both availability and performance monitoring.
Provide Profile Details
Enter profile information
Provides additional information required for the MySQL discovery profile.
IP Address
Enter IP details
Enter an IP address, IP range, or subnet to be discovered.
Device Credentials
Select a credential profile
Click Next to proceed to the Filter section.
The Filters section allows you to control which Wireless Controllers are included or excluded from discovery and configure monitoring for specific network components.
The Filters section contains three areas:
Default Filters
Device Filters
Network Component Filters
Filters | Default Filters
Filter By Ping
Enable or disable
Filters Wireless Controllers based on their response to a ping check.
Ping Monitor
Enable or disable
Enables ping monitoring to check whether the Wireless Controller is reachable.
Filters | Device Filters
Device Filters
Select a condition
Configure conditions to include or exclude specific Wireless Controllers from discovery.
Include Devices / Exclude Devices
Select an option
Specify whether matching devices should be included in or excluded from discovery.
Filter Type
Select an option
Select the required filter type, such as IP Address, Device Type, or Device Name.
The filter condition follows:
Include Devices / Exclude Devices → IP Address / Device Type / Device Name → Equals / Contains → Number or Device Name
Filters | Network Component Filters
Access Points
Enable or disable
Enables or disables Access Point Monitoring for access points managed by the Wireless Controller.
Host
Enable or disable
Enables or disables Host Monitoring for the Wireless Controller host.
Click Next to configure the Schedule.
The Schedule section determines when the MySQL Discovery should be initiated. You can start the discovery immediately using Discover Now or configure a Discovery Schedule to run it at a specified date and time. To learn more, click here.
Description / Example
Profile Name*
Enter a name.
Add a name for the Discovery Profile. Discovery Profiles help save preferences and identify profiles for tracking and periodic discovery.
Data Collector Details
Configure details
Select the Data Collector to be used for the VMware discovery process.
The Data Collector is installed within the customer's network and communicates with the target environment using the configured protocols and credentials.
It collects the required inventory, availability, and performance information and sends the data to Infraon for monitoring.
Discovery Options
Select an option
Discover inventory with availability and performance monitoring.
Discover only Inventory Information.
Discover inventory with availability and performance monitoring.
Discover only Inventory Information
Select an option
Discovers and collects basic inventory information about the selected devices or resources, such as device details, configuration, and hardware/software information.
Availability and performance monitoring are not enabled.
Discover inventory with availability monitoring
Select an option
Discovers inventory information and enables availability monitoring to check whether the device or resource is reachable and operational.
Discover inventory with availability and performance monitoring
Select an option
Discovers inventory information and enables both availability and performance monitoring.
IMS checks device availability and collects performance metrics for ongoing monitoring.
Provide Profile Details
Enter a description.
Add a brief description of the discovery profile and the VMware environment to be discovered.
IP Address*
Enter an IP address, IP range, or subnet.
Specify the IP address, IP range, or subnet of the VMware environment to be discovered.
Import from CSV
Import a CSV file.
Import the list of VMware resources from a CSV file instead of manually entering the IP address, IP range, or subnet.
Device Credentials
Select a credential.
Create device credentials before performing VMware Discovery.
Select an HTTP credential containing the authentication and connection details required to communicate with the VMware environment.
The selected credential enables IMS to establish connectivity and collect virtualization and infrastructure information.
Click Next to configure Filters.
The Filters section allows you to include or exclude specific VMware resources from the discovery process. Filters are optional.
The Filters section contains two areas:
Default Filters
Device Filters
Filters | Default Filters
Label
Action
Description / Example
Filter By Ping
Enable or disable.
Filters VMware resources based on their response to ping.
Ping Monitor
Enable or disable.
Enables ping monitoring to check whether the VMware resource is reachable.
Filters | Device Filters
Label
Action
Description / Example
Include Devices / Exclude Devices
Select a condition.
Select whether to include or exclude devices from the discovery process.
Filter Type
Select a filter type.
Select IP Address, Device Type, Device Name, or another available value.
Condition
Select a condition.
Choose the required condition to define the filter criteria.
Value
Enter or select a value.
After configuring the required Device Filters, click Next to configure the Schedule.
The Schedule section determines when the VMware Discovery should be initiated. You can start the discovery immediately using Discover Now or configure a Discovery Schedule to run it at a specified date and time. To learn more, .
Label
Action
Enter the value used to identify the Windows servers.
Provides monitoring information for .NET components and their runtime status.
Exchange
Enable or disable Exchange Core Monitoring
Provides visibility into Microsoft Exchange components and their availability.
SharePoint
Enable or disable SharePoint Core Monitoring
Provides monitoring information about SharePoint components and their operational status.
Active Directory
Enable or disable Active Directory Monitoring
Provides visibility into Active Directory services and directory-related activities.
IIS
Enable or disable IIS Monitoring
Provides monitoring information about Internet Information Services (IIS) and hosted web applications.

Create an application credential before performing MySQL Discovery. Select an Application credential configured with the required MySQL authentication and connection details. The selected credential enables IMS to establish connectivity and collect database information.
Data Collector Details*
Select details
Select the Data Collector to be used for the MySQL discovery process. The Data Collector is installed within the customer's network and communicates with the target environment using the configured protocols and credentials. It collects the required inventory, availability, and performance information and sends the data to Infraon for monitoring.
Equals / Contains
Select an operator
Select the operator used to match the specified value.
Number or Device Name
Enter a value
Enter the value used to identify the Wireless Controller.
+
Add a condition
Add additional filter conditions as required.


Specify the IP address, device type, device name, or corresponding value based on the selected filter.
+
Click to add a condition.
Add additional filter conditions as required.


Agent Heartbeat Interval
Enter the interval in seconds.
Defines how frequently the agent sends a heartbeat to the system to indicate that it is active and connected.
Example: Enter 60 to send a heartbeat every 60 seconds.
Collect Performance Metrics
Enable or disable the option.
Enables the agent to collect performance-related metrics from the associated asset. When enabled, the agent collects the configured performance information.
Performance Metrics Sync Interval
Enter the interval in seconds.
Defines how frequently the collected performance metrics are synchronized with the system.
Example: Enter 300 to synchronize the metrics every 300 seconds.
Enable Event Collection
Enable or disable the option.
Controls whether the agent collects events generated by the associated asset.
When enabled, relevant events are collected and synchronized with the system.
Device Uptime Tracking
Enable or disable the option.
Enables tracking of the device's uptime information through the agent.
Enable Software Metering
Enable or disable the option.
Once added, click Next to continue.
Select the required schedule frequency: Once, Every, Daily, Weekly, or Monthly.
Determines how often the inventory synchronization is performed.
Once
Select Once and specify the date and time.
Runs the inventory synchronization only once at the specified date and time.
Every
Select Every and configure the required interval.
Runs the inventory synchronization repeatedly at the configured interval.
Daily
Select Daily and specify the time.
Runs the inventory synchronization every day at the specified time.
Example: Daily at 11:30 AM.
Weekly
Select Weekly and configure the required day and time.
Runs the inventory synchronization every week according to the configured schedule.
Monthly
Select Monthly and configure the required date and time.
Runs the inventory synchronization every month according to the configured schedule.
At
Select the date and enter the time.
Specifies when the inventory synchronization should run.
Example: 14 August 2026 at 11:30 AM.
After entering the scheduling details, click Submit to finalize the policy.
Defines the name used to identify the Agent Control Policy.
Example: Enterprise Agent Policy.
Select Agent*
Search for and select the required agents.
Determines which agents the policy will be applied to.
Search
Enter a keyword.
Searches the available agents to help locate the required agent.
Filter
Apply filter conditions.
Filters the available agents based on selected criteria.
Filter Condition
Define the required filtering criteria.
Allows administrators to narrow down the agent list based on specific agent/asset attributes.
Field
Select an attribute.
Defines the attribute on which the filter is applied.
Example: Asset Name.
Operator
Select the required operator.
Defines how the selected attribute should be evaluated.
Example: not in.
Value
Select or enter the required value.
Specifies the value against which the condition is evaluated.
Example: Select one or more asset names.
Add Control Policy
Add the selected control policy
Adds the selected control policy to the list of policies assigned to the asset.
Example: Select a control policy and click Add Control Policy to assign it to the asset.
Remove Control Policy
Remove the selected control policy
Removes the selected control policy from the asset's assigned policy list.
Example: Select an assigned control policy and click Remove Control Policy to unassign it.
Select All
Select all the listed control policies
Selects all control policies displayed in the list, allowing you to add or remove multiple policies at once.
Example: Click Select All to select every policy currently displayed.
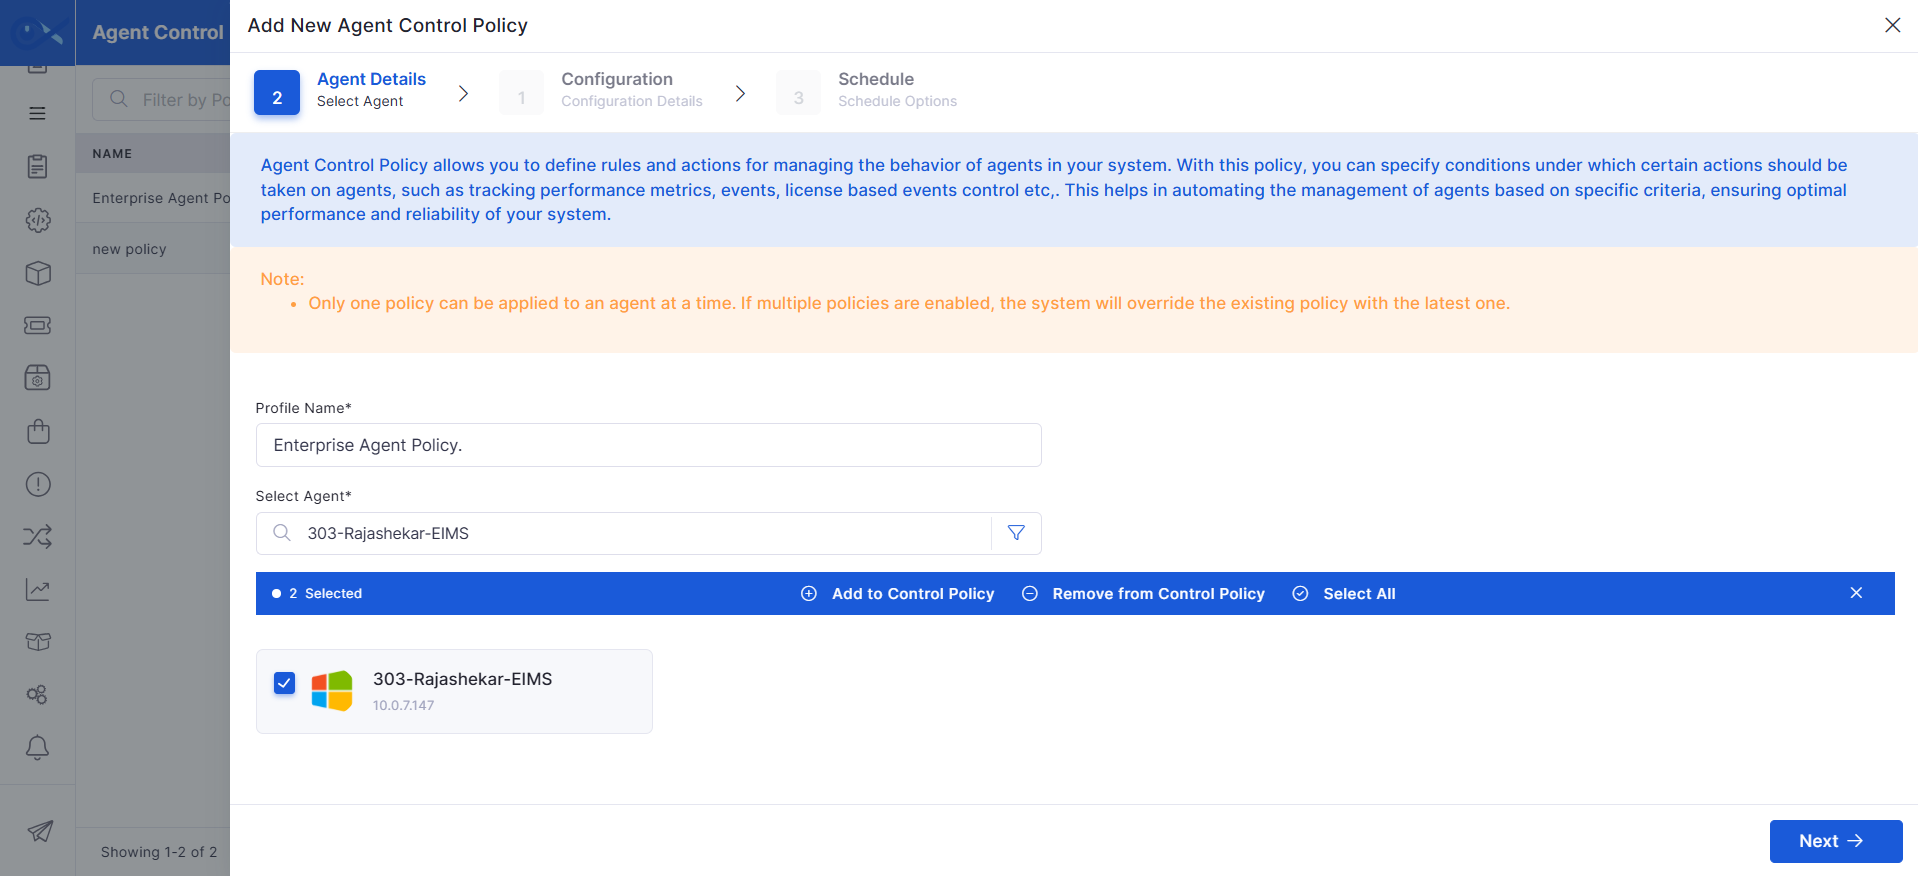
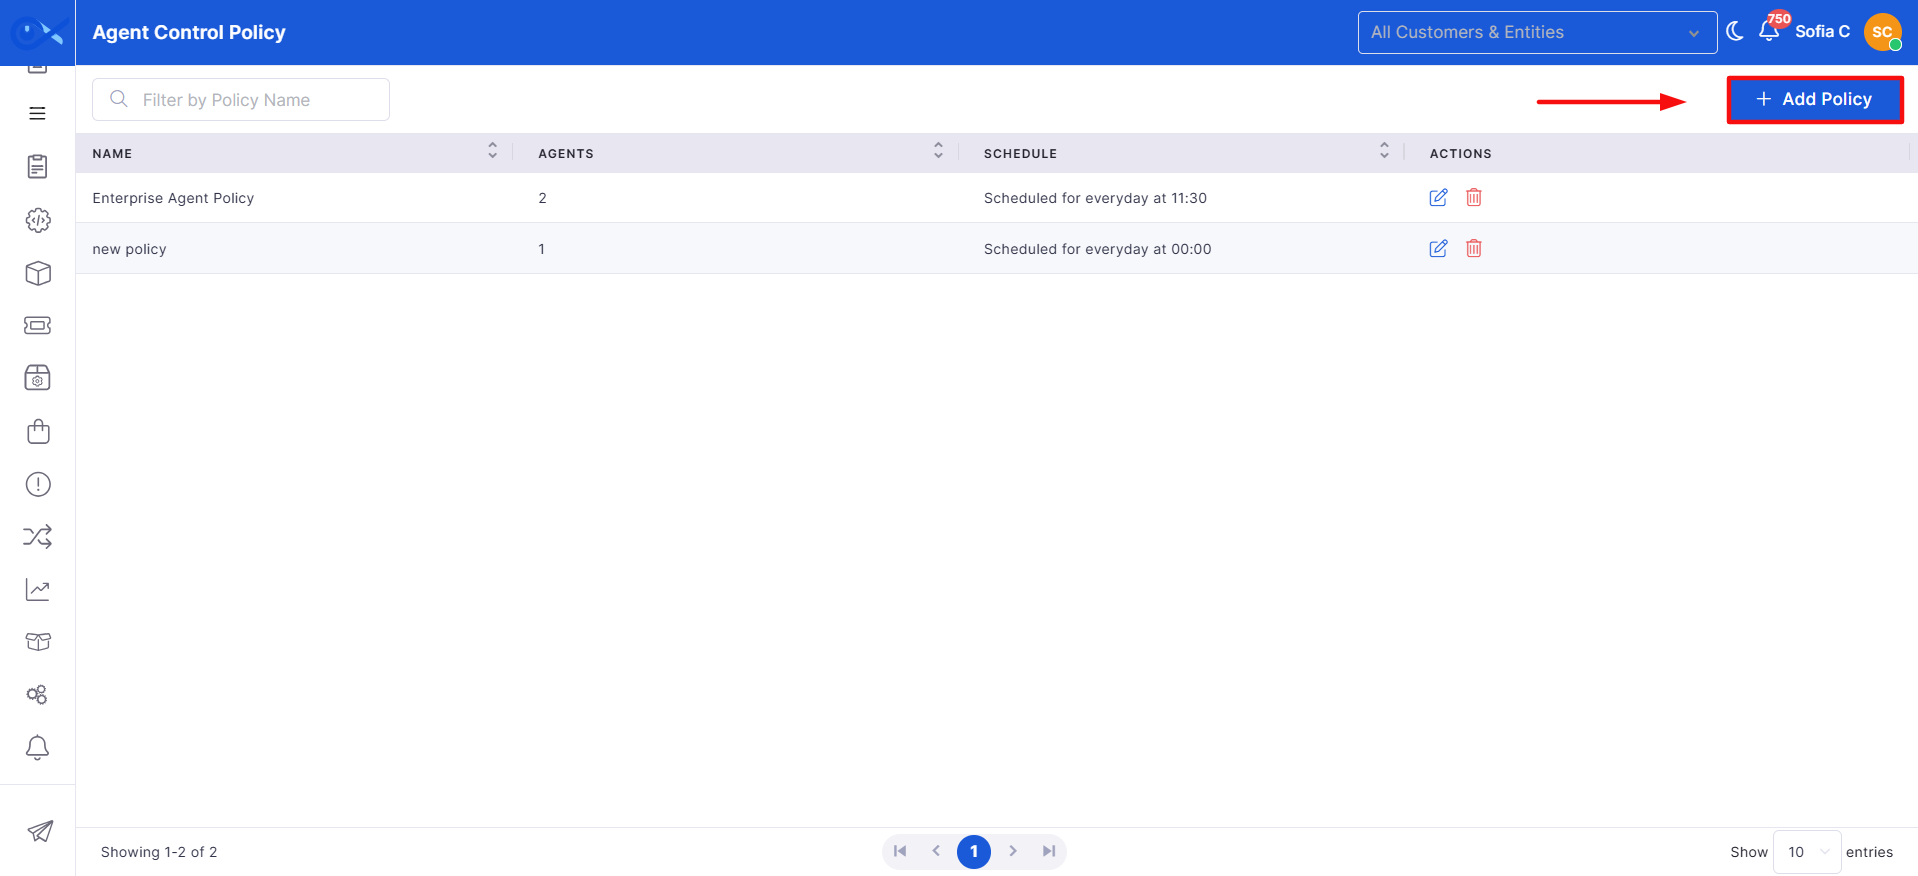
Schedule Mode
SASL (SSL)
The Automatic Discovery allows you to configure and initiate discovery for Network, Windows, and SSH-supported devices. The Automatic Discovery process identifies supported devices based on the configured IP address, IP range, or subnet and collects the required device information. You can configure the discovery profile, credentials, filters, monitoring options, and agents before starting the discovery.
There are three tabs on the 'Automatic Discovery page.
Discovery Details | Filters | Schedule
The Discovery Details section provides the discovery profile, device information, credentials, agent details, and data collector details settings.
Discovery Details | Profile and Discovery Information
Label
* Fields are mandatory.
The Filters section allows you to control which devices are included or excluded from discovery and which server components are monitored. It contains Device Filters, Server Component Filters, and Port.
Click 'Next' to add details on 'Filters.'
The Filters section contains four areas:
Default Filters
Device Filters
Server Component Filters
Port Monitoring
The Filters section is optional. You can click Next without configuring any filters.
Filters | Default Filters
Filters | Device Filters
Include Devices/Exclude Devices -> IP Address/Device Type/Device Name -> Equals/Contains -> Number or Device name
Filters | Server Component Filters
Filters | Port Monitoring
After adding Device Filters, click 'Next' to add 'Schedule.'
The Schedule section determines when Automatic Discovery should start. You can start discovery immediately using Discover Now or configure a Discovery Schedule.
Schedule | Types
The Discovery Schedule section lets you specify when discovery should run.
Scheduling Mode | Basic Details
Scheduling Fields | Basic Details
After adding details to the 'Discovery Schedule,' click 'Submit' to initiate the 'Automatic Discovery.'
On Successful discovery, Download Jobs (per device) will be created automatically using the inputs provided on the Discovery Page and from System Default, and the Configurations and operational Data will be downloaded immediately.
The Configure SMS Gateway section is used to configure SMS delivery services for the platform.
The module contains the following configuration types:
Global Configuration
Customer Specific Configuration
Global Configuration defines system-wide SMS gateway settings that apply across the platform. Administrators can configure:
SMS provider details
Authentication parameters
Request headers
Query parameters
SMS delivery methods
SMPP settings
The configuration process contains two steps:
Configuration
Test
Select SMS Gateway in the SMS Config Type field to configure API or HTTP-based SMS delivery services.
This configuration type is generally used for third-party SMS providers that support REST APIs or URL-based SMS requests.
Follow the table below for more details.
Configuration Details | SMS Gateway
Configure request parameters required by the SMS provider API for authentication, recipient details, message content, routing, and other delivery settings.
Select SMPP Gateway in the SMS Config Type field to configure SMPP protocol-based SMS communication.
This configuration type is generally used for enterprise-grade SMS delivery and telecom provider integrations supporting SMPP connectivity.
Follow the table below for more details.
Configure DLT (Distributed Ledger Technology) parameters required for telecom regulatory compliance and SMS delivery validation in supported regions.
Once added, click on Submit to save the SMS gateway configuration details configured for the selected SMS provider.
Click on Test & Save to validate the configured SMS gateway settings by sending a test request and saving the configuration after successful verification.
After adding the SMS configuration details, users can move to the Test section to validate SMS delivery before saving the configuration.
The Test section helps administrators verify:
Gateway connectivity,
Message delivery,
Request parameter configuration,
And the SMS provider response.
Follow the table below for more details.
Click on Save to save the SMS gateway configuration after successful testing and validation of the configured settings.
Feature
Description / Example
RDP Agent
Installed on the target system to allow remote access. Runs as a background service, allowing admins to initiate unattended sessions without user intervention. Example: IT admin installs the agent on a user’s laptop, enabling direct remote access during off-hours for patching.
RDP Assistant
Works with user consent. Prompts the end user to accept/deny access requests. Does not run as a background service. Example: A technician sends an RDP request; the user clicks Allow before the session begins.
Immediate Access (Unattended)
Provides instant access without requiring user confirmation. Enabled only if the RDP Agent is installed. Example: Admin takes unattended access at midnight to install updates without disturbing the user.
Sessions can be scheduled for a specific date and time, with a defined duration. Session ends automatically once the scheduled time expires. Example: A 10-minute session scheduled at 5:30 PM for troubleshooting.
The RDP module operates through two components — the Mesh Agent and the Mesh Assistant — that determine how remote sessions are handled. Both integrate with the Infraon platform to provide secure remote access options depending on the use case.
The Mesh Agent is installed as a background service on the user’s computer and is primarily designed for unattended remote access. Once installed, it runs automatically at startup, allowing administrators to control and manage systems even if no user is logged in.
This makes it particularly useful for managing servers or always-on workstations that require continuous availability.
In contrast, the Mesh Assistant provides a lightweight, user-friendly interface for on-demand support. Unlike the Agent, it does not run as a background service and requires the user to be present to approve each remote session.
This makes it better suited for helpdesk scenarios or temporary troubleshooting, where sessions are initiated with the user’s consent and end once the session is closed.
Admin/technician initiates a request for RDP access.
Depending on the setup:
Assistant (Consent-based): The end user receives a prompt to allow or deny access.
Agent (Unattended): The remote session begins instantly without user interaction.
The backend system ensures secure communication between the Infraon platform, central server, and user device.
Agent/Assistant Installation
User devices must have either the Mesh Agent (background service) or Mesh Assistant installed.
Devices are mapped via serial numbers and tied to organization-specific keys for security.
Server Communication
The RDP installation process enables administrators and technicians to prepare end-user devices for remote access sessions. Installation must be completed on the requester’s device (not the technician’s system) before scheduling or initiating RDP.
Once installed, the RDP Agent or Assistant enables secure remote desktop connectivity, file transfers, chat, and session recording, all based on the configured permissions.
Step 1: Navigate to the Inventory Agent Page
Go to Infraon Configuration > Bot > Inventory Agent Page.
The list of available agents will be displayed.
In the Actions section, locate the Install RDP icon.
Step 2: Select Installation Type
Click on the Install RDP icon.
A sidebar titled Select Mesh Agent will appear.
Two options will be shown with toggle buttons:
Mesh Agent (Background Agent) – for unattended remote access.
If Mesh Agent is selected → Mesh Assistant is disabled automatically.
If Mesh Assistant is selected → Mesh Agent is disabled automatically.
Step 3: Install the Agent
Enable the desired toggle option (Mesh Agent or Mesh Assistant) and click Submit.
On submission:
a. If Mesh Agent is selected → RDP Agent will be installed at
b. If Mesh Assistant is selected → RDP Assistant will be installed at
C:\ProgramData\Microsoft\Windows\Start Menu\Programs\Startup
The device status will update to RDP Agent Installation Request Sent.
Step 4: Verify Installation Status
The installation may take a few minutes to reflect.
If required, perform a Rescan (can take 15–30 minutes).
If not updated within 24 hours, the status will automatically refresh.
Once installed, the status changes to:
RDP Agent is running (green) → Installation successful.
Agent is installed, but the service is not running (red) → Installation failed or is inactive.
To troubleshoot:
Go to the Services panel on the device, locate InfraonAgent, and restart the service.
The installation is now complete. to learn how to schedule an RDP session.
The Wireless Controller discovery feature allows Infraon to discover wireless controllers and the access points they manage using the SNMP protocol. It collects controller and associated access-point information and can enable inventory, availability, and performance monitoring based on the selected discovery configuration.
The selected Data Collector uses the configured SNMP credentials to connect to the wireless controller and retrieve information through SNMP. After successful communication, Infraon collects details about the controller and the access points it manages, such as device identity, status, interfaces, and available performance metrics. Infraon then adds the discovered controller and associated access points to the inventory, applying availability and performance monitoring based on the selected discovery options.
There are three tabs on the Wireless Controller page:
Discovery Details | Filters | Schedule
The Discovery Details section is used to provide the discovery profile, discovery options, device information, credentials, and agent details.
Discovery Details | Profile and Discovery Information
Click Next to configure Filters.
The Filters section allows you to control which Wireless Controllers are included or excluded from discovery and configure monitoring for specific network components.
The Filters section contains three areas:
Default Filters
Device Filters
Network Component Filters
The Filters section is optional. You can click Next without configuring any filters.
Filters | Default Filters
Filters | Device Filters
The filter condition follows:
Include Devices / Exclude Devices → IP Address / Device Type / Device Name → Equals / Contains → Number or Device Name
Filters | Network Component Filters
Click Next to configure the Schedule.
The Schedule section determines when the Wireless Controller Discovery should be initiated. You can start the discovery immediately using Discover Now or configure a Discovery Schedule to run it at a specified date and time. To learn more, .
Infraon automatically converts emails into tickets and sends them to end-users using IMAP configuration. It saves tremendous time to send tickets from the mail manually.
IMAP (Internet Message Access Protocol) is a standard email retrieval (incoming) protocol. It saves email messages on a mail server and allows recipients to see and edit them as if they were locally saved on their device(s).
You can configure your email servers on Infraon using the IMAP Configuration module, which allows us to read emails and turn them into incidents.
Administrators or privileged users can configure (add), edit, and delete IMAP configurations. Refer to the 'Email Integrations' section for instructions to forward from your existing email accounts.
Navigate to Infraon Configuration → Infraon Automation → Mail Automator.
Click the "New Config" button to begin IMAP setup.
Enables software metering for the associated assets, allowing software usage information to be collected through the agent.
Enable Software Metering Rule Sync
Enable or disable the option.
Enables synchronization of software metering rules with the agent so that the configured metering rules can be applied to the associated assets.
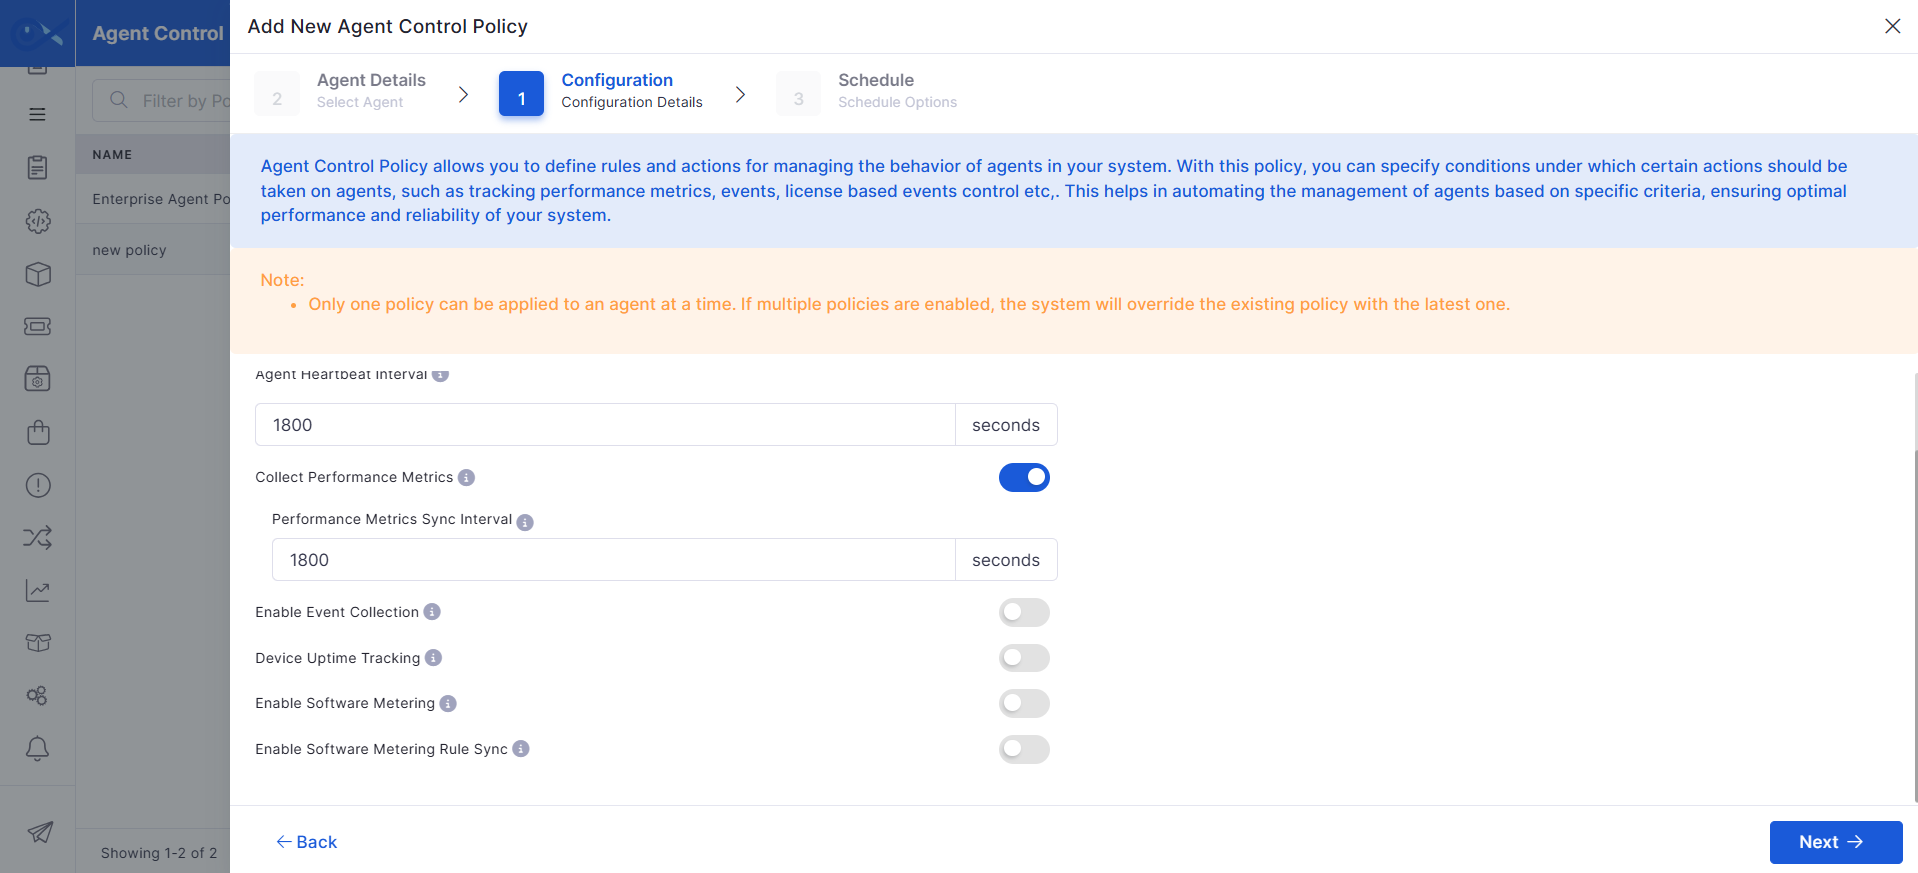
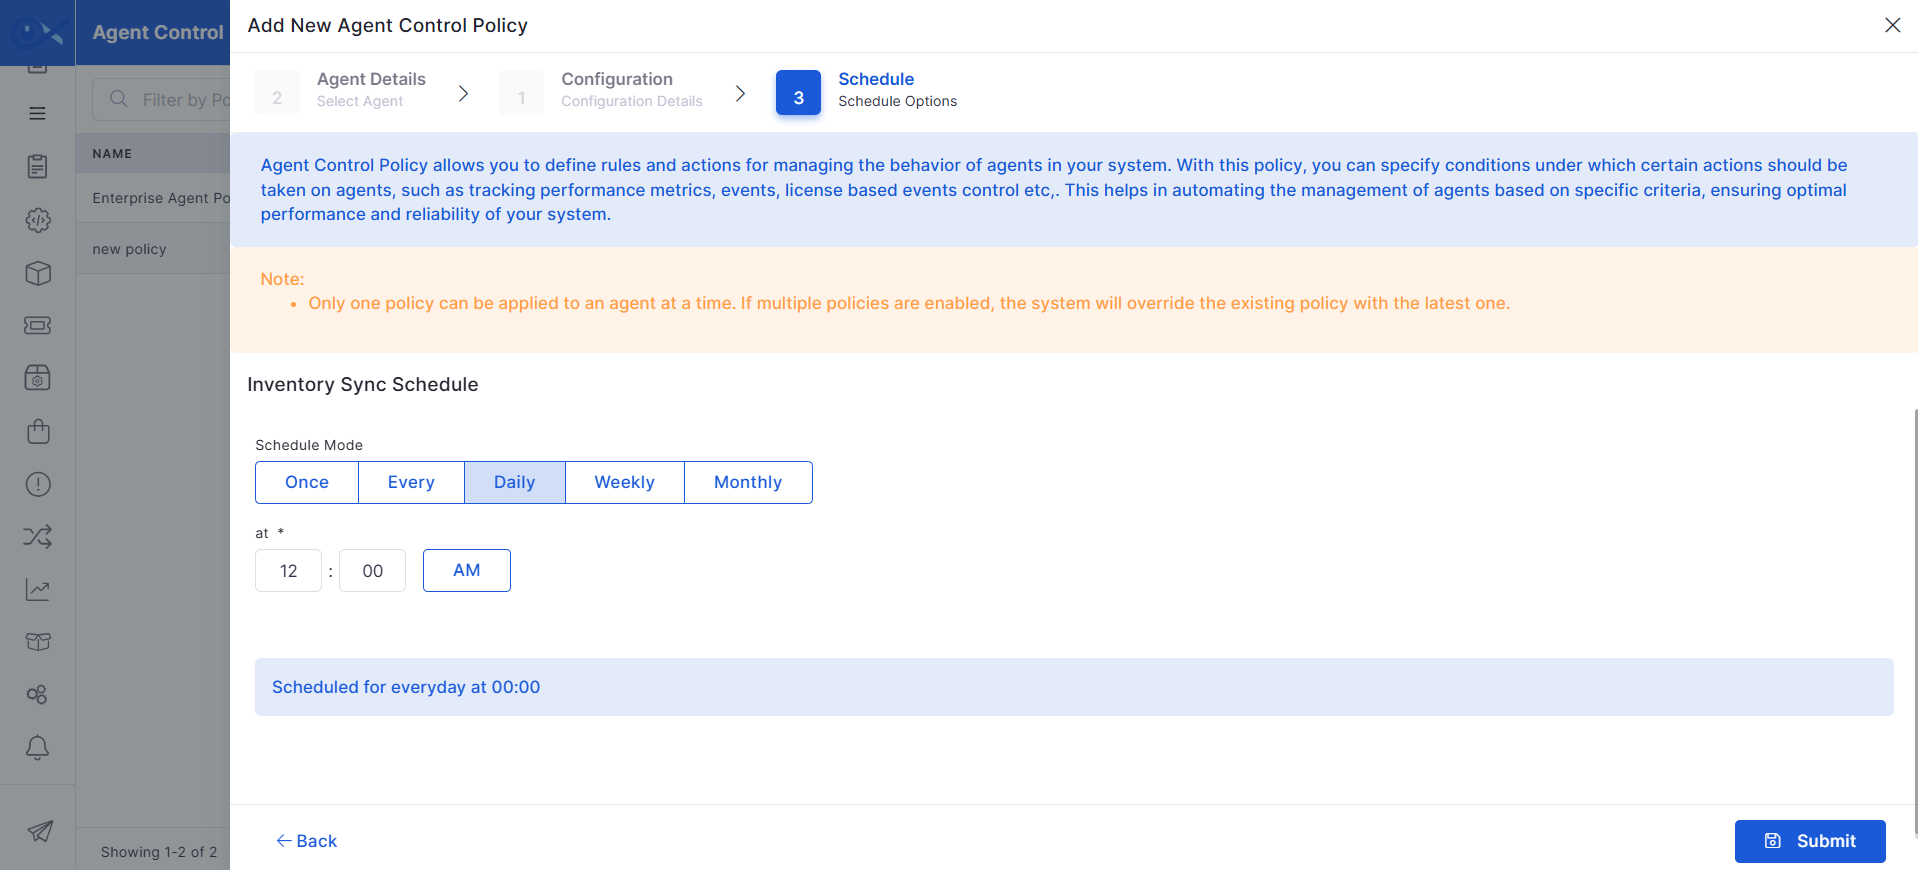
Server Flavour
Select one or more server flavors
Filters monitoring results by the server operating system/flavor.
For example, selecting Ubu filters the results to Ubuntu servers.
Monthly
Runs Automatic Discovery once each month at the specified date and time.
Perform monthly discovery to periodically reconcile devices and identify changes in a stable network.
Action
Description / Example
Profile Name*
Enter a name
Enter a name for the Discovery Profile. The profile name helps identify and track the discovery configuration.
Data Collector Details
Configure details
Select the Data Collector to be used for the Automatic discovery process.
The Data Collector is installed within the customer's network and communicates with the target environment using the configured protocols and credentials.
It collects the required inventory, availability, and performance information and sends the data to Infraon for monitoring.
Discovery Options
Select an option
1. Discover inventory with availability and performance monitoring.
2. Discover only Inventory Information.
3. Discover inventory with availability and performance monitoring.
Discover only Inventory Information
Select an option
Discovers and collects basic inventory information about the selected devices or resources, such as device details, configuration, and hardware/software information. Availability and performance monitoring are not enabled.
Discover inventory with availability monitoring
Select an option
Discovers inventory information and enables availability monitoring to check whether the device or resource is reachable and operational.
Discover inventory with availability and performance monitoring
Select an option
Discovers inventory information and enables both availability and performance monitoring. IMS checks device availability and collects performance metrics for ongoing monitoring.
Provide Profile Details
Enter details
Add a brief description of the discovery profile.
Example: For WMI devices, Desktops only.
IP Address*
Enter IP details
Enter an IP address, IP range, or subnet to be discovered.
Import from CSV
Import a file
Import a device list from a CSV file. This option is optional.
Device Credentials
Select a credential
Create device credentials before performing Automatic Discovery.
The credential contains the authentication and connection details IMS needs to communicate with target devices during discovery.
Select a credential that matches the protocol supported by the target device.
For Automatic Discovery, the supported protocols are SNMP, WMI, SSH, TELNET, and HTTP. The selected credential establishes connectivity, collects device information, and supports monitoring of the discovered device.
Label
Action
Description / Example
Filter By Ping
Enable or disable
Filters devices based on their response to a ping check.
Ping Monitor
Enable or disable
Uses ping monitoring to check whether a device is reachable.
Label
Action
Description / Example
Device Filters
Select a condition
Configure conditions to include or exclude devices from discovery.
Include Devices / Exclude Devices
Select an option
Specify whether matching devices should be included in or excluded from discovery.
Contains
Select an operator
When Device Name is selected, choose whether the value should exactly match or contain the specified text.
Value
Enter a value
Label
Action
Description / Example
Process
Select a process or choose All
Filters the server components based on the Process being monitored. For example, selecting All displays components for all available processes.
Process Name
Enter or select a process name
Filters the results by a specific process name. For example, selecting a process name displays monitoring information related to that process.
Service
Select a service or choose All
Filters the server components based on the Service being monitored.
Service Name
Enter or select a service name
Label
Action
Description / Example
Port
Enable or disable
Enables monitoring of specific network ports during the discovery process. When enabled, IMS checks the configured ports to verify whether the associated services are reachable and available on the discovered device.
Port Monitoring
Select or enter the port to monitor
Specifies the network port that IMS should monitor for the selected device or service. The selected port is checked during discovery to determine whether the corresponding service is reachable.
Example: Port 80 for HTTP, 443 for HTTPS, or 22 for SSH.
Label
Action
Description / Example
Discover Now
Enable the option
Initiates the discovery from the current time. This option is enabled by default when no Discovery Schedule is configured.
Discovery Schedule
Configure a schedule
Schedule Automatic Discovery to run according to the selected schedule mode and date/time.
Scheduling Mode
Purpose
Example Use Case
Once
Runs Automatic Discovery one time at the specified date and time.
Perform an initial discovery when adding a new network range or subnet.
Every
Runs Automatic Discovery repeatedly at a specified interval.
Run discovery every 6 hours to identify newly added or changed devices in a dynamic network.
Daily
Runs Automatic Discovery once every day at the specified time.
Perform daily discovery to identify newly connected devices and update device information.
Weekly
Runs Automatic Discovery on a selected day of the week and at the specified time.
Label
Action
Description / Example
at*
Select the date and time when the Discovery should run.
This field's availability may vary based on the selected scheduling mode.
Example: 23 September 2026, 11:30 AM
Summary Message
View Summary Message
Displays a confirmation summary of the configured Automatic Discovery schedule.
Example: Scheduled on 23 September 2026, 11:30


Enter the value used to identify the devices.
Filters the results by a specific service name. For example, selecting a service displays monitoring information for that service.
Run discovery every Sunday to periodically identify changes in the network environment.
Number or Device Name
Enter a value
Enter the value used to identify the Wireless Controller.
+
Add a condition
Add additional filter conditions as required.
Label
Action
Description / Example
Profile Name*
Enter a name
Enter a name for the Discovery Profile. Discovery Profiles are used to save discovery preferences and identify profiles for tracking and periodic discovery.
Data Collector Details
Configure details
Select the Data Collector to be used for the Wireless Controller discovery process.
The Data Collector is installed within the customer's network and communicates with the target environment using the configured protocols and credentials.
It collects the required inventory, availability, and performance information and sends the data to Infraon for monitoring.
Discovery Options
Select an option
1. Discover inventory with availability and performance monitoring.
2. Discover only Inventory Information.
3. Discover inventory with availability and performance monitoring.
Discover only Inventory Information
Select an option
Discovers and collects basic inventory information about the selected devices or resources, such as device details, configuration, and hardware/software information.
Availability and performance monitoring are not enabled.
Discover inventory with availability monitoring
Select an option
Discovers inventory information and enables availability monitoring to check whether the device or resource is reachable and operational.
Discover inventory with availability and performance monitoring
Select an option
Discovers inventory information and enables both availability and performance monitoring.
IMS checks device availability and collects performance metrics for ongoing monitoring.
Provide Profile Details
Enter details
Add a brief description of the discovery profile and the Wireless Controllers to be discovered.
Example: Corporate Wireless Controllers.
Primary IP Address*
Enter IP details
Enter an IP address, IP range, or subnet to be discovered.
Secondary IP Address
Enter IP details
Enter the secondary IP address, if applicable, for the SD-WAN device or environment.
Device Credentials
Select a credential
Create device credentials before performing Wireless Controller Discovery.
Select an SNMP credential containing the required authentication and connection details.
The selected credential enables IMS to communicate with the wireless controller and collect device and network information.
Label
Action
Description / Example
Filter By Ping
Enable or disable
Filters Wireless Controllers based on their response to a ping check.
Ping Monitor
Enable or disable
Enables ping monitoring to check whether the Wireless Controller is reachable.
Label
Action
Description / Example
Device Filters
Select a condition
Configure conditions to include or exclude specific Wireless Controllers from discovery.
Include Devices / Exclude Devices
Select an option
Specify whether matching devices should be included in or excluded from discovery.
Filter Type
Select an option
Select the required filter type, such as IP Address, Device Type, or Device Name.
Equals / Contains
Select an operator
Label
Action
Description / Example
Access Points
Enable or disable
Enables or disables Access Point Monitoring for access points managed by the Wireless Controller.
Host
Enable or disable
Enables or disables Host Monitoring for the Wireless Controller host.


Select the operator used to match the specified value.
Best for
IT admins, servers, unattended access
Helpdesk support, temporary remote help
Sessions can be scheduled for a specific date/time or started immediately.
Notifications (toaster alerts) appear on the user device. Sessions automatically end when the allocated duration expires.
During an active session, admins can:
Use live chat for communication.
Transfer files securely.
Access user drives without interrupting their screen activity.
Record the session for compliance.
When a session is triggered, Infraon sends a request to the Mesh Central Server.
The server validates the device status (active, idle, sleep, offline).
If the device is active, the server pushes a session executable (EXE) or connection request.
Session Establishment
Agent-based sessions: The background service auto-connects to the server, establishing a secure tunnel for unattended access.
Assistant-based sessions: The session only starts once the user explicitly approves the request.
Audit and Security
All RDP sessions are logged with timestamp, user, and actions performed.
Session recordings are stored for audit and compliance.
Role-based permissions ensure that only authorized admins can initiate remote sessions.
If required, sessions can be terminated by the end user (close session prompt).
Mesh Assistant (Quick Assistant) – for consent-based remote access.
Audit & Recording
All RDP sessions can be logged and recorded for compliance and security purposes. Example: Admin reviews a session recording during an audit to verify changes made to a system.
Live Chat
Provides a built-in chat interface between the admin and the end user during an RDP session. Allows file exchange and text communication, with the ability to export chat logs. Example: A technician requests screenshots from the user during troubleshooting.
File Access / Drive Access
Admins can directly access user drives during RDP without disturbing on-screen work. Example: A file is retrieved from a user’s *C:* drive without interrupting their active session.
Session Controls
- Show toaster notifications for session start/stop. - The end-user can manually close a session. - Admin can reschedule or extend existing sessions.
Dependencies
Requires the RDP Agent/Assistant to be installed. Mapped via serial numbers/ organization-specific keys and connected through Mesh Central Server in the backend.
Device Availability Check
RDP sessions only initiate if the target device is active/awake. If the system is off, idle, or in sleep mode, RDP will not connect.
Feature
Mesh Agent
Mesh Assistant
Runs as a background service
✅ Yes
❌ No
Unattended access
✅ Yes
❌ No (User must allow access)
Persistent remote access
✅ Yes
❌ No (Session ends when closed)
Requires user approval each time
❌ No


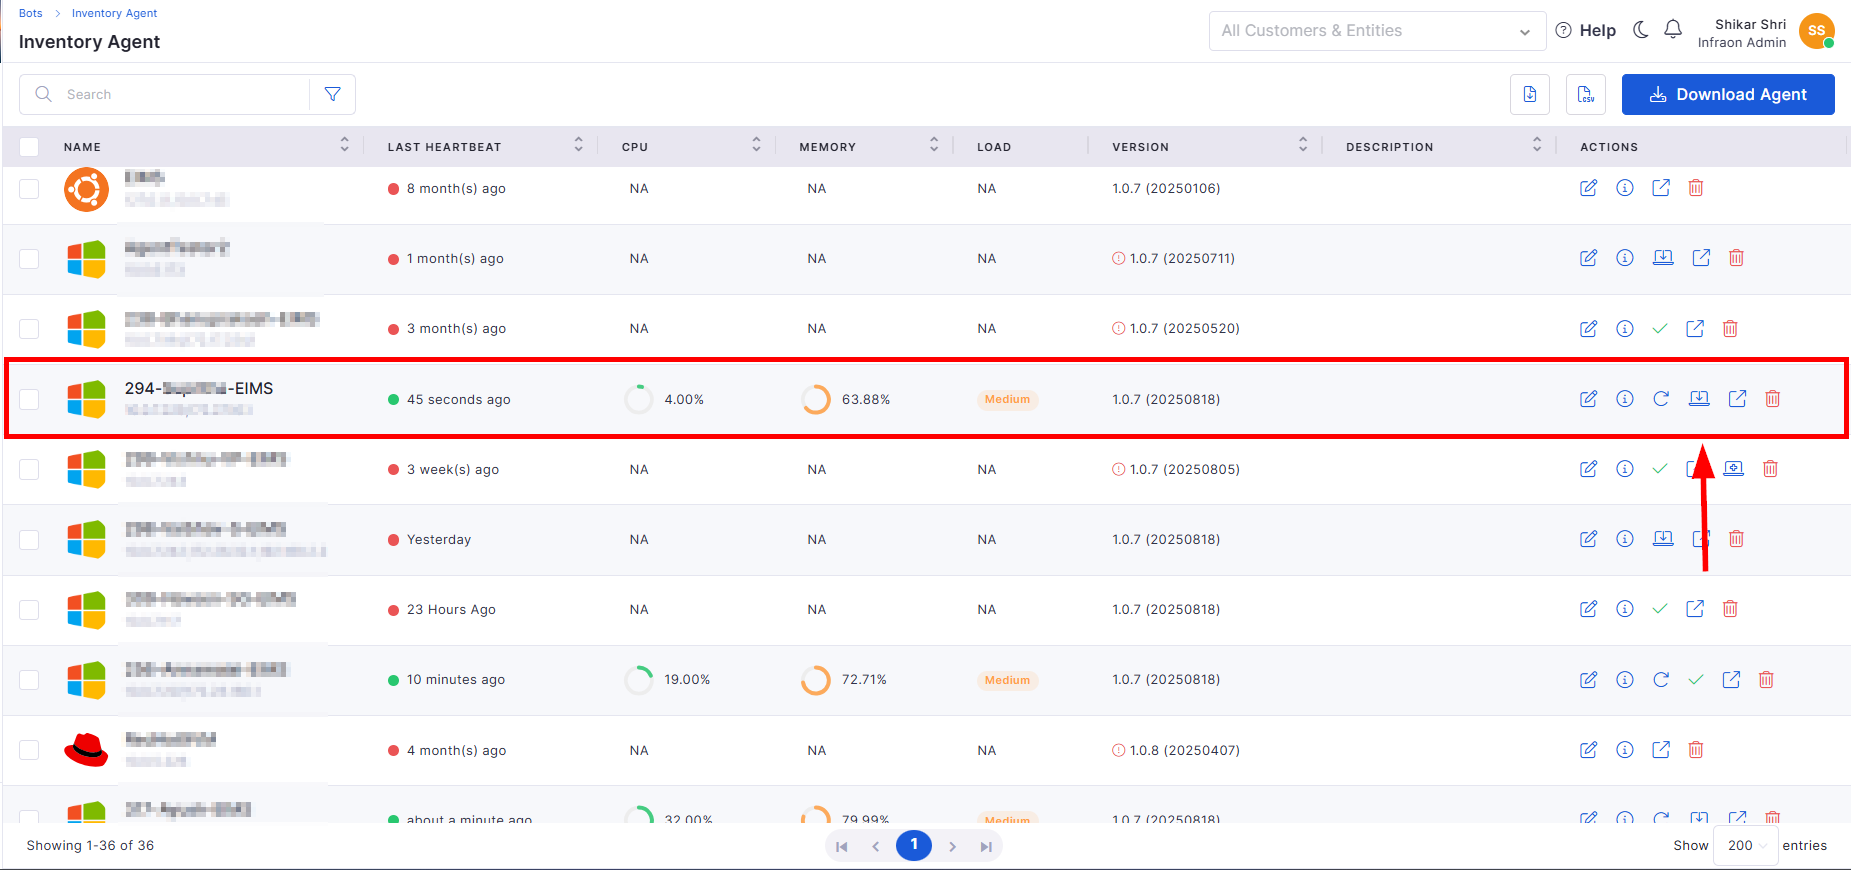
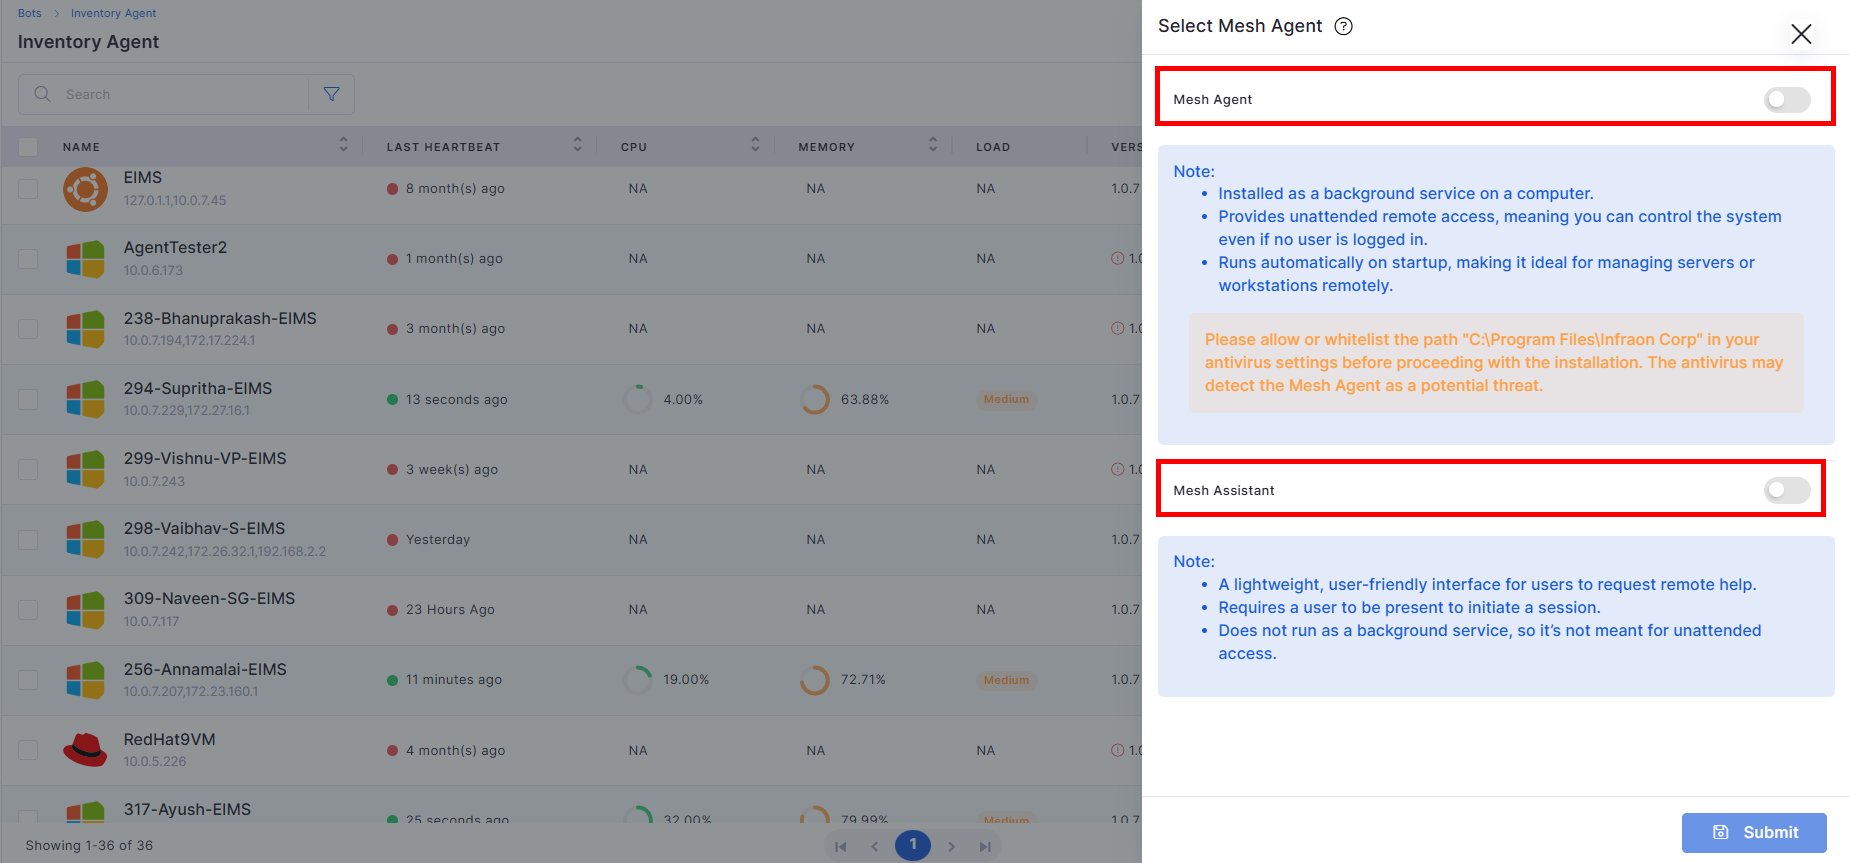
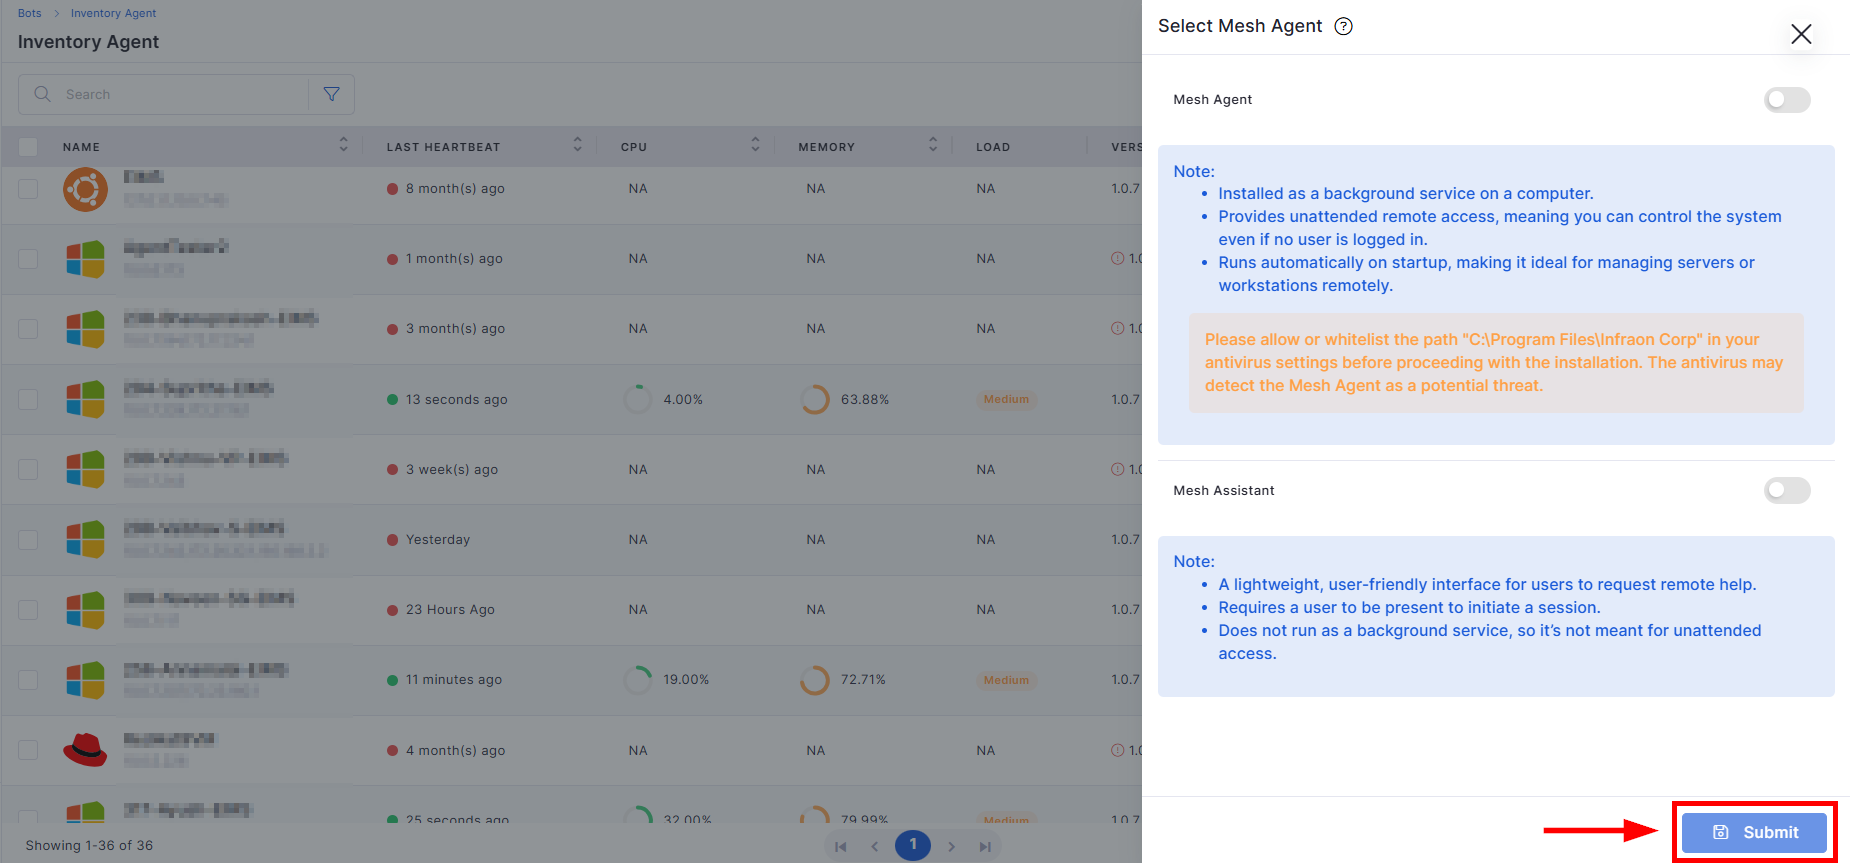
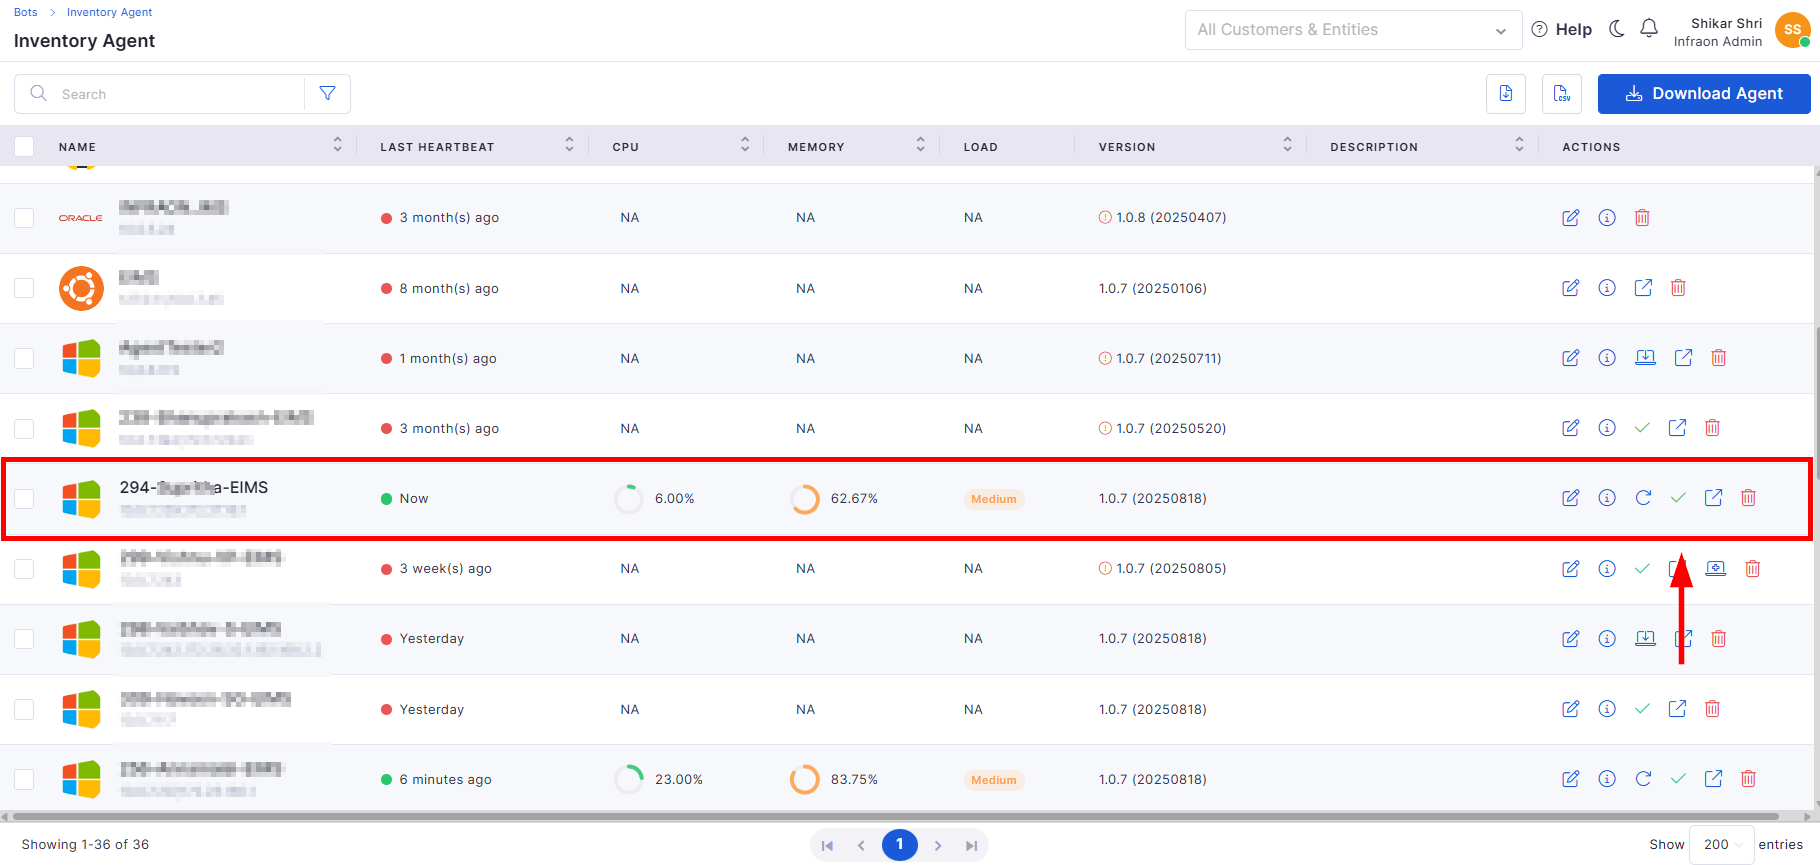
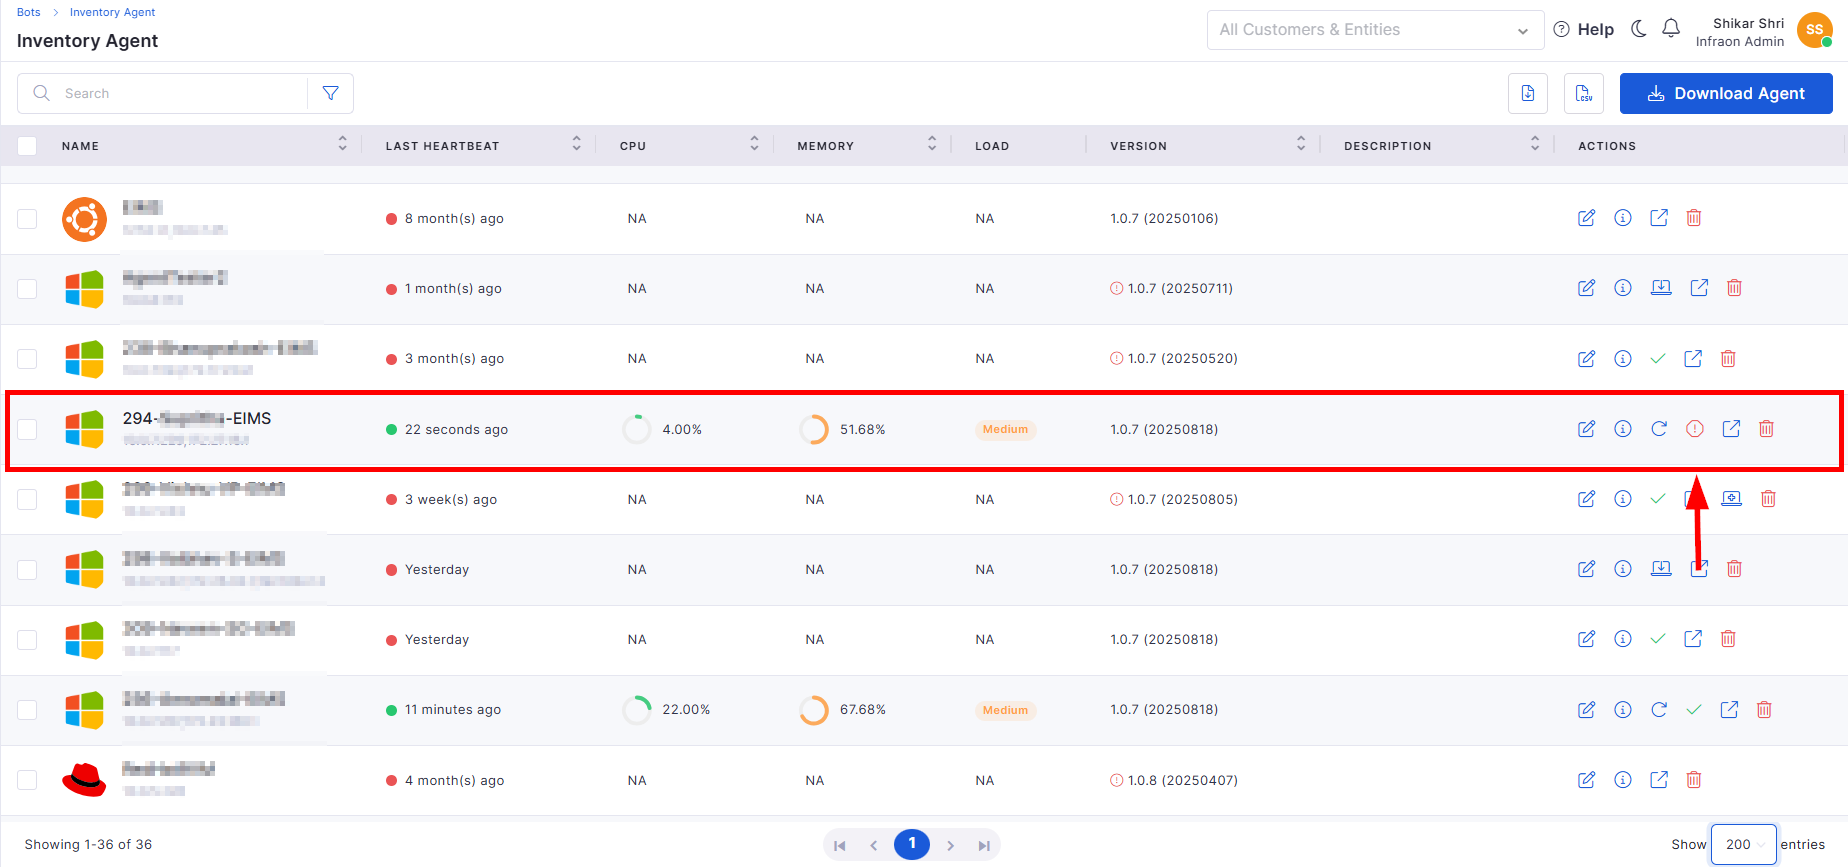
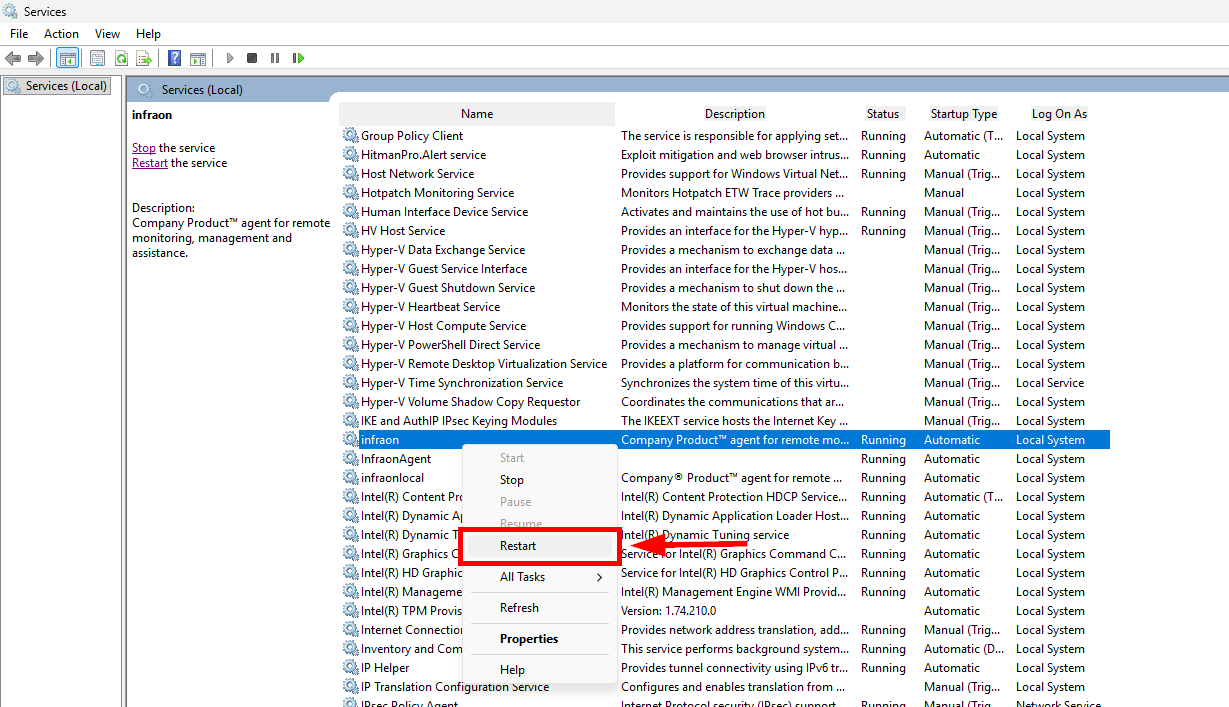
✅ Yes
C:\Program Files\Infraon CorpC:\Program Files\Infraon Corp\InfraonAgentEnable/Disable Toggle
Automatically appends the configured country code to recipient mobile numbers before sending SMS messages.
Use GET Request
Enable/Disable Toggle
Sends the SMS request using the HTTP GET method instead of the default POST method, depending on the provider API requirement.
Use HTTPS
Enable/Disable Toggle
Enables secure HTTPS communication for encrypted SMS API requests and secure data transmission.
Status Code
Enter Status Code
Specify the expected success response code returned by the SMS provider after successful SMS submission. Example: 200
Send SMS Individually
Enable/Disable Toggle
Sends SMS messages separately to each recipient instead of processing all recipients in a single bulk request. Useful for providers requiring individual message delivery.
Enable/Disable Toggle
Sends the configured parameter as a URL query parameter in the SMS API request.
Add
Click Add
Adds a new request parameter row to configure additional API fields required by the SMS provider.
Delete
Click the Delete Icon
Removes the selected request parameter from the SMS gateway configuration.
Enter Username
Specify the username provided by the SMPP gateway provider for authentication and connection establishment.
SMPP Host Password
Enter Password
Specify the password associated with the SMPP account used for secure authentication.
SMPP System ID
Enter System ID
Specify the SMPP System ID provided by the SMS vendor or telecom provider for gateway identification.
SMPP Host Port
Enter Port
Specify the communication port number used for SMPP connectivity between the platform and the SMS provider. Example: 443
TRX Sessions
Enter the number of TRX sessions to establish with the SMPP gateway.
Specifies the number of concurrent SMPP transceiver (TRX) sessions to establish with the SMS gateway. The default value is 1. Configure multiple TRX sessions to distribute SMS traffic across multiple active SMPP connections, improving message throughput, connection stability, and SMS delivery performance in high-volume messaging environments.
Example: Configure 4 TRX Sessions to establish four concurrent SMPP connections, enabling the SMS gateway to process high-volume SMS traffic more efficiently.
Click the Delete Icon
Removes the configured DLT parameter from the SMPP gateway configuration.
Click Secondary
Tests the SMS delivery using the Secondary SMS Gateway configuration when secondary gateway settings are enabled.
SMS Config Type
Select SMS Gateway
Defines the SMS integration method using API-based or HTTP-based SMS gateway providers. This option is commonly used for providers such as Fast2SMS, MSG91, TextLocal, and similar SMS services.
Title
Enter Title
Specify a unique name for the SMS gateway configuration for easy identification and management. Example: SMS Gateway Demo
URL
Enter URL
Specify the SMS provider's API endpoint URL for sending SMS requests from the platform. Example: www.fast2sms.com/dev/bulkV2
Key
Enter Key
Specify the parameter name required by the SMS provider API. Example: numbers, message, authorization, route, Content-Type
Value
Enter Value
Specify the parameter value or dynamic system variable used during SMS processing. Example: gateway_sms_recipients, gateway_sms_message, API tokens, route values, or content types.
Pass To Header
Enable/Disable Toggle
Sends the configured parameter in the API request header. Typically used for authorization tokens, API keys, or content-type configurations.
SMS Config Type
Select SMPP Gateway
Defines the SMS integration method using SMPP protocol communication for enterprise or telecom-based SMS delivery services.
Title
Enter Title
Specify a unique name for the SMPP gateway configuration for identification and management purposes. Example: SMPP Gateway Demo
SMPP Hostname
Enter Hostname
Specify the hostname or server address provided by the SMPP service provider for establishing SMS communication. Example: mail.domain.extn
Key
Enter Key
Specify the DLT parameter key required by the provider. Example: PE_ID, Template_ID
Value
Enter Value
Specify the corresponding DLT parameter value provided by the SMS gateway or telecom operator.
Add
Click Add
Adds additional DLT parameter fields for configuring multiple regulatory or provider-specific parameters.
Phone Number
Enter Phone Number
Specify the recipient mobile number to which the test SMS should be sent to validate the configured SMS gateway. Example: 91XXXXXXXX90
Message
Enter Message
Specify a sample SMS content to verify message delivery and SMS gateway functionality. Example: Test SMS from Infraon Infinity
Primary
Click Primary
Tests the SMS delivery using the Primary SMS Gateway configuration configured in the module.
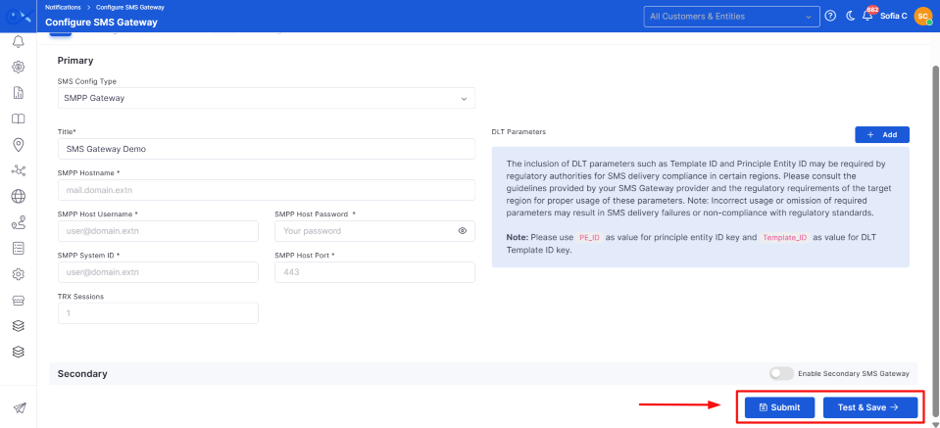
Add Country Code
Pass to query params
SMPP Host Username
Delete
Secondary
Email Config | Add IMAP
Email Provider
Choose the provider’s option.
Select the type of mail provider:
Sign in with Microsoft → Uses OAuth 2.0 authentication for Office365/Outlook.
Other → For Gmail, custom IMAP servers, or any non-OAuth provider where credentials must be entered manually.
Module Type*
Choose module
Select the application module where incoming emails should be converted:
Ticket → Emails are logged as incidents/tickets.
Request → Emails are logged as service requests.
Request for Quotation → Emails are logged as service requests for quotation.
Mail Server*
Enter IMAP mail server URL
This is the incoming mail server (IMAP) used to fetch messages. Example: support.infraon.io.
Authentication Type| IMAP Config
When selecting the Authentication Type, three options are available:
Basic Authentication
OAuth2 Microsoft
Microsoft Exchange Server
Based on your selection, the required fields will appear dynamically.
Basic Authentication
With Basic Authentication, you configure the mailbox using a username (email address) and password. This method is straightforward but less secure compared to OAuth. It’s best suited for mail servers that do not support modern authentication standards.
Optionally, you can enable the Add Username field if the mail server requires a login ID different from the email address.
Basic Authentication | Email Config
Email*
Enter email ID
Example: helpdesk@infraon.io
Add Username
Toggle button
An optional field if the server requires a different login name.Example: infraon_support.
Password*
Enter password
Securely input the account password.
OAuth2 Microsoft
When selecting OAuth2 Microsoft, you configure secure, token-based authentication for Microsoft accounts (Office 365 / Outlook). Instead of storing user passwords, OAuth uses client credentials to request and refresh tokens, making it more secure and compliant with modern standards.
You’ll need to provide values such as Client ID, Client Secret, and Tenant ID, which can be obtained from the Azure Active Directory App Registration.
OAuth2 Microsoft | Email Config
Email*
Enter email ID
Example: support@infraon.io.
Password*
Enter password
If required for specific hybrid setups (optional in pure OAuth).
Client ID*
Enter Client ID
Example: f72d1abc-1234-4f56-b78a-******
Microsoft Exchange Server
For Microsoft Exchange Server authentication, the configuration is tailored to on-premises Exchange environments or dedicated Exchange setups. This method requires the mailbox email address and password, which are typically validated against Active Directory credentials.
It’s suitable for organizations that manage their own Exchange infrastructure instead of using Office 365.
Microsoft Exchange Server | Email Config
Email*
Enter email ID
Example: itadmin@company.com.
Password*
Enter password
Active Directory/Exchange account password.
Server Port Configuration | Email Config
Incoming (IMAP)*
Add the server port
Defines the port used to receive incoming emails via the IMAP protocol.Example: 993 (with SSL/TLS).
Encryption Type*
Select the appropriate option.
Ensures secure communication between the mail server and the application.Options: SSL or TLS.
SMTP Server*
Click to add information.
Specifies the outgoing mail server used to send emails from the application.Example: smtp.gmail.com.
After entering the details, click Test to verify the connection, authentication, and mailbox accessibility. Any errors will be displayed if the login fails or the server cannot be reached.
Click Next to proceed to the Domains Tab, where you can configure domain-level rules and filter after successful IMAP validation.
Domains Tab | IMAP Configuration
Select Impact Services
Optional drop-down selection
Allows linking email processing to specific IT services for impact correlation.
Example: Select Corporate Network to tag requests impacting that service.
Impact Service
Choose a related impact service.
Pick the exact service affected. Useful for service-specific routing and automation. Example: Database Services, Email System.
Use Email Subject in Service Classification
Enable/Disable toggle.
When enabled, the system scans email subjects to automatically classify the request into a service.
Example: Subject "Payroll Access Issue" → HR Service.
After completing the setup, click Submit to finalize and save the IMAP and domain configurations. This activates email-to-request/ticket automation for the selected module.
Before creating a notification rule, you must first create a notification template. A notification template defines the category, severity, subject, and message body used when a notification rule is triggered.
To add a notification template:
Navigate to Templates.
Click + New Template located in the upper-right corner of the page.
Click Submit to create the template.
Configuration Details | Add Template
Label
Action
Description / Example
Template Name
Enter a unique name for the notification template.
The template name is mandatory, must contain at least 3 characters, and must be unique within the organization. Example: Assign New
Category
Select the notification category.
Determines the event type for which the template will be used. The available categories depend on the selected module. Example: Ticket Assignment
Severity
Select the notification severity.
Specifies the severity level associated with the notification. Available options: Info, Warning, Critical.
Subject
Enter the notification subject.
Once added, click on Submit to create the notification template and make it available for selection while creating notification rules.
A notification rule defines when, how, and to whom notifications are sent based on specific events and conditions. Before creating a notification rule, ensure that a notification template has already been created.
To add a notification rule:
Navigate to Notification Rules.
Click + Add Rule located in the upper-right corner of the page.
Complete the five-step wizard by configuring the required settings.
Click Save Rule to create the notification rule.
The Add Rule wizard consists of the following steps:
Trigger
Channels
Recipients
Conditions
Delivery
Trigger Details | Add Rule
The Trigger tab defines the basic information for the notification rule, including its category, associated item, template, and severity.
Label
Action
Description / Example
Rule Status
Enable or disable the rule.
Enables or disables the notification rule. When disabled, notifications are not generated.
Rule Name
Enter a unique rule name.
Mandatory field with a minimum of 3 characters. Example: Priority Change
Description
Enter the rule description.
Provides additional information about the notification rule. Example: Notify users when a ticket priority changes.
Category
Select a notification category.
Once added, click Next to validate the current step and proceed to the Channels tab.
Channels Details | Add Rule
The Channels tab defines the communication channels used to send notifications.
Label
Action
Description / Example
Enable or disable Email notifications.
Sends notifications through Email.
In-app
Enable or disable In-app notifications.
Sends notifications within the application.
SMS
Enable or disable SMS notifications.
Sends notifications through SMS.
Webhook
Enable or disable Webhook notifications.
Once added, click Next. It saves the channel configuration and proceeds to the Recipients tab.
Recipients Details | Add Rule
The Recipients tab specifies the users or roles that receive notifications and the channels through which notifications are delivered.
Label
Action
Description / Example
Roles
Select a role.
Specifies the recipient role for the notification. Example: Default, Assignee, Requester.
Users
Select one or more users.
Adds individual users as notification recipients. Example: Naveen.
Channels
Select notification channels.
Select one or more enabled channels for the recipient. Available options: Email, In-app, SMS, Webhook (if enabled).
Add Role
Click Add Role.
Once added, click Next to proceed to the Conditions tab.
Conditions Details | Add Rule
The Conditions tab defines the criteria that trigger the notification rule.
Label
Action
Description / Example
Condition Logic
Select the condition matching logic.
Available options:
All Match (AND)
Any Match (OR)
Field
Select a field.
Selects the field used for evaluation. Example: Priority, Status, Category.
Operator
Select an operator.
Specifies how the field value is evaluated. Example: Equals, In, Not In.
Value
Select or enter a value.
Once added, click Proceed to the Delivery tab.
Delivery Details | Add Rule
The Delivery tab specifies when notifications are delivered and allows you to configure quiet hours.
Label
Action
Description / Example
Real-time
Select Real-time delivery.
Sends notifications immediately when the configured event occurs.
Daily Digest
Select Daily Digest.
Sends a consolidated notification once each day.
Weekly Digest
Select Weekly Digest.
Sends a consolidated notification once every week.
Quiet Hours Start
Select the start time.
Once added, click on Save Rule to create the notification rule using the configured settings.
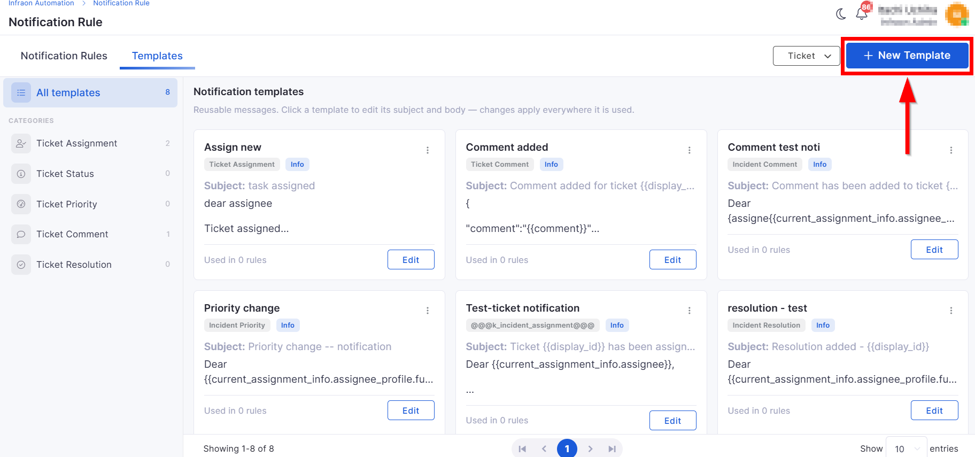
Client Secret*
Enter secret key
Example: Generated in Azure AD app registration.
Tenant ID*
Enter Tenant ID
Example: 72f988bf-******-91ab-2d7cd011db47.
Authority*
Enter authority URL
Example: https://login.microsoftonline.com/2d7cd01.
Outgoing (SMTP)*
Add the server port
Defines the port used for outgoing emails via SMTP.Example: 587 (commonly used with TLS).
Encryption Type*
Select the appropriate option
Secures outgoing mail communication with encryption.Options: SSL or TLS.
Allow Duplicates
Enable/Disable toggle.
If enabled, duplicate emails create separate requests/tickets. Useful when repeat notifications must be logged independently.
If Email in To Address
Enable/Disable toggle.
Controls ticket creation based on the email recipient field. If enabled: Ticket is created only when the configured IMAP email address is present in the To field of the incoming email. Emails where the configured address appears only in CC or BCC are ignored, and no ticket is created. Example (Enabled): IMAP email configured as support@example.com
To: support@example.com → Ticket is created
CC: support@example.com → Ticket is not created
BCC: support@example.com → Ticket is not created
If disabled: A ticket is created whenever the configured IMAP email address appears in the To, CC, or BCC fields of the email. Example (Disabled):
To:
CC: → Ticket is created
Full Subject Match
Enable/Disable toggle.
Only processes/classifies emails whose subject exactly matches defined keywords. Partial matches will be ignored.
Allow Process Classification
Enable/Disable toggle
Automates the classification of incoming emails into processes/workflows.
Example: Routing HR-related mails to Employee Request Workflow.
Blocked Email
Enter addresses to block
Define blacklisted senders to prevent spam.
Example: spam@example.com, ads@marketing.io.
Department
Select organizational department
Routes the request/ticket created to a specific department.
Example: IT Helpdesk, Finance, HR.
Approve all Domains
Enable or disable the toggle
Controls domain-based approval for incoming emails.
When enabled, all domains are approved except the domains configured in the Exclude Domains field.
When disabled, only the domains configured in the Approved Domains field are allowed to create tickets.
Exclude Domains
Select domains to exclude
Displays when Approve all Domains is enabled. Emails received from the selected domains are excluded from ticket creation.
Approved Domains
Select approved domains
Displays when Approve all Domains is disabled. Only emails received from the selected domains are considered for ticket creation.
Approved Emails
Select requester email IDs
Allows users to configure specific requester email IDs that are permitted to create tickets through IMAP.
If no email IDs are configured, tickets are created for all requester email addresses that meet the other ticket creation conditions.
If email IDs are configured, tickets are created only when the requester's email matches one of the configured email IDs.
Enable Spam Filter
Enable or disable the spam filter for the mailbox.
Filters emails identified as spam before Email-to-Ticket conversion. The filter is enabled by default.
Enable Bounce/Undelivered Filter
Enable or disable the Bounce/Undelivered Filter for the mailbox.
Filters automated bounce or undelivered emails before Email-to-Ticket conversion. The filter is enabled by default.
The Inventory Agent is used to discover, collect, and synchronize device information from systems within your IT environment. It helps maintain accurate asset records by sending hardware, software, performance, and heartbeat data to the Infraon platform.
Administrators can monitor agent health, track connectivity status, and manage installed agents across devices. The agent automatically collects and synchronizes device information at scheduled intervals.
This page provides a comprehensive view of the agents currently installed on various devices within the IT infrastructure. It is a central hub for monitoring agent health and managing their configurations.
Inventory Agent | Basic Details
When the user clicks the Details icon, a detailed information panel opens.The following table describes each section and field displayed.
Inventory Agent | Details Page
Bulk Edit | Basic Details
From the Inventory Agent page, users can select multiple Infraon Inventory Agents and trigger the installation of the Patch Management Agent across all selected systems in a single action.
This enables bulk deployment of the patch agent without requiring individual asset-level installation.
Inventory agent can be installed on the following devices:
Windows Agent - The inventory agent supports all Windows desktops/laptops, not Windows Servers. The agent can be installed on each device individually or in bulk through the Active Directory.
Mac OS Agent - It supports all Mac versions. The agent supports devices with both Intel-based chips and M-series chips.
Ubuntu(Linux) - Supports all Ubuntu desktops/laptops and servers.
The steps in installing an inventory agent are as follows:
Go to Infraon Configuration -> Bots -> Agents.
Click the 'Download Agent' icon.
Download the Windows Agent.
The agent is downloaded to your device as an MSI file.
Copy the Agent API token displayed on this page. Use it when the agent is installed.
Go to Infraon Configuration -> Bots -> Agents.
Click the 'Download Agent' icon.
Download the Mac Agent.
The agent is downloaded as a package onto your device. The package includes the PKG file and the API token.
Go to Infraon Configuration -> Bots -> Agents.
Click the 'Download Agent' icon.
Download the Ubuntu Agent.
Your agent has been downloaded as a DEB file. Open the Command center. Type 'sudo dpkg—i InfraonAgent.deb' to initiate installation. Copy the 'Agent Token' from Infraon. Paste this code when the command center prompts for 'Organization Key'.
Type 'y'(yes) to install missing dependencies.
Your agent has been successfully installed. To view installation logs, use the command 'journalctl—u infraonagent.service'.Ensure that the URL 'https://instance01.wss.infraon.app/' is added to the whitelist.
Defines the subject line displayed in the notification. You can insert supported macros to dynamically populate values at runtime.
Example: Task Assigned
Insert Macro
Click Insert Macro to insert a supported macro into the Subject or Message Body.
Displays the list of available macros for the selected module. The selected macro is appended to the current cursor position. Example: {{display_id}}, {{assignee}}
Message Body
Enter the notification message.
Defines the content of the notification sent to recipients. The message body supports plain text and module-specific macros for dynamic values.
Example: Dear Assignee, Your ticket has been assigned. Thanks
Determines the event that triggers the notification. Example: Incident Priority, Ticket Assignment.
Severity
Select the severity level.
Available options:
Info
Warning
Critical
Associate With
Select the module item.
Defines the entity to which the notification rule applies. Example: Incident, Request, Change.
Associated Items
Select the associated workflow or item.
Select one or more items to which the rule applies. Example: Ticket Workflow.
Template
Select a notification template.
Select the notification template created earlier. The template provides the subject and message body used when the notification is triggered.
Sends notification payloads to the configured webhook endpoint.
Template Selection
Select a template for each enabled channel.
Selects the notification template used for the corresponding channel.
Example: Priority Change.
Adds another recipient row to configure additional users or roles.
Delete
Click the delete icon.
Removes the selected recipient row.
Specifies the value against which the selected field is evaluated. Example: Low.
Add Condition
Click Add Condition.
Adds another condition to the rule.
Delete
Click the delete icon.
Removes the selected condition.
Specifies when notification delivery should be suppressed.
Quiet Hours End
Select the end time.
Specifies when notifications resume after quiet hours.
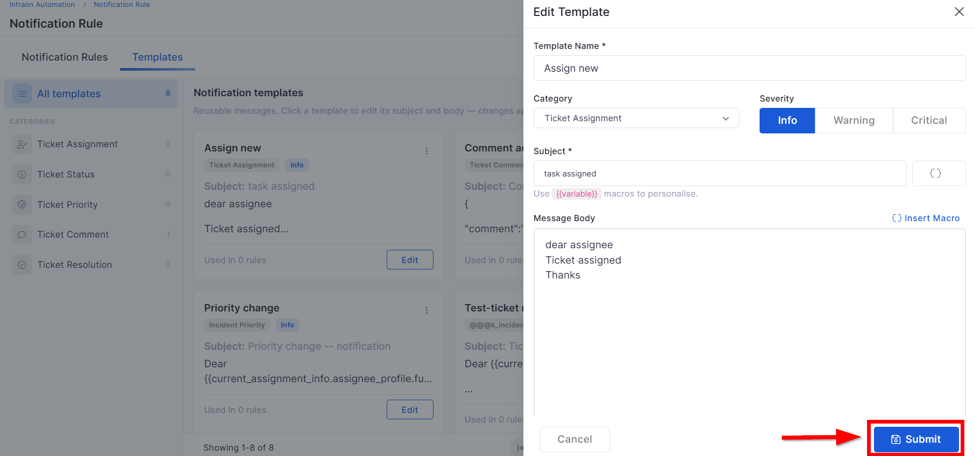
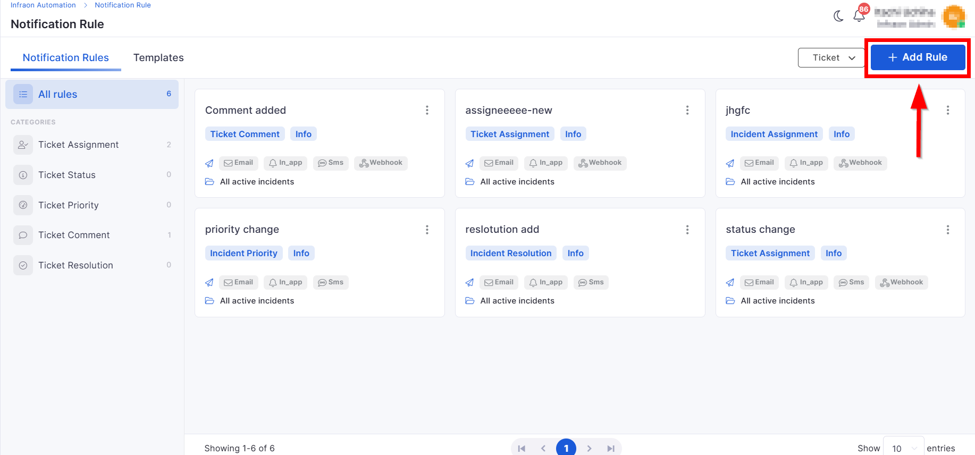
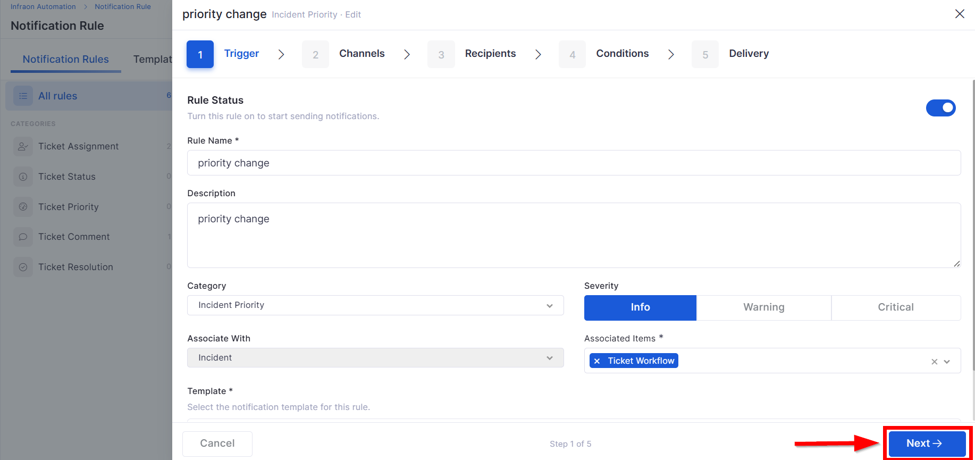
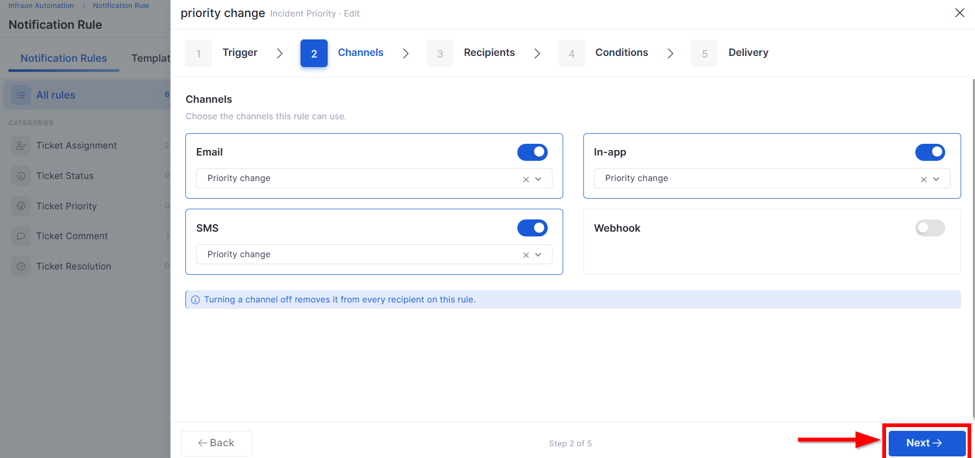
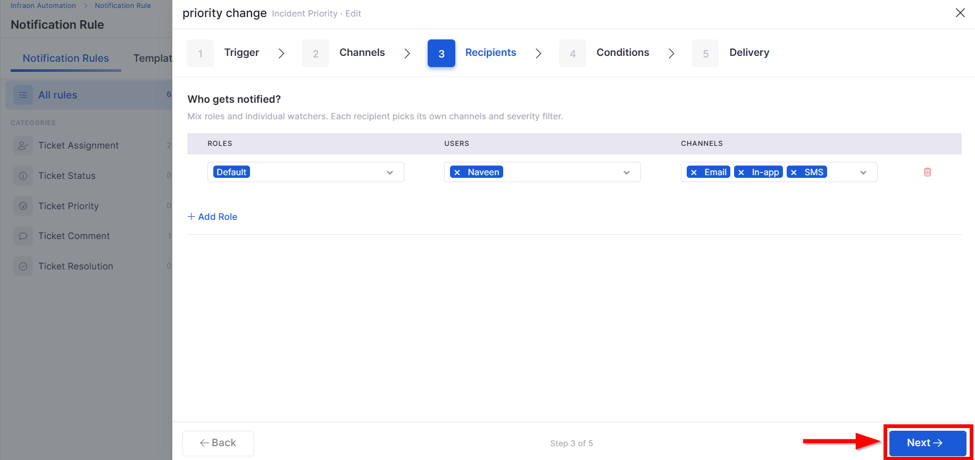
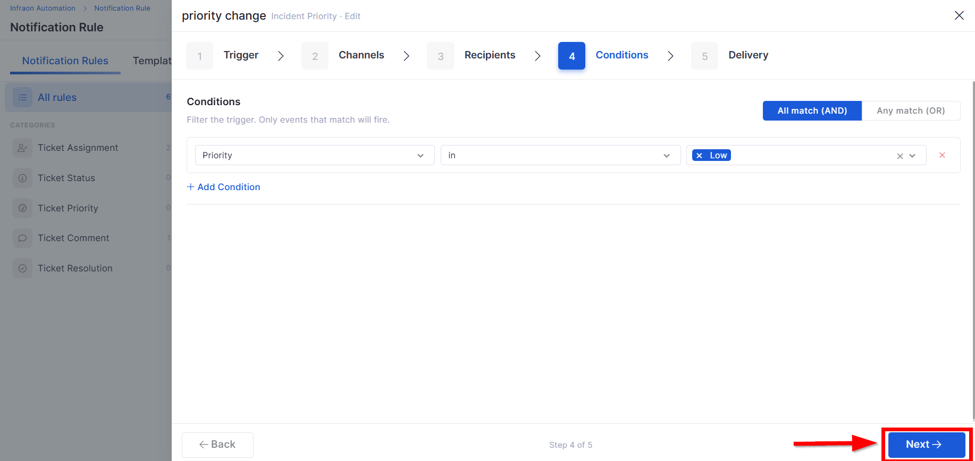
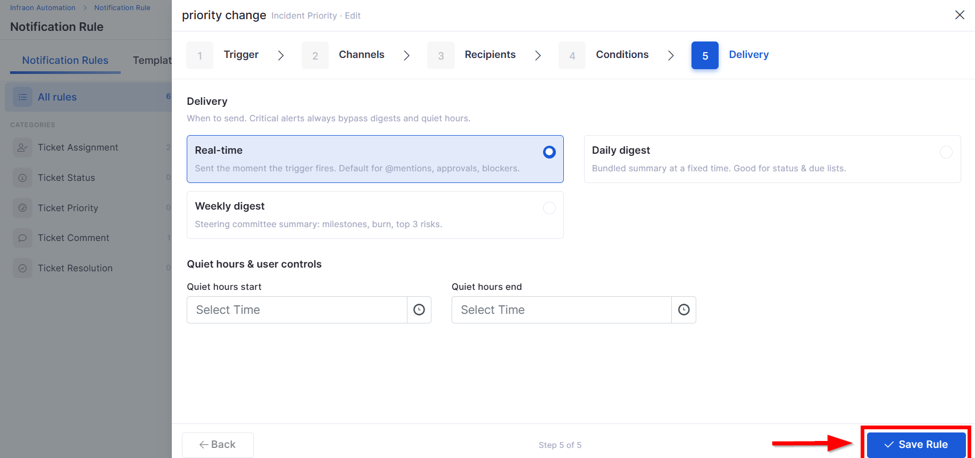
Double-click on the downloaded MSI file to initiate installation.
Paste the Agent API token in the 'Organization Key' field and follow the prompts to finish the installation of the agent on your device.
Add the HTTP or HTTPS proxy server details if a proxy server is used to access the internet.
Provide the administrator's username and password to install the Infraon agent with admin privileges. If not provided, the Infraon agent will be installed on the local account with default privileges.
Once the agent is installed, ensure that the URL https://instance01.wss.infraon.app/' is added to the whitelist.
Once the agent is installed, ensure that the URL https://instance01.wss.infraon.app/' is added to the whitelist.
Disk usage
Search
Enter the keyword and press search.
Use the search option to quickly locate installed agents by Name, Agent ID, IP Address, or related details.
Filter
Click the filter icon to open filter conditions. Select Field, Condition, and Value, then click Apply Filter.
Use filters to refine the Inventory Agent list based on specific criteria. Fields: Name, Agent ID, IP Address, Serial Number, CPU, Memory, Load, Version, Build Number, Operating System, Is Asset Created, Last Heartbeat, and Creation Time.Conditions: In, Not In, Contains, Not Contains, Equal To, Not Equal To. For date fields such as Last Heartbeat and Creation Time, Before and After options are available.
Name
View agent details
Displays the agent’s name and associated IP addresses. Selecting the row or clicking the details icon opens complete agent information.
Last Heartbeat
View heartbeat status
Shows when the agent last communicated with the platform. This value is used to monitor agent availability and automatically update the asset's operational status.
If no heartbeat is received for approximately 35–45 minutes, the asset status may change to Down. When communication resumes, the status updates to Up. Example: 22 seconds ago, 15 minutes ago, 2 months ago.
CPU
View system usage
Displays the device's current CPU utilization where the agent is installed. Example: 8%.
Memory
View system usage
Organization ID
View
Displays the unique organization identifier assigned to the agent. Example: 132356506XXXXX7775040.
Agent ID
View
Unique system-generated ID for the installed agent. Example: 5753EAF56201419C98XXXXX13D3321907.
Agent Version
View
Label
Action
Description / Example
Enable Inventory Scan
Select agents and click Enable Inventory Scan
Enables inventory scanning for selected agents to collect hardware and software details.
Disable Inventory Scan
Select agents and click Disable Inventory Scan
Disables inventory scanning for selected agents, stopping data collection.
Rescan
Select agents and click Rescan
Triggers an immediate inventory scan on selected agents to refresh asset data.
Install RDP Agent
Shows memory utilization of the device. Example: 81.03%.
Load
View system load indicator.
Displays the agent load or performance status (Low, Medium, High). Example: Medium.
Version
View agent version
Displays the installed agent version and release date. Example: 1.0.7 (20251117).
Description
View or edit notes
Shows additional notes or description added for the agent.
Actions
Edit
Modify agent details
Opens the edit form to update name, description, or mapping details.
Details
Open agent information
Opens a detailed view showing system information, installed components, battery details, and agent properties.
Rescan
Trigger immediate data refresh.
Initiates a rescan for collecting updated data from the device, including CPU, memory, load, and battery information.
Install RDP / RDP Agent Running
Install or verify the RDP agent.
If the RDP agent is not installed, clicking initiates installation. If installed, it displays running status. Allows remote access, file transfer, and session management.
Redirect to Asset
Open the corresponding asset record
Navigates to the associated asset page in the Asset Management module.
Delete
Remove agent entry
Deletes the agent record from the Inventory Agent listing.
Shows the installed Inventory Agent version. Example: 1.0.7.
Agent Build
View
Displays the agent's build number. Example: 20251117.
Installation Directory
View
Shows the directory path where the agent is installed. Example: C:\Program Files\Infraon Corp\InfraonAgent.
Agent Uptime
View
Displays the time elapsed since the agent last restarted. Example: Up since 12/9/2025 4:57:32 PM.
Utilization
CPU
View usage
Real-time CPU utilization of the device. Example: 8%.
Disk
View usage
Current disk usage percentage. Example: 85.31%.
Memory
View usage
Current memory utilization. Example: 81.03%.
Battery Info
View laptop battery status.
Shows battery percentage and condition if the device is a laptop. Example: 54%. Hidden for non-laptop devices.
System Info
Operating System
View
Displays OS name and edition. Example: Microsoft Windows 11 Pro.
System Uptime
View
Indicates the duration the system has been running since the last shutdown or restart.
Total Physical Memory
View
RAM on the device is installed. Example: 14.83 GB.
Free Physical Memory
View
Available RAM. Example: 2.81 GB.
Total Disk Size
View
Total disk storage capacity. Example: 475.48 GB.
Free Disk Size
View
Available free disk space. Example: 69.84 GB.
Network Interface Information
Expand/Collapse
Displays detailed network configuration of the device, including host name, DNS values, IP routing, adapters, MAC addresses, and media state.
Select agents and click Install RDP Agent
Installs the RDP agent to enable remote access and session management for selected agents.
Uninstall RDP Agent
Select agents and click Uninstall RDP Agent
Removes the RDP agent from selected agents, disabling remote access capability.
Enable Polling
Select agents and click Enable Polling
Enables periodic polling to monitor system metrics, including CPU, memory, and status.
Disable Polling
Select agents and click Disable Polling
Disables periodic polling for selected agents, stopping real-time monitoring updates.
Install Patch Management Agent
Select agents and click Install Patch Management Agent
Installs the patch management agent on selected systems to enable centralized patch deployment.
Install Log Agent
Select agents and click Install Log Agent
Installs the log agent to collect and forward logs for monitoring and analysis.
Uninstall Log Agent
Select agents and click Uninstall Log Agent
Removes the log agent from selected systems, stopping log collection.
Start Log Agent
Select agents and click Start Log Agent
Starts the log agent service to begin collecting and monitoring logs.
Stop Log Agent
Select agents and click Stop Log Agent
Stops the log agent service, pausing log collection on selected agents.
Shut Down
Select one or more agents → Click More → Click Shut Down
Sends a shutdown command to the selected devices through the Inventory Agent. A details panel displays the execution status with categories such as successful devices, offline devices, unsupported OS, and agent update required.
Only supported for Windows devices with the required agent version.
Restart
Select one or more agents → Click More → Click Restart
Sends a restart command to the selected devices through the Inventory Agent. A details panel shows execution results, including successful, offline, unsupported, and agent-update-required devices.
Action is executed only for eligible devices based on status, OS, and agent version.
Check LogAgent Conf
Check Log Agent Configuration
Checks the Log Agent configuration for the selected inventory agents.
Upload LogAgent Conf
Upload Log Agent Configuration
Uploads the Log Agent configuration for the selected inventory agents.
Check LogAgent Conf
Check Log Agent Configuration
Checks the Log Agent configuration for the selected inventory agents.
Upload LogAgent Conf
Upload Log Agent Configuration
Uploads the Log Agent configuration for the selected inventory agents.
The Data Collector is a component installed within the customer's network that collects information from infrastructure devices and sends it to Infraon. It enables agentless inventory, availability, and performance monitoring of devices in the network.
The Data Collector communicates with devices using supported protocols and credentials. Depending on the device type, it can use protocols such as SNMP, SSH, WMI, Telnet, and HTTP.
For large infrastructure environments, the Data Collector provides a centralized way to collect information from multiple devices without installing an individual monitoring agent on every device.
The Data Collector acts as a communication and data collection point between the infrastructure devices and the Infraon application.
Data Collector workflow:
Data Collector → Device Credentials → Supported Protocol → Infrastructure Device → Infraon
For example:
Windows devices can be monitored using WMI.
Linux devices can be monitored using SSH.
Network devices, such as routers, switches, and firewalls, can be monitored using SNMP, SSH, or Telnet.
Web URLs can be monitored using HTTP.
The Data Collector collects the required information from these devices and sends it to Infraon for monitoring and management.
The Data Collector page provides an overview of the registered Data Collectors, including their basic information and available management options. Users can access Edit, Report, Details, and Resync Data Collector actions to manage configurations, review performance reports, view detailed agent information, and perform resynchronization.
Basic Details | Information
Actions | Edit
Actions | Data Collector Details
Actions | Report
Allows users to initiate resynchronization for individual or multiple Data Collectors. Users can click the Resync icon in the Actions column to resync an individual Data Collector or select multiple Data Collectors using the checkboxes and click Resync Agent to perform a bulk resync.
Data Collector | Resync
Label
Action
Description/Example
Search
Search data collector
Search for the required Data Collector.
Filter
Filter data collector
Filter Data Collectors based on the selected field and condition. Fields: Name, IP Address, Agent ID, CPU, Memory, Load, Version. Conditions: In, Not in, Equal to, Not equal to, Contains, Not contains.
Dump Agent Poller Memory
Click
Allows users with the required Bot Agents Edit privilege to generate a memory dump of the agent poller. When clicked, a confirmation dialog is displayed with Yes, Continue and Cancel options.
Select Yes, Continue to proceed with the memory dump or Cancel to close the dialog without acting.
The Dump Memory button is available in the Agent Grid within the Data Collector grid for users who have the required privilege.
Export as CSV
Label
Action
Description/Example
Agent Name
View
Displays the name of the Data Collector.
Agent IP
View
Displays the IP address assigned to the Data Collector.
Gateway IP
View
Displays the gateway IP address associated with the Data Collector.
Agent Management IP
Edit Agent Management IP
Label
Action
Description/Example
Organization ID
View
Displays the organization ID associated with the Data Collector.
Agent ID
View
Displays the unique identifier assigned to the Data Collector.
Agent Version
View
Displays the installed agent version.
Label
Action
Description/Example
Heartbeat Time
View
Displays the heartbeat timestamp recorded for the Data Collector.
CPU Utilization
View
Displays the CPU utilization percentage recorded at the corresponding heartbeat time.
Memory Utilization
View
Displays the memory utilization percentage recorded at the corresponding heartbeat time.
Disk Utilization
View
Label
Action
Description/Example
Resync
Individual Resync
Click the Resync icon in the Actions column to initiate a hard resync of the selected Data Collector.
Select Checkbox
Bulk Resync
Allows users to select individual Data Collectors for bulk resynchronization.
Header Checkbox
Bulk Resync
Allows users to select all Data Collectors displayed in the grid.
Selection Count
Bulk Resync
Click
Downloads the displayed Data Collector information in CSV format for offline analysis and reporting.
Download Agent
Download Agent
Allows users to download the appropriate Data Collector agent package based on the selected operating system, such as Oracle Linux.
The agent collects inventory, availability, and performance metrics from servers and network devices.
Name
View
Indicates the name of the Data Collector and its associated IP address.
Last Heartbeat
View
Displays the timestamp of the agent's most recent communication with the central server, indicating its activity status.
Kafka Status
View
Displays the Kafka communication status of the Data Collector, such as Success or Failed.
Agent Version
View
Displays the installed Data Collector agent version and build information.
Connection Mode
View
Displays the connection mode of the Data Collector.
CPU
View
Displays the CPU utilization of the Data Collector.
Memory
View
Displays the memory utilization of the Data Collector.
Nodes
View
Indicates the number of nodes associated with the Data Collector.
Load
View
Displays the overall system load of the Data Collector.
Time
View
Displays the current time associated with the Data Collector.
Time Zone
View
Displays the time zone configured for the Data Collector. Example: GMT +0530 (IST).
Description
View
Displays the description provided for the Data Collector.
Actions
Edit, Details, Report, Resync
Provides options to modify Data Collector information, view detailed information, access performance reports, and initiate agent resynchronization.
Displays the management IP address used to communicate with the Data Collector.
Description
Edit Data Collector Descripton
Allows users to enter or update the description of the Data Collector.
Agent System Parameters
Click Show Details and edit the required parameters
Allows users to expand the Agent System Parameters section and view the system configuration parameters along with their corresponding values.
These include the agent heartbeat interval, monitoring interval, execution timeouts, connection settings, configuration management settings, SNMP, SSH, WMI, Ping, Syslog, Kafka, and other agent-related parameters.
Save
Save the Data Collector modifications
Saves the changes made to the Data Collector configuration.
Agent Build
View
Displays the agent build number.
Agent Timezone
View
Displays the configured time zone of the agent.
Installation Directory
View
Displays the directory where the agent is installed.
Agent Uptime
View
Displays the duration for which the agent has been running.
CPU
View
Displays the percentage of CPU resources currently utilized by the Data Collector.
Disk
View
Displays the percentage of disk resources utilized by the Data Collector.
Memory
View
Displays the percentage of memory currently utilized by the Data Collector.
Current Load
View
Displays the total number of nodes, Resources, and Statistics associated with the Data Collector.
Protocol Wise Load
View
Displays the protocol or monitoring category associated with the Data Collector, such as APPLICATION, BMC, CLOUD, CUSTOM, EMS, HTTP, PING, SNMP, SSH, and WMI.
System Info
Show Details
Allows users to expand and view system-related information about the Data Collector.
Processor Information
Show Details
Allows users to expand and view processor-related information.
Server Information
Show Details
Allows users to expand and view server-related information.
Memory Information
Show Details
Allows users to expand and view detailed memory information.
Disk Information
Show Details
Allows users to expand and view detailed disk information.
Network Interface Information
Show Details
Allows users to expand and view network interface-related information.
Process Information
Show Details
Allows users to expand and view process-related information.
Resync
Reync Data Collector Details
Allows users to initiate a resynchronization of the Data Collector from the Details panel.
Displays the disk utilization percentage recorded at the corresponding heartbeat time.
Kafka Status
View
Displays the Kafka communication status, such as Success or Failed.
Kafka Error
View
Displays the error details when Kafka communication fails. Example: Broker connectivity error.
Displays the total number of Data Collectors selected.
Resync Agent
Bulk Resync
Initiates a bulk resync operation for all selected Data Collectors.
Yes, Continue
Resync Confirmation
Confirms and proceeds with the resync operation.
Cancel
Resync Confirmation
Closes the confirmation dialog without performing the resync operation.


Requesters are internal or external users who can raise incidents, service requests, and change requests in Infraon. Technicians, such as Tech Support Users or NOC Operators, can also raise incidents or requests on behalf of requesters.
Requesters can access the to raise and track requests and access the Knowledge Base.
The Requesters module allows administrators to create and manage internal and external requesters.
Requesters can be added or managed using the following options:
Add Requester
Import from CSV
Invite Requester(s)
Administrators can also activate or deactivate requesters and manage their requester details, work information, access, and asset associations.
When an administrator marks a requester as inactive, Infraon automatically removes the requester from all associated assets.
This applies to the following asset fields:
Requester
Owner
Managed By
Used By
A confirmation message is displayed before disabling the requester.
When you deallocate the requester, the asset allocation status updates from Requester to Deallocated, and the change is recorded in the Asset Activity Log.
This functionality is supported for:
Manual updates
Grid updates
Bulk updates through CSV
Go to Infraon Configuration → User Management → Requester.
The Requesters page can be displayed in List View or Card View. Use the view toggle available next to the Add Requester(s) button.
The page lets you search, filter, export, invite, add, and manage requesters.
Requester | Basic Details
Requester | Requester List
Edit and delete icons are available for each requester when you hover over the corresponding list item or card.
The Requester module provides multiple options for creating and managing requesters in Infraon. Administrators can create requesters individually, import users in bulk, and invite users through email.
The available options are:
Add Requester
Import from CSV
Invite Requester(s)
The Add Requester option allows administrators to create a requester by entering the required requester, work, and address information.
Go to Infraon Configuration → User Management → Requester and click Add Requester.
The Add Requester page contains the following sections:
Requester
Work
Address
Add Requester | Requester
Click Submit to create the requester.
To add work and address details, click Next.
Add Requester | Work
Click Next to continue.
The address can be populated based on the requester's Base Location or Work Location.
Select the appropriate location from the dropdown list. Infraon uses addresses already available in the address book.
Add Requester | Address
The Import from CSV option allows administrators to add multiple requesters at once.
Click Import from CSV, then click Download sample CSV file here.
Enter the requester details in the downloaded CSV file.
Upload the completed CSV file using Browse or drag and drop.
The Import CSV option allows you to download a sample CSV file and upload your completed CSV file. It also provides details about the required CSV format and field requirements.
During CSV import, Infraon provides column-matching options to map CSV columns to the corresponding requester fields.
After mapping the required columns, click Next. Infraon validates the uploaded data and separates the records into Valid and Invalid data. For invalid records, click Download to download the failed data. Click Show Fields to view the specific fields that contain errors.
The Invite Requester(s) option allows administrators to invite one or more requesters through email.
Go to Infraon Configuration → User Management → Requester → Add Requester.
Click Invite Requester(s).
Enter the requester's email address. Multiple email addresses can be entered using a semicolon (;) or comma (,).
The Bulk Delete Requesters option allows administrators to remove multiple requesters from the system.
When deleting requesters who are associated with assets or tickets, Infraon checks their existing associations before deletion.
Requesters with mapped assets can be removed according to the applicable deletion rules.
Requesters associated with active tickets may require the ticket or requester association to be resolved first.
If an owner cannot be deleted because of active tickets or associated users, Infraon displays a prompt to replace the owner before proceeding.
This ensures that deleting requesters does not leave active tickets or asset associations without the required ownership.
Click Next and map the required columns.
Review the validation results.
Click Import, then click Proceed with Valid Records to continue with the valid records.
Click Invite to send the invitation.
Search
Enter a keyword in the search field.
Searches for requesters based on the entered information.
Filter
Select the required filter criteria.
Filters requesters based on available fields.
Add Requester
Click Add Requester.
Creates a new requester by entering requester, work, and address details.
Username
View the username.
Displays the username of the requester.
Phone
View the phone number.
Displays the requester's phone number.
Type
View the requester type.
Indicates whether the requester is Internal or External.
Change
Click to add or change the profile photo.
Upload or update the requester's profile photo.
Full Name*
Enter the requester's full name.
John Doe
Email*
Enter the requester's email address.
Designation
Enter the requester's designation.
Technical Support Engineer
Department
Select the department from the dropdown list.
Technical Department, IT System
Employee Type
Select the employee type.
Internal or External
Base Location
Select the requester's base location.
Select the applicable location.
Work Location
Select the requester's work location.
Select the applicable work location.
Download sample CSV file here
Click to download the template.
Downloads the sample CSV file for requester import.
Upload
Upload the completed CSV file.
Supports CSV files up to 1 MB.
Next
Click to continue.
Validates the uploaded requester information.
File Format
CSV
Maximum File Size
1 MB
Mandatory Fields
Full Name and Email
Phone Number
Must contain the country code and be enclosed in single quotes. Example: '919988776655'
Is Active
Show only Mandatory
Enable or disable
When enabled, only mandatory columns are displayed. When disabled, all columns are displayed.
Full Name*
Map the CSV column to the requester’s full name.
Mandatory field. Example: John Doe
Email*
Enter Requester's Email ID
Enter one or more email addresses.
john.doe@company.com; jane.doe@company.com
Invite
Click to send the invitation.
Sends an invitation email to the requester.
Pending Invitations
View pending invitations.
Allows administrators and privileged users to view and resend pending invitations.
Import from CSV
Click Import from CSV.
Adds multiple requesters by uploading a CSV file.
Is Active
Enable or disable the requester.
Indicates whether the user is active or inactive.
Action
Edit or delete the requester and view the license
Provides options to edit or delete the requester. Click the View Allocated Licenses icon; it will display licenses allocated for the requester
Phone Number
Enter the requester's mobile number.
+919988776655
Landline Number
Enter the requester's landline number.
Enter the landline number, if applicable.
Contact Extension
Enter the contact extension.
Enter the extension assigned to the requester, team, or department.
Customer Name
Select the customer or entity.
Select the applicable customer or entity.
Type
Select the requester type.
Internal or External
Enable Login
Enable or disable the option.
Allows the requester to access the self-service portal.
Approval Access
Enable or disable the option.
Provides the requester with the applicable approval access.
Is Active
Enable or disable the option.
Determines whether the requester account is active.
Enable 2FA
Enable or disable the toggle.
Enables email-based two-factor authentication.
User ID
Enter the user ID.
Enter a unique user ID for the requester.
Password
Enter the password.
Used by the requester to log in when login is enabled.
Time Zone
Select the requester's timezone.
Select the applicable timezone.
Language
Select the preferred language.
Select the language used by the requester.
Enable Reporting
Enable or disable the option.
Allows a reporting manager to be assigned to the requester.
Reporting Manager
Select the reporting manager.
Select the applicable manager.
Joining Date
Select or enter the joining date.
Select the employee's joining date.
Notify Email ID(s)
Enter email address(es).
Used to send notifications to the requester.
Notify Phone No(s)
Enter phone number(s).
Used to send notifications to the requester.
Tags
Select tags from the dropdown list.
DevOps, Front Desk Manager
Service Hub
Select the applicable service hub.
Head Office, Branch Office
Employee ID
Enter the employee ID.
EMP001
Must be true or false.
Phone Number Length
Must contain numeric data with 10–15 digits.
Notify Email IDs
Multiple email IDs must be separated using semicolons.
Notify Phone Nos
Multiple phone numbers must be separated using semicolons.
Tags
Multiple tags must be separated using semicolons and must contain unique existing tag names.
Type
Must be Internal or External. If another value is provided, the system saves it as Internal.
Is Work From Home
Must be True or False. The default value is False.
Map the CSV column to the requester’s email address.
Mandatory field. Example:
Type
Map the CSV column to the requester type.
Internal or External
Enable Login
Map the CSV column to the login access setting.
Enables or disables requester login.
Password
Map the CSV column to the requester password.
Password used when login is enabled.
Phone Number
Map the CSV column to the requester’s phone number.
Example: '919988776655'
Landline
Map the CSV column to the requester’s landline number.
Enter the landline number.
Subscription Plan
Map the CSV column to the subscription plan.
Select or specify the applicable plan.
Subscriber ID
Map the CSV column to the subscriber ID.
Enter the subscriber identifier.
Subscription Details
Map the CSV column to subscription information.
Enter the applicable subscription details.
Contact Extension
Map the CSV column to the contact extension.
Example: 1025
Is Active
Map the CSV column to the requester status.
Set to True or False.
Enable 2FA
Map the CSV column to the two-factor authentication setting.
Enables or disables 2FA for the requester.
Timezone
Map the CSV column to the requester's timezone.
Example: Asia/Kolkata
Language
Map the CSV column to the requester's preferred language.
Select the applicable language.
Enable Reporting
Map the CSV column to the reporting setting.
Enables reporting for the requester.
Reporting Manager
Map the CSV column to the reporting manager.
Specify the requester's reporting manager.
Designation
Map the CSV column to the requester's designation.
Example: Technical Support Engineer
Department
Map the CSV column to the requester's department.
Example: IT
Employee Type
Map the CSV column to the employee type.
Internal or External
Joining Date
Map the CSV column to the joining date.
Example: 15-Jan-2026
Notify Email IDs
Map the CSV column to notification email addresses.
Multiple email IDs can be separated by semicolons.
Notify Phone Nos
Map the CSV column to notification phone numbers.
Multiple phone numbers can be separated by semicolons.
Tags
Map the CSV column to requester tags.
Example: DevOps; Front Desk Manager
Service Hub
Map the CSV column to the service hub.
Example: Head Office
Employee ID
Map the CSV column to the employee ID.
Example: EMP001
Is Work From Home
Map the CSV column to the work-from-home status.
Set to True or False.
Base Location
Map the CSV column to the requester's base location.
Select or specify the applicable location.
Work Location
Map the CSV column to the requester's work location.
Select or specify the applicable work location.
Approval Access
Map the CSV column to the approval access setting.
Enables the applicable approval access for the requester.
Customer ID
Map the CSV column to the associated customer.
Enter the customer ID associated with the requester.


The Template module enables administrators to create predefined templates for modules such as Ticket, Request, Change, Release, and Risk. These templates help standardize recurring issues by pre-configuring key fields like subject, impacted services, service classification, priority, etc.
Templates can be linked to specific teams, support levels, or assigned technicians.
It displays all templates in a card/ grid layout, each showing the template name, description, and tags like module type (e.g., Ticket, Request), status, and priority.
On the left panel, you can filter templates by category—Ticket, Change, Request, Release, or Risk. Search and filter options can refine results using simple conditions based on fields like title, risk, or priority.
For the section below, please create documentation on how to create templates.
Each template module includes action icons that allow you to perform specific operations. In Card View, click the three-dot menu on a template to display and access these actions.
Action Icons | Basic Details
The Template module allows administrators to create predefined configurations for different ITSM and operational modules.
The following template categories are available in the Template module:
Template Categories | Basic Details
Request Template Types | Basic Details
The Request template category supports multiple request types to standardize workflows across different service requests.
To create a new template, click the + Add Template button at the top-right corner of the screen.
Each template allows you to predefine values such as title, description, priority, impact, service classification, assignee, tags, and more.
Add Template | Basic Details
Once the Title and Description are added, click Add to define the questions that make up the Risk Template.
Add Questions | Basic Details
Once added, click on Save to continue.
Once the questions are added, you can Submit to save the template.
The Task tab is available as the third and final step when adding a new Template. This section enables users to predefine the tasks associated with a particular change request.
Click on + New Task to add a task involved in the service. A task configuration panel will appear with the following fields:
Title: Enter a name that clearly defines the task.
Description: Add detailed instructions or information regarding the task.
Type: Choose the type of task from the dropdown (e.g., Default, Checklist).
Status: Set the initial status of the task (e.g., To Do, In Progress, Done).
Once filled, click on Submit to save the configurations.
It allows you to define task relationships within a request/ release workflow. By configuring parent-child dependencies, you can control the order in which tasks are executed and ensure that no child task progresses until its parent task is completed. It offers:
Standalone tasks – A task without dependencies that can be executed immediately.
Parent-Child relationship – A child task is only triggered when its parent task is marked as Closed.
Multi-level dependencies – Supports nested hierarchies (e.g., Task A → Task B → Task C).
Sequential execution – Ensures child tasks are created only after their dependencies are met.
Configuring Dependent Tasks
When creating or editing a template:
Navigate to General Settings > Template > Request/ Release.
Add or edit a task
In the Dependent Tasks section:
Select an existing task to act as the parent.
Once configured, the dependency hierarchy is applied automatically whenever the request/ release workflow is triggered.
The Restriction Rule Configuration tab is the third step when creating a Release Template. This feature allows administrators to define control rules restricting a release's transition through various stages based on specific task conditions.
These rules ensure releases move forward only if pre-defined task conditions are met.
Navigate to the Restriction Rule Configuration tab.
Click + Add Condition to define a rule.
Use the condition builder to set up the logic for restriction.
Each condition is based on:
If the release status is "Planning", you may want to ensure that "Task A" is marked as "Done" before the release can progress.
This rule can be configured using the following condition:
The Close Task option is used to mark a task as completed. To ensure proper documentation, a mandatory Closure Note must be entered before closing the task. This note is then stored in the system and made visible in key sections for reference.
The closure note requirement applies not only to Tasks but also to other modules, including:
Tickets
Requests
Problems
Changes
Releases
A text area appears when closing a task, requiring the assignee to enter closure details. The task cannot be closed without providing this note.
Once saved, the closure note is automatically displayed in:
Recent Activities section
Communication page of the related record
The Request Template configuration allows administrators to create and manage templates for different request types, including Provisioning Request, Purchase, Request, Request for Information, Security, Onboarding, Offboarding, and Service Order.
Templates define the default request details and custom field values used when a requester creates a request. The available custom fields change dynamically based on the selected Impact Service.
Add Request | Basic Details
Example: If the selected Impact Service is configured with employee-related fields, those fields appear in this section. Administrators can configure their default values for an Onboarding request template.
After completing the Basic Details, click Next to move to the Custom Configuration section.
Add Template | Custom Configuration
Example: For an Onboarding template, an administrator can configure a company policy declaration. The requester must acknowledge the declaration before submitting the request.
Click Next to move to the Add Task section.
Add Template | Add Task Page
Add Template | Task Details
Click the Submit button to save the template.
This feature enables automated task generation when a predefined request template is selected during onboarding.
Allows administrators to define pre-configured rules that trigger multiple tasks automatically based on specific employee types or roles. It restructures the onboarding process by ensuring that all necessary actions (e.g., issuing a laptop, creating user credentials, assigning software access) are handled via system-generated tasks.
This feature is primarily used for automating tasks tied to employee onboarding or similar HR-driven processes. The platform creates specific tasks automatically based on the employee type, role, or department.
How it Works
Navigate and click on Add Template. Now select the Request Template from the available template categories.
Enter the following configuration details:
Template Name: Provide a name that defines the template's purpose (e.g., "New Employee Onboarding").
Request Type: Choose the type, such as Onboarding.
Task Creation Based on Rules:
Admins can define rules linked to employee parameters such as role, department, or level.
Each rule can trigger a specific set of onboarding tasks.
When the request is submitted using this template:
The system evaluates the configured rules.
It auto-generates predefined tasks based on the selected employee profile.
Tasks are assigned to the relevant teams or users responsible for completing the onboarding steps.
A dependent task creation request is triggered when the parent task closes.
The Health Template enables administrators to create standardized questionnaires to evaluate a project's overall health. Each template consists of weighted questions and predefined health indicators that help assess project performance based on user responses.
Unlike Risk Templates, which use Critical, High, Medium, and Low values, Health Templates use Red, Amber, and Green indicators to represent a project's health status.
Click + Add.
Select Health from the drop-down list.
Enter the required template details.
Add one or more health assessment questions.
The Health Template is created and becomes available for use in Project Health assessments.
Template Details Specify the basic information required to create the Health Template.
Health Template Question
Add the questions that will be used to evaluate project health.
Click Add to create a new assessment question.
Add Questions
Configure the question, assign its weight, and define the available response options.
Add Options
Each question can contain one or more response options.
Form Template allows you to create reusable forms by adding custom fields based on your business requirements. These templates can be used while adding a helping users capture additional information in a structured format.
Use Form Templates when different task types require specific input fields such as Email, Number, Date, Dropdown, Checkbox, Text Area, or other custom data fields.
Navigate to Template.
Click Add.
Select Form Template.
Enter the Template Name.
Click Add Custom Field to create required fields.
The template will be created and available for use while adding a Task.
Add Template | Form Template
Add Custom Field | Form Template
Clicking Add Custom Field opens the field creation panel, where you can define the field type and configuration.
The Custom Configuration section allows administrators to configure custom forms for templates by selecting predefined fields, arranging required fields, and adding custom fields based on business requirements.
Once the custom configuration is created, it can be assigned to a template. When users create or work on a request using that template, the configured fields are displayed in the request form, allowing them to capture the required information, validate inputs against configured rules, and ensure all mandatory details are completed before submitting the request.
To configure a custom form for the template:
Navigate to the Custom Configuration tab while creating or editing a template.
Select the Enable Custom Form toggle.
Drag and drop fields from the Available Fields section to the Selected Fields section based on the requirement.
Use the Add Custom Field option to create additional fields if required.
The Add Custom Field option allows administrators to create additional fields that are not available in the predefined field list.
To add a custom field:
Navigate to the Custom Configuration tab.
Select Add Custom Field.
Configure the required field details.
Select Submit to add the custom field to the template form.
Add Custom Field | Field Details
Once added, click Submit to save the custom field configuration and add the field to the custom form template.
After selecting and arranging the required fields in the Selected Fields section, users can validate and customize the custom form layout using the available configuration options.
The following actions are available in the Custom Configuration section:
Once the form preview and configuration are complete, select Save to apply the custom configuration to the template.
Priority: Define the task's urgency (e.g., Low, Medium, Critical).
Due In Date: Specify how many days after the change initiation this task is due.
Actual Start Date & End Date: (Optional) Fill these if the task already has expected start/end timelines.
Team: Select the team responsible for executing the task.
Assignee: Choose the individual who will carry out the task.
Validation – Prevents triggering of child tasks when dependent tasks are still pending.
Leave blank if the task is standalone.
Save the template.
Release Status (e.g., New, Planning, Pending)
Task Name (e.g., Task A, Task B)
Task Status (e.g., To Do, Ongoing, Done)
Impacted Services: Select the relevant impacted services from the drop-down menu.
Description: Briefly describe the purpose of the template.
Under Employee Information Form Template, configure the fields:
Drag and drop to move elements from the Available Fields panel to the Selected Fields area to define the information to be captured during onboarding.
Optionally, freeze specific columns that should always remain visible.
Configure Form: This section allows admins to customize the layout and behavior of the form. Fields can be marked as mandatory, reordered, renamed, or grouped to align with internal processes.
Preview Form: Preview the configured form before publishing to validate its layout and ensure all required inputs are included. The preview shows how end-users view and interact with the onboarding request.
Click Submit.
Drag the created fields from Available Fields to Selected Fields.
Arrange the fields as required.
Click Submit.
Configure the required field details and validations.
Select Next to proceed to the next configuration step.
Label
Action
Description / Example
Edit
Click to open the template in edit mode
Modify existing details or update configurations as needed.
Clone
Click to duplicate
Create an identical copy of the template, which can be modified without affecting the original.
Delete
Click to remove
Permanently delete the selected template from the system.
Ticket
Used to create predefined Incident or Ticket configurations with default values such as subject, priority, assignment details, impact, urgency, and related services.
Change
Used to create standardized Change configurations, including change details, planning information, task configuration, risk details, and approval settings.
Request
Used to create predefined service request configurations for different request types such as provisioning, onboarding, purchase, and security requests.
Release
Used to configure Release templates with predefined release details, task dependencies, restriction rules, workflows, and execution plans.
Risk
Provision Request
Used to create templates for provisioning-related activities such as user access, software allocation, device setup, or infrastructure provisioning.
Purchase
Used to create templates for procurement and purchase-related requests, including hardware, software, licenses, or service acquisitions.
Request
Used to configure general service request templates for standard operational or business service requests.
Request for Information
Used to create templates for information-related requests where users require clarification, details, or operational information from support teams.
Security
Label
Action
Description / Example
Template Title*
Enter a title for the template.
Name of the risk template. Example: Network Upgrade Risk Template
Template Description
Enter a description of the template.
Brief explanation of the purpose of the template. Example: Used for assessing risks in major network upgrades.
Add (button)
Click Add to insert risk questions.
Opens the Add Questions pop-up, where assessment criteria can be defined.
Label
Action
Description / Example
Question*
Enter the assessment question.
The risk-related query. Example: Does the change impact production systems?
Weight (Range: 1–5)*
Assign a weight to the question.
Defines the importance of the question in risk calculation. Higher = more impact.
Example: 5 (critical question).
Option Name
Enter option choices.
Possible answers to the question.
Example: Yes, No, Partially.
Option Value
Select a criticality level for each option (dropdown).
Label
Action
Description / Example
Allow
Select from the drop-down
Defines the release attribute (e.g., status) that needs to be controlled. This is the primary field whose transition will be conditionally restricted.
Example: Select “Status” to control transitions between release statuses.
In
Enter one or more values
Specifies the actual values of the selected attribute that the rule will govern. These are the values that are subject to the conditional restriction.
Example: “Planning”, “Pending”, “New”.
Only If
Enter task name(s)
Identifies the specific task(s) whose status will determine whether the action (like status transition) is allowed. This links the restriction to task progress.
Example: “Task A”, “Testing Task”.
Is in
Enter task status(es)
Label
Action
Description/Example
Template Name*
Text Input
Enter a name to identify the template.
Example: Employee Onboarding Request.
Request Type*
Dropdown Selection
Select the type of request the template is intended for, such as Provisioning Request, Purchase, Request, Request for Information, Security, Onboarding, Offboarding, or Service Order.
Description
Text Input
Enter a brief description of the template's purpose and intended use.
Request Title*
Label
Action
Description
Enable Custom Form
Enable / Disable
Enables or disables the availability of the form associated with a request template.
When enabled, users can use both the Configure Form and Preview Form options in read-only mode to view the form configuration and preview the form.
When disabled, these options are unavailable for use.
Custom Form Template
Section
Displays the form builder used to configure the fields associated with the request template.
Available Fields
Field Selection
Displays the fields available to be added to the form. Drag and drop the required fields into the Selected Fields section.
Selected Fields
Label
Action
Description/Example
Create New
Click
Click Create New in the Add Task to open the Add Task page.
Enter the task details, configure dependencies and rules, and assign the task to the appropriate team or user.
Task Name
Text Box
Enter the name of the task to identify its purpose.
Example: Install Required Software.
Description
Enter Text
Enter a detailed description of the task, including instructions, requirements, or other relevant information. The editor supports text formatting.
Dependent Tasks
Label
Action
Description/Example
Task Details
Side Panel
Displays the task properties that can be configured while creating or managing the task.
Status
Dropdown Selection
Select the current status of the task.
Due On
Date Picker
Select the date by which the task must be completed.
Priority
Dropdown Selection
Template Title *
Specifies a unique name for the Health Template. Example: Project Health Assessment
Template Description
Provides a brief description of the template and its intended purpose. Example: Health assessment template for infrastructure implementation projects.
Question *
Specifies the assessment question presented during the Project Health evaluation. Example: Is the project progressing according to the approved schedule?
Weight (Range: 1–3) *
Specifies the importance of the question in the overall project health calculation. Accepted values range from 1 (lowest priority) to 3 (highest priority).
Options
Defines the available responses for the question. Multiple options can be configured using Add.
Option Name
Specifies the response displayed to users during the assessment. Example: Completed, Delayed, Requires Attention
Option Value
Assigns the health indicator associated with the selected response. Available values are: 🔴 Red – Poor project health 🟡 Amber – Moderate project health 🟢 Green – Good project health
Add
Adds another response option for the current question.
Delete
Removes the selected response option from the question.
Template Name*
Enter text
Specify a unique name for the template. Example: Employee Onboarding Form
Add Custom Field
Click to add
Opens the custom field configuration panel to create a new field.
Available Fields
Drag and drop
Displays all created custom fields available to use in the template.
Field Type*
Select from the drop-down
Choose the type of field to create. Example: Email, Text, Number, Date, Dropdown
Label*
Enter text
Enter the field name shown in the form. Example: Employee Email
Placeholder
Enter text
Add helper text inside the field. Example: Enter your email
Field Type
Select from the drop-down
Defines the type of custom field to be created. Available options include Text, Email, Phone Number, Checkbox, etc.
Label
Enter the field label
Specifies the display name of the custom field in the form.Example: Employee ID, Work Location, or Contact Number.
Placeholder
Enter placeholder text
Displays sample text inside the field before user input. Example: Enter Employee ID.
Preview Form
Select Preview Form
Opens a preview window displaying the configured custom form with all selected fields arranged in the configured layout. Users can verify field labels, placeholders, mandatory field indicators, dropdown values, and overall form structure before saving the template configuration.
Configure Form
Select Configure Form
Opens the Configure Form window to define the form name and organize the selected fields into the required layout structure. Users can rearrange fields, group related sections, and customize the overall form presentation based on operational or business requirements before saving the configuration.
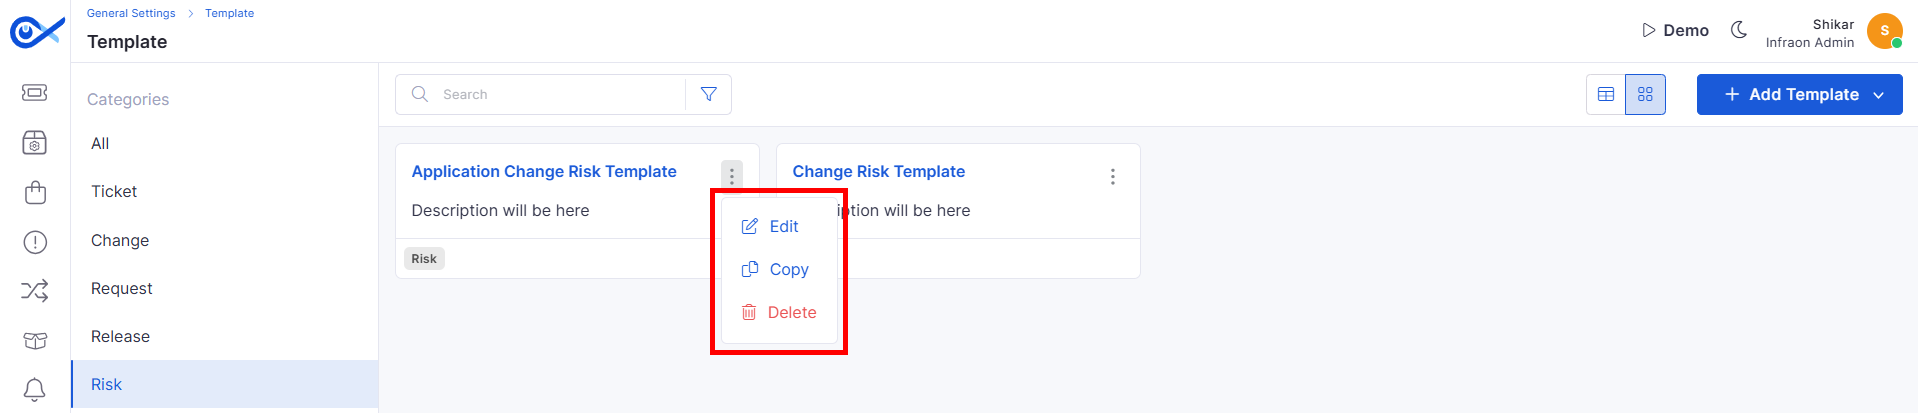
Used to create predefined risk assessment configurations with risk-related details, classifications, impact, mitigation plans, and ownership information.
Health
Used to configure predefined health monitoring templates for tracking operational or service health-related activities and alerts.
Form Template
Used to create reusable form structures with configurable fields that can be used across request workflows and operational processes.
Used to create templates for security-related requests such as access permissions, security approvals, compliance activities, or security validations.
Onboarding
Used to standardize employee onboarding processes, including account creation, asset allocation, access provisioning, and task assignments.
Offboarding
Used to standardize employee exit processes, including access revocation, asset recovery, task closure, and compliance activities.
Service Order
Used to create templates for predefined service delivery or service fulfillment activities requested by users or departments.
Defines risk level for the chosen option. Options: Critical, High, Medium, Low.
Add (button)
Add more questions.
Use this to build multiple questions in the same template.
Specifies the allowed status(es) of the identified task(s) which must be true to permit the action defined in “Allow”. This helps enforce process completeness before advancing the release.
Example: “Done”, “On Going”.
Text Input
Enter the default title for the request.
Example: New Employee Laptop Setup.
Description
Text Input
Enter details about the request, including its purpose or requirements.
Status*
Dropdown Selection
Select the status to be applied to the request.
Priority
Dropdown Selection
Select the priority level for the request. The displayed default is Medium.
Impact
Dropdown Selection
Select the impact level associated with the request.
Impact Service
Dropdown Selection
Select the service associated with the request. The available custom fields depend on the selected service.
Service Classification
Dropdown Selection
Select the applicable service classification for the request.
Assignee
Dropdown Selection
Select the user responsible for handling the request.
Severity
Dropdown Selection
Select the severity level associated with the request.
Urgency
Dropdown Selection
Select the urgency level of the request.
Tags
Dropdown Selection
Select relevant tags to categorize and identify the request.
Location
Dropdown Selection
Select the location associated with the request.
Custom Fields
Field Configuration
This section displays the custom fields associated with the selected Impact Service. Administrators can configure default values so that the corresponding fields are prefilled when a requester uses the template.
Displays the custom fields configured for the selected Impact Service. The fields may change when a different service is selected.
Field Configuration
Displays the fields selected for the form. Administrators can arrange the fields according to the required form structure.
Add Fields
Button
Allows administrators to create custom fields by specifying the field type, label, mandatory status, and applicable validation rules.
Preview Form
Button
Displays the selected fields in a preview of the form so administrators can review the form layout and fields.
Configure Form
Button
Opens the form configuration view, where the configured form and its details are displayed in read-only mode when the Enable Form toggle is enabled.
Add Rule
Click
Click to add a validation rule. The Field and Rule Type options are displayed for configuring the rule.
Field
Dropdown Selection
Select the required custom field to be used in the rule. Available fields may include different field types, such as text, number, dropdown, checkbox, and radio button.
Example: Select Node Count or another relevant custom field based on the rule being configured.
Rule Type
Dropdown Selection
Select Max Add Items to limit the number of items that can be added.
Policy/Declaration
Toggle or Configuration Option
Enable or configure the policy declaration for the template.
Declaration Statement
Text Input or Document Upload
Enter the declaration text or upload the applicable policy document, depending on the available configuration options.
Agreement Checkbox
Requester Action
When the declaration is enabled, the requester must confirm that they have read or agreed to the statement before submitting the request.
Dropdown Selection
Select an existing task that must be considered as a dependency for the current task.
Add Rule
Button
Click to define a rule that determines when the task dependency or condition applies.
When
Condition Selector
Specifies the condition under which the configured rule is evaluated.
Status
Dropdown Selection
Select the task status used as a condition for the rule.
And
Condition Operator
Adds another condition to the rule so that multiple conditions can be evaluated together.
Or
Condition Operator
Adds an alternative condition to the rule. The rule is satisfied when either the preceding condition or the alternative condition is met.
Example: Set the condition to Status = New OR Priority = High to evaluate the rule when either condition is satisfied.
Check List
Section
Displays checklist items associated with the task, where available, to help track the completion of required activities.
Add checklist items to define the individual steps or activities that need to be completed as part of the task.
Select the priority level of the task based on its urgency or importance.
Team
Dropdown Selection
Select the team responsible for handling the task.
Assignee
Dropdown Selection
Select the user responsible for completing the task.
Selected Fields
Drag and drop
Move required fields here to include them in the template form.
Edit Icon
Click to modify
Edit the selected custom field properties.
Delete Icon
Click to remove
Removes the field from Selected Fields and moves it back to Available Fields.
Mandatory
Enable / Disable toggle
Mark the field as required when filling out the form.
Validation Rules
Configure
Define input validation, such as Regex or allowed values.
Error Text
Enter text
Message shown when invalid data is entered. Example: Please enter a valid email
Mandatory
Enable the toggle
Marks the field as mandatory. Users must provide a value before submitting the form.
Validation Rules
Configure validation details
Allows administrators to define input validation using Regex patterns to control the accepted format for field values.
Regex
Enter validation pattern
Defines the validation pattern for user input.
Error Text
Enter validation message
Displays a custom validation message when the entered value does not match the configured validation rule.
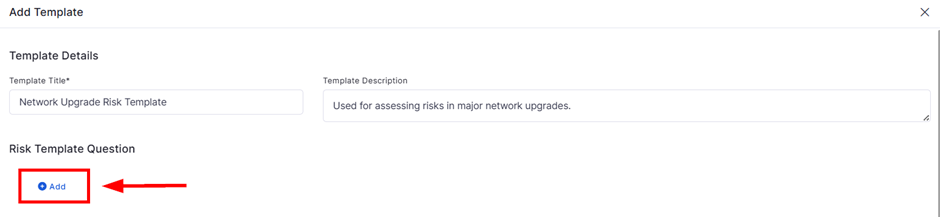
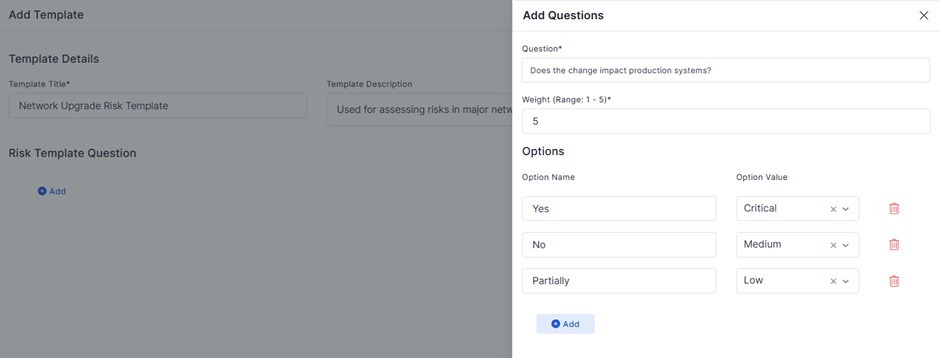
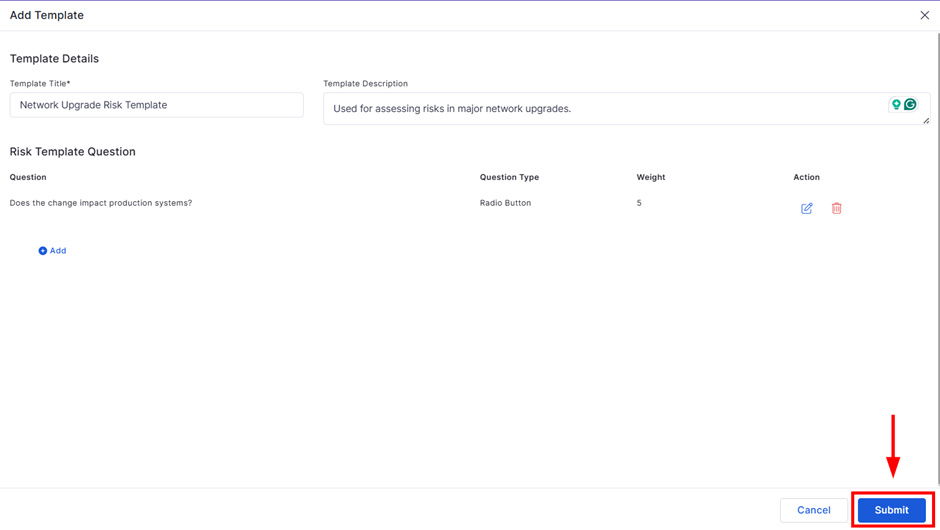

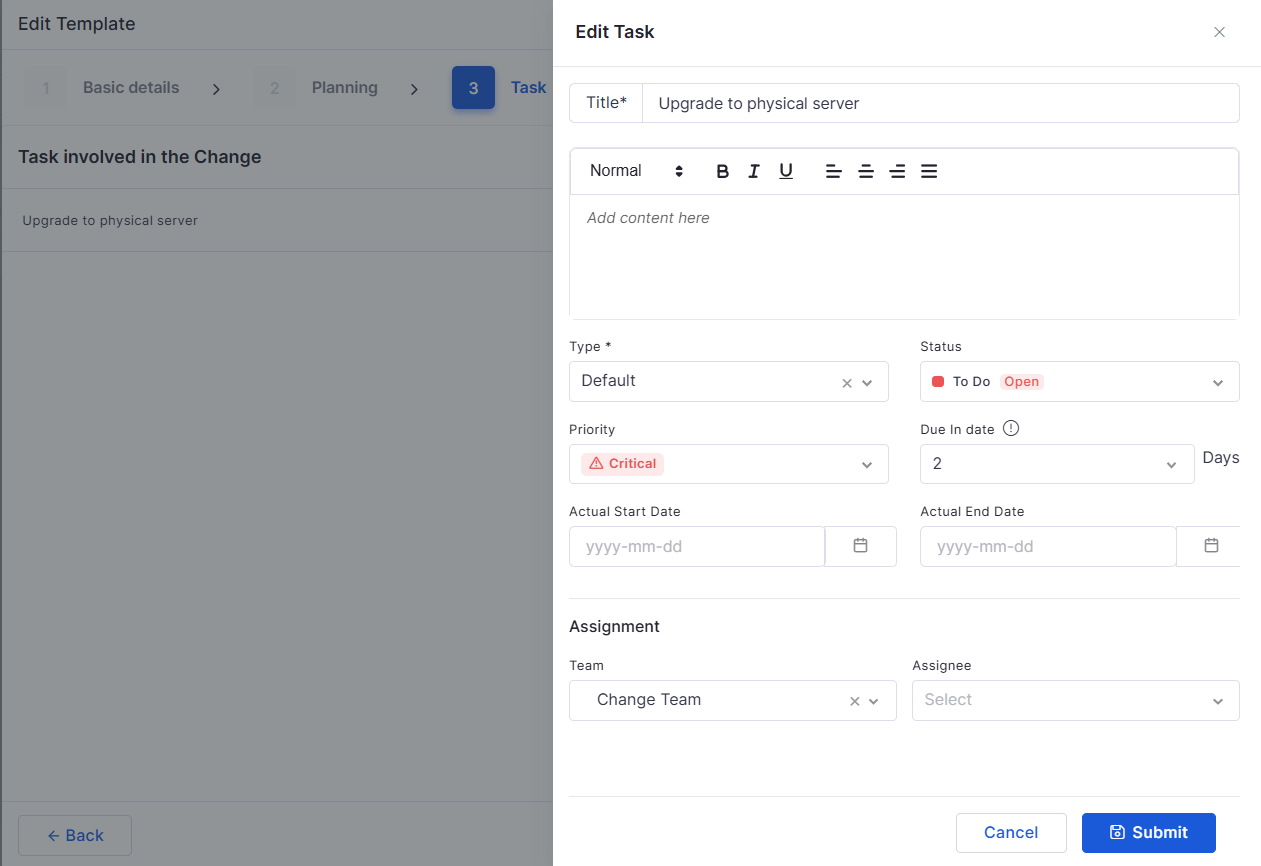
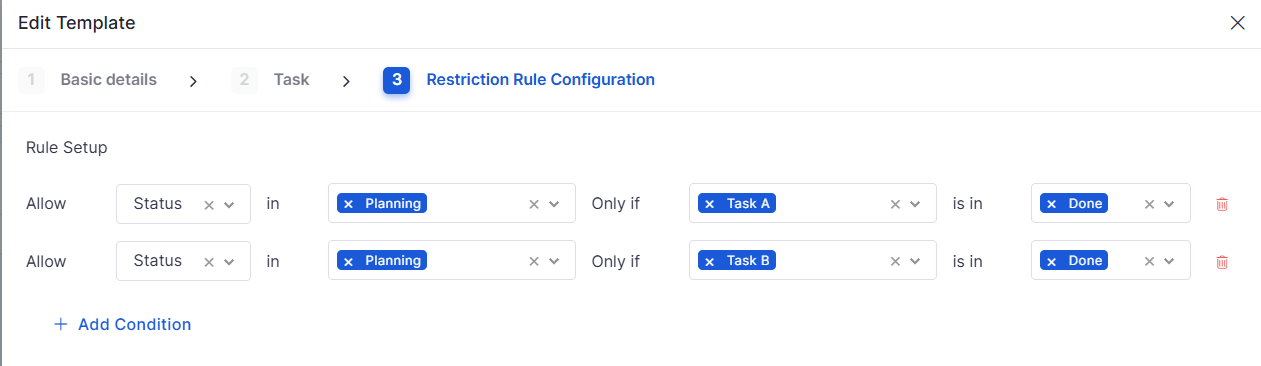
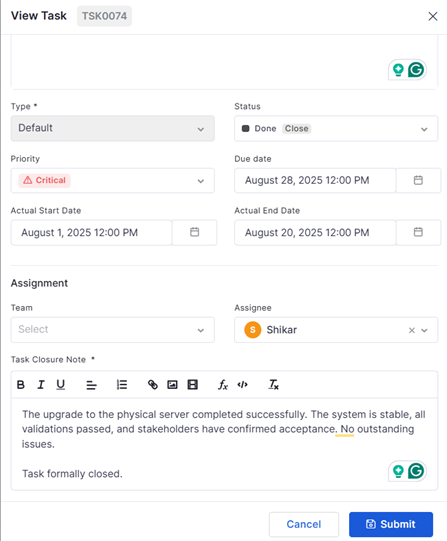


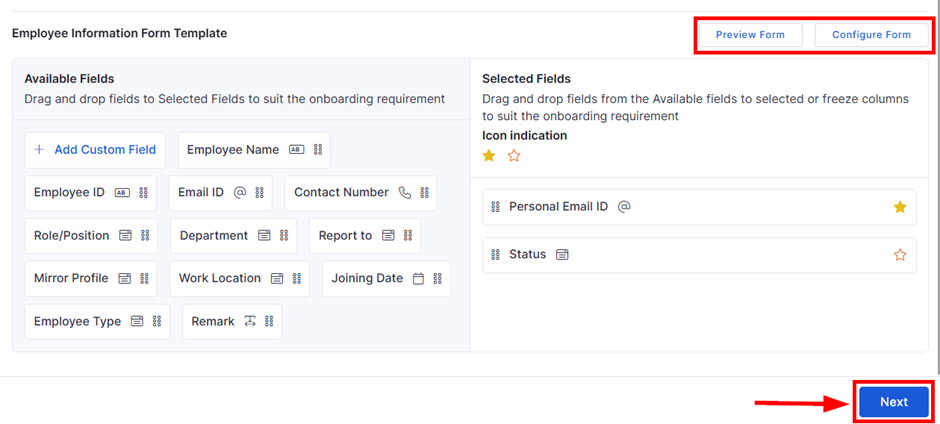
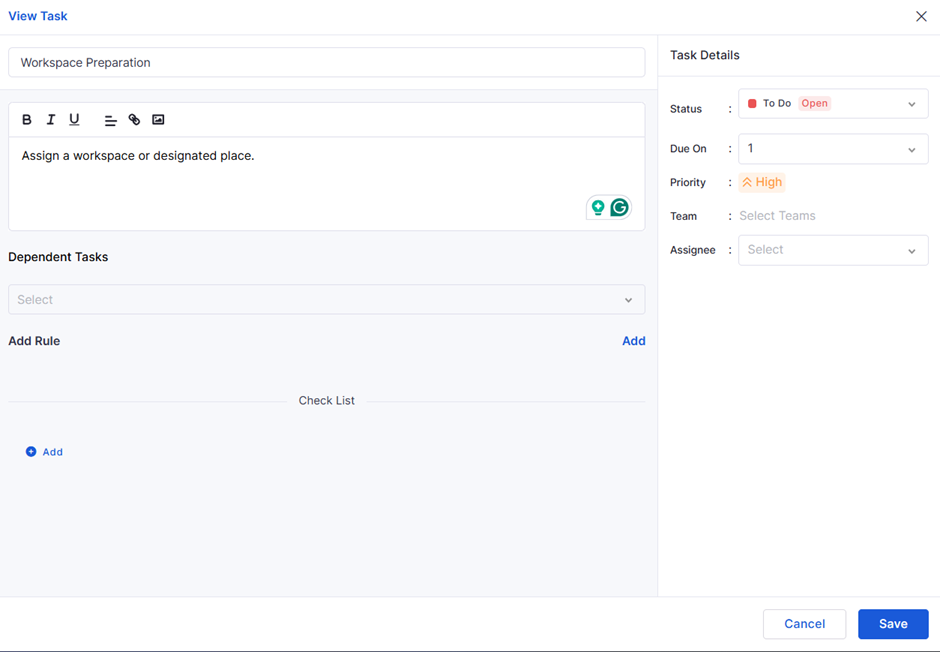
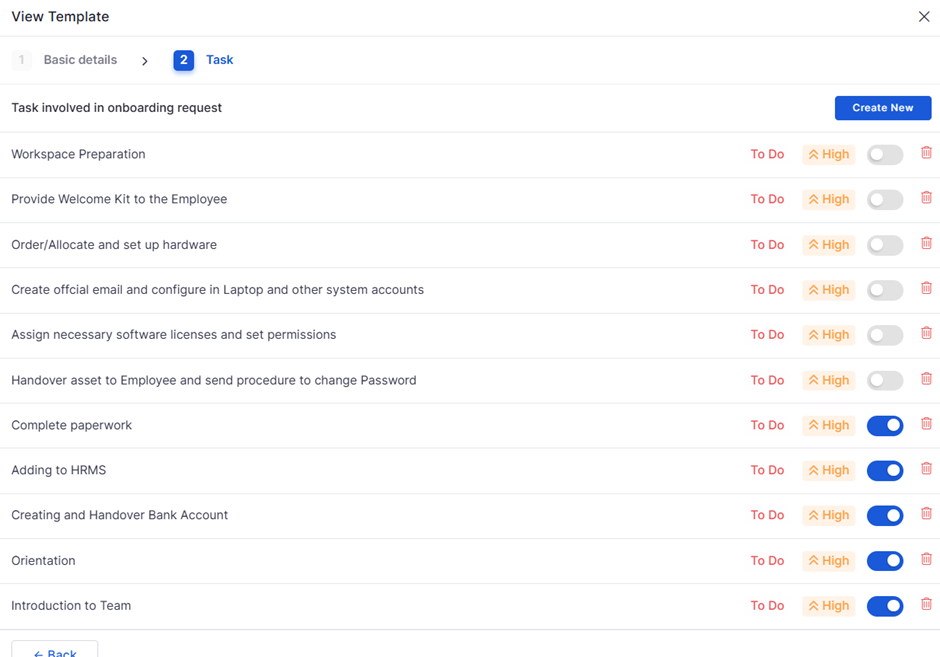
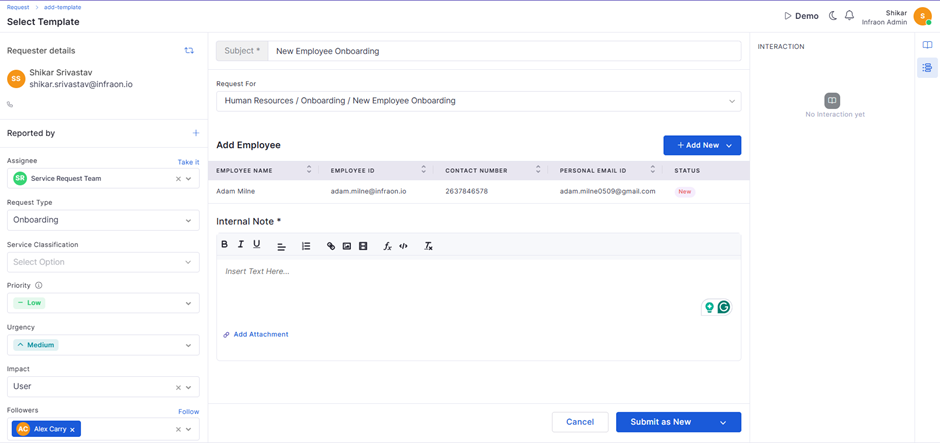
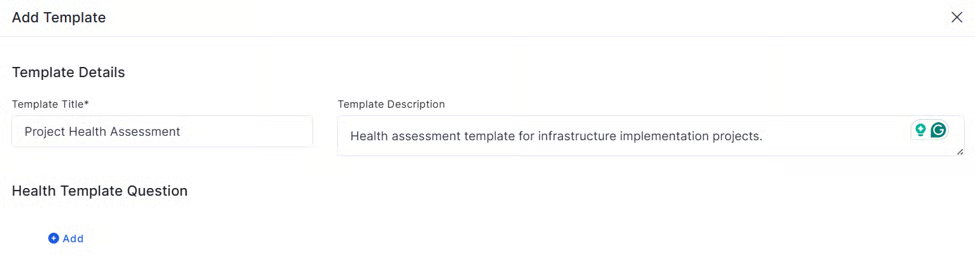
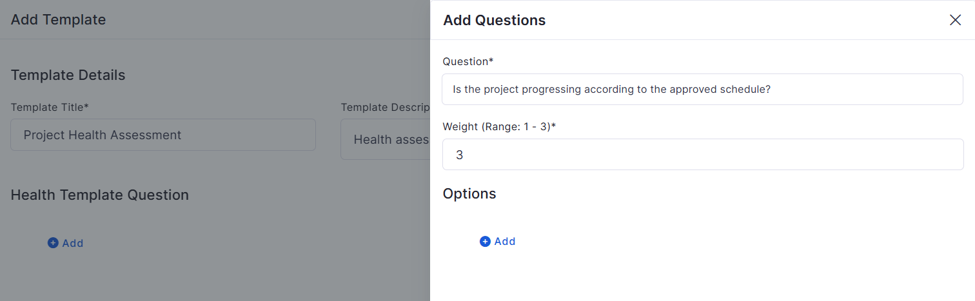
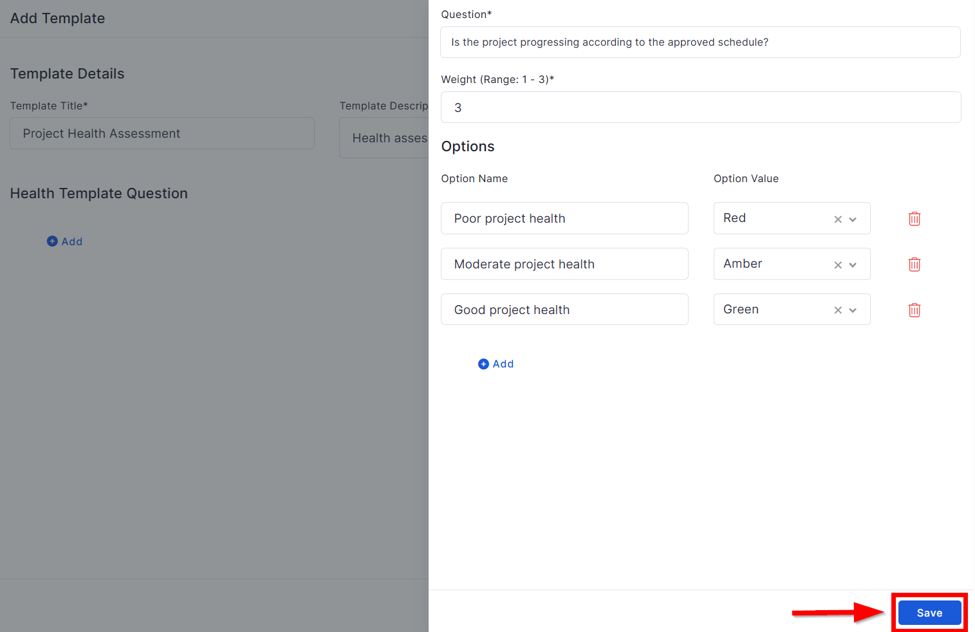
The CMDB (Configuration Management Database) module in Infraon platform is designed to maintain a structured repository of all configuration items (CIs) within an IT environment. These CIs can include assets such as laptops, servers, routers, and applications, along with their relationships and dependencies.
A Business Rule in Infraon defines an automation logic that performs actions when certain conditions are met. In the CMDB module, business rules can be applied to assets for activities such as:
Auto-updating tags and properties
Assigning ownership
Enabling workflows based on asset data
Triggering changes when predefined criteria are satisfied
This use case demonstrates how to automatically assign values to discovered assets (such as Asset Tag, Owner, and User Tag) based on their IP Address. This helps:
Automatically categorize assets during discovery
Assign ownership without manual intervention
Maintain consistency in asset metadata
An organization wants to automatically assign specific properties to all IT assets discovered within a certain IP address range. For example:
Any device within the IP range 192.168.50.1 should be tagged as an HP asset.
The technician Alex should be assigned as the asset owner.
The asset should also be grouped under the DevOps user tag for better filtering and reporting.
Once the rule is enabled:
Infraon continuously monitors assets being discovered or updated in the CMDB.
If an asset's IP address matches the defined rule (192.168.50.1), the system automatically updates the configured fields (Asset Tag, Owner/Technician, User Tag).
This ensures that the asset is properly categorized and assigned without manual input.
to view.
This use case explains how to automatically calculate and update the End of Life (EOL) date for assets using the Model Year field. It is useful when acquisition or purchase dates for existing assets are unavailable.
The business rule evaluates the asset category and applies a predefined lifecycle period to determine the expected EOL date.
Example Lifecycle Rules:
Laptop → Model Year + 5 Years
Desktop → Model Year + 7 Years
Monitor → Model Year + 10 Years
Use this rule to:
Standardize lifecycle estimation across assets
Automatically maintain End-of-Life values
Reduce manual updates for large asset inventories
Improve replacement planning and reporting
Navigate to Infraon Configuration → Infraon Automation → Business Rule.
Click Add Business Rule.
In the Rule details section, enter the required information:
Under Rule Setup, define when the rule should execute.
Define which field should be updated automatically.
Once configured:
The Software module in Infraon Business Rules enables administrators to automatically trigger notifications when specific software-related events are detected during inventory synchronization. Instead of manually monitoring software changes across managed devices, administrators can configure rules that evaluate software and asset conditions and notify the appropriate users when those conditions are met.
Business Rules for the Software module support event-driven automation for software lifecycle activities such as software installation, uninstallation, blacklisted software detection, non-whitelisted software detection, and whitelisted software detection. Rules can also be filtered using software properties and asset attributes to ensure notifications are generated only for relevant events.
This use case demonstrates how to automatically notify the asset owner and designated users whenever a blacklisted software application is detected on a managed Windows device during inventory synchronization. This helps administrators:
Detect unauthorized software immediately.
Improve software compliance across managed devices.
Notify responsible users without manual intervention.
Automate software monitoring using Business Rules.
An organization wants to receive an email notification whenever a blacklisted application is detected on any Windows laptop within the Finance department.
The administrator creates a Software Business Rule that monitors the Blacklisted Software Detected event. During inventory synchronization, whenever a matching software is discovered on a Windows device belonging to the Finance department, the system automatically sends an email notification to the asset owner and the configured administrator.
Navigate to Infraon Configuration → Infraon Automation → Business Rule.
Click Add Business Rule.
In the Rule Details section, configure the following:
Configure the conditions that determine when the notification should be triggered.
Configure the recipients who should receive the notification when the rule conditions are satisfied.
Once the rule is enabled:
The Inventory Agent periodically scans managed devices and synchronizes software information with the Infraon server.
During inventory synchronization, the Business Rule engine evaluates the detected software events against the configured rule conditions.
If the detected software event matches the configured Event, software filters, and asset filters, the rule is triggered.
The system automatically sends an email notification to the configured recipients, such as the asset owner, selected users, or user tags.
The CMDB Business Rule module enables you to automatically update asset properties based on configured conditions. With Dynamic Asset Rule Re-Evaluation & Enforcement, the rule engine continuously monitors supported asset updates and re-evaluates applicable business rules whenever dependent asset attributes change.
This feature introduces Priority and Enforcement Mode settings to control rule execution, conflict resolution, and how automated updates behave after users manually modify asset values.
This use case demonstrates how to automatically update the Department field for assets based on their IP Address, while controlling how the rule behaves during future asset updates using Enforcement Mode.
This helps you:
Automatically update asset values when matching conditions are met.
Re-evaluate rules when dependent asset attributes change.
Prevent conflicting rule execution using rule priority.
Control whether automated values should overwrite manual updates.
An organization wants to automatically assign the Department field for assets whose IP address matches a predefined range.
For example:
Assets with the IP Address 1.0.0.0 should automatically be assigned to the IT Team department.
The rule should execute whenever the asset is created or updated through discovery synchronization, API updates, manual edits, or bulk import.
The administrator wants the rule to update the department only if the field is currently empty by configuring the Apply If Empty enforcement mode.
Navigate to Infraon Configuration → Infraon Automation → Business Rule, and then click Add Business Rule.
Once the rule is enabled:
The rule engine evaluates matching assets during asset creation, manual updates, discovery synchronization, API updates, and bulk imports.
When an asset's IP Address matches the configured value (1.0.0.0), the Department field is automatically updated to DepTestCount0.
Future rule execution follows the configured Enforcement Mode:
The Business Rule module in Infraon enables administrators to configure automated email notifications for asset lifecycle events. This feature sends notifications whenever assets are created or deleted, ensuring stakeholders are informed without requiring manual intervention.
Notifications are generated only for informational purposes and do not require approval or user action. For bulk operations, the system sends a single consolidated email instead of individual emails for each asset, preventing unnecessary email traffic.
This case demonstrates how to configure a Notification Business Rule that sends email notifications whenever assets are created or deleted.
This helps you:
Notify administrators or stakeholders when assets are added or removed.
Receive a single summary email for bulk asset import and deletion operations.
Avoid email flooding during large-scale asset operations.
Maintain notification history and audit logs for asset lifecycle events.
An organization wants to notify the IT Asset Management team whenever assets are created or deleted.
For example:
When a single asset is added, an email containing the asset details is sent to the configured recipients.
When 5,000 assets are imported, the system sends one consolidated email containing the import summary and a bulk import report.
When a single asset is deleted, an email containing the deleted asset details is sent.
When 10,000 assets are deleted in bulk, only one summary email is generated after the operation completes.
Navigate to Infraon Configuration → Infraon Automation → Business Rule, and then click Add Business Rule.
In the Rule Details section, configure the following settings.
Add Rule | Basic Details
Rule Setup | When
Configure the event that triggers the notification.
Rule Setup | Then
Configure the notification action.
Use the + icon to add additional conditions and the − icon to remove conditions from the rule.
Once the rule is enabled:
The selected notification event is continuously monitored by the system.
When the configured event occurs, the system evaluates the rule and sends an email notification to the configured recipients.
For single asset operations, an individual email is generated containing the asset details, user information, and operation timestamp.
For bulk asset import operations, the system sends one consolidated email after the import completes. The email includes the total processed records, created count, updated count, failed count, operation details, and a bulk import report.
The Business Rule in Infraon enables automated ticket assignment by matching selected asset attributes with corresponding technician/user attributes. This helps identify the appropriate technician from the resolved team based on asset information such as Base Location, Installed Location, Asset Owner, Asset Tag, or Owner Tag.
This use case demonstrates how to automatically assign tickets to the appropriate technician based on the asset associated with the ticket. This helps:
Reduce manual ticket assignment.
Route tickets to technicians based on relevant asset information.
Ensure tickets are assigned to technicians associated with the asset's location or ownership.
Provide a fallback assignment when no matching technician is found.
An organization wants tickets raised for its IT assets to be automatically assigned to the appropriate technician based on the asset information.
For example:
A ticket is raised for a laptop located at the Bangalore Office.
The assignment rule uses Base Location as the Match By option.
Infraon matches the asset's base location with the technician's corresponding location.
The ticket is automatically assigned to the technician associated with the Bangalore Office.
Similarly, an organization can use Asset Owner to assign a ticket directly to the technician responsible for the asset.
A Delayed Assignment Rule applies the same asset-based matching logic when ticket assignment is processed after a defined delay.
Once the assignment rule is enabled:
Infraon identifies the resolved team for the ticket.
The system checks the selected Match By criteria.
The selected asset attribute is matched with the corresponding technician/user attribute.
If a matching technician is found, the ticket is automatically assigned to that technician.
Example: If Match By = Base Location, an asset located at the Bangalore Office is matched with technicians associated with the Bangalore location, and the ticket is assigned to the appropriate technician.
Automated Assignment: Reduces manual effort in identifying technicians.
Attribute-Based Routing: Assigns tickets using relevant asset information.
Accurate Technician Selection: Helps route tickets to technicians associated with the asset.
Flexible Matching: Supports location, ownership, tags, and other asset attributes.
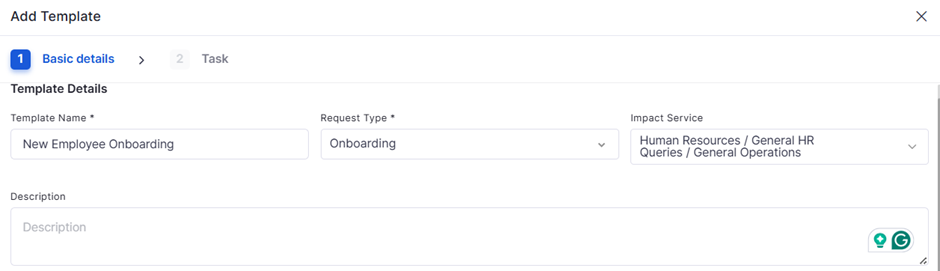
Brief description for internal reference.
Is Enable
ON (Toggle Enabled)
Ensures the rule is active and will run automatically.
Enforcement Mode
Select the required enforcement mode.
Determines how the business rule applies its configured value to the selected CMDB attribute.
Apply Once
Select Apply Once.
Applies the business rule value only once when the rule is executed.
Example: If the rule sets Department to IT, the value is applied once and is not continuously enforced.
Enforce Always
Select Enforce Always.
Continuously enforces the value defined in the business rule.
Example: If Department is configured as IT and a user changes it to Finance, the rule can restore the value to IT.
Apply If Empty
Select Apply If Empty.
Applies the business rule value only when the target field is empty.
Example: If Department is empty, the rule sets it to IT. If it already contains Finance, the existing value is retained.
Preserve Manual Changes
Enable or disable the toggle.
Determines whether manually modified CMDB values are retained when the Enforce Always or Apply If Empty enforcement modes are used.
When enabled, manual changes are preserved.
When disabled, the business rule can apply its configured value according to the selected Enforcement Mode.
Select value
Define the execution priority if multiple rules exist.
Description
Enter text
Add a short summary of the rule purpose.
Is Enable
Toggle On
Enables the business rule.
Add condition
Add additional filters, such as Make contains Lenovo, if required.
Enter value
Optional. Leave blank if not required.
Enter text
Add a brief description describing the purpose of the rule. Example: Notify asset owner when blacklisted software is detected.
Is Enable
Toggle On
Enables the business rule so it is evaluated during inventory synchronization.
Equals
Finance
Restricts notifications to assets belonging to the Finance department.
Software Publisher (Optional)
Equals
Example Publisher
Filters notifications based on the software publisher.
Software Name (Optional)
Contains
Example Software
Triggers the rule only for matching software names.
Software Version (Optional)
Equals
5.2.1
Restricts notifications to a specific software version, if required.
All rule creation, modification, deletion, and notification execution activities are recorded in the audit logs for traceability.
Rule Name
Enter value
Specify a descriptive name for the business rule. Example: Department Auto Assignment
Module
Select from the dropdown
Select CMDB.
Type
Select from the dropdown
Select Set Value.
Precedence
Select from the dropdown
Defines the execution priority when multiple matching rules exist. Example: High
Enforcement Mode
Select from the dropdown
Select how the rule behaves after the initial execution. Example: Select Apply If Empty to populate the Department field only if it does not already contain a value.
Preserve Manual Change
Toggle On or Off
Prevents automated updates from overwriting manually modified values when enabled. Example: Enabled
Description
Enter text
Optionally provide a short description for the rule. Example: Automatically assign department based on IP address.
Is Enable
Toggle On
Enables the business rule.
Configure the field that should be updated when the condition is satisfied.
Then Value Update To
Select field
Select the asset field to update.
Example: Department
Value
Select value
Add additional conditions or actions using the + icon or remove existing ones using the − icon.
Enforce Always reapplies the configured value whenever the rule conditions match.
Apply If Empty updates the target field only when it is empty.
Preserve Manual Changes prevents automated updates after a user manually modifies the field.
If multiple rules match the same asset, the rule with the highest Precedence is applied.
All automated updates are recorded in the Audit Log for traceability.
Description
Enter text
Optionally provide a short description. Example: Sends notification whenever a new asset is created.
Is Enable
Toggle On
Enables the notification rule.
For bulk asset deletion, the system sends one consolidated email after the delete job completes. The email includes the deleted asset count, operation details, and a deleted asset report.
The system sends only one notification per bulk operation and does not generate separate emails for every asset.
Notification history and audit logs are maintained to record the notification status and asset lifecycle events.
Assignment Rule
Under Then Assign To, select the required Match By option to assign the ticket based on an asset attribute.
Allows an assignment rule to identify the appropriate technician using the selected asset attribute, such as Base Location, Installed Location, Asset Owner, Asset Tag, or Owner Tag.
Example: When Match By = Base Location, the ticket is assigned to the technician associated with the asset's base location.
Delayed Assignment Rule
Under Then Assign To, select the required Match By option for the delayed assignment rule.
Allows delayed ticket assignment to use asset-related information when selecting the technician.
Example: When Match By = Asset Owner, the ticket is assigned to the technician associated with the asset owner when the delayed assignment is processed.
Precedence*
High
Determines the priority of the rule when multiple assignment rules are applicable.
Description
Optional
Provides additional information about the rule's purpose.
Is Enable
ON
Ensures the rule is active and applied to eligible tickets.
Then Assign To
Required Match By option
Determines the asset attribute used to identify the appropriate technician.
Match By
Base Location
Matches the asset's base location with the corresponding technician attribute.
Group
Select the required group.
Assigns the incident to the selected support group.
Example: Assign the incident to the Network Support group.
Expertise
Select the required expertise.
Filters technicians based on the expertise required to handle the incident.
Example: Select Network expertise for a network-related incident.
Asset Tag
The system matches the asset tag with the corresponding technician attribute.
Owner Tag
User Tag
The system matches the asset's owner tag with the technician's corresponding user tag.
Select the compatible user attribute.
Defines the technician information to match the selected asset attribute.
Note: This field is hidden when Asset Owner is selected because the ticket is directly assigned to the asset owner.
If Mandatory is enabled and no matching technician is found, the ticket remains assigned to the team.
If Mandatory is disabled, the system falls back to the existing team, expertise, and level-based assignment.
Fallback Assignment: Prevents tickets from remaining unassigned when no matching technician is available.
Field
Value
Description
Module
CMDB
Selects the CMDB module to apply the rule to asset-level records.
Type
Set Value
Specifies that values will be auto-filled when the condition is met.
Rule Name
Auto-Tag HP Assets
A custom, descriptive name for the rule.
Description
Field
Operator
Value
Description
IP Address
In Range
192.168.50.1
The condition checks if the asset IP matches this value (or falls within a range).
Field
Value to Set
Description
Asset Tag
HP
Automatically tags the asset with “HP” to classify it by vendor or type.
Owner/Technician
Alex
Assigns Abdul as the default technician or owner responsible for this asset.
User Tag
DevOps
Applies the DevOps tag for segmentation or automation.
Rule Name
Enter value
Specify a name for the rule. Example: End of Life Auto-Update
Module
Select from the dropdown
Choose CMDB.
Type
Select from the dropdown
Choose Set Value.
When
Select field
Choose the asset category field such as Device Type.
Condition
Select operator
Example: Contains
Value
Enter value
Example: Laptop
Then Value Update To
Select field
Choose End of Life.
Reference Field
Select field
Choose Model Year.
Add Years
Enter value
Example: 5 for Laptop assets.
Rule Name
Enter a value
Specify a meaningful name for the business rule. Example: Blacklisted Software Notification
Module
Select from the dropdown
Choose Software to create a software-based notification rule.
Type
Select from the dropdown
Choose Notification as the business rule type.
Event
IN
Blacklisted Software Detected
Select the software event to monitor. This is the mandatory first condition and cannot be modified.
Device Type
In
Laptop
Limits the rule to laptop devices.
Then
Notify To
Select the notification action.
Recipients
Asset Owner, Administrator
Select one or more recipients, including Asset Owner, specific users, or user tags.
Notification Channel
Sends the notification using the default email template.
Label
Action
Description / Example
Rule Name
Enter value
Specify a descriptive name for the notification rule. Example: Asset Creation Notification
Module
Select from the dropdown
Select CMDB.
Type
Select from the dropdown
Select Notification.
Precedence
Select from the dropdown
Label
Action
Description / Example
When
Select field
Select Event.
Operator
Select operator
The operator is In.
Event
Select value
Select one of the supported events:
Single Asset Added
Bulk Import
Single Asset Deleted
Bulk Delete
And
Add condition (Optional)
Label
Action
Description / Example
Then
Select action
Select Notify To.
Recipients
Select users or email addresses
Select one or more recipients who should receive the notification. Example: alex@infy.com, chrisbrown@example.com
Module
Ticket Management
Applies the business rule to ticket assignment.
Type
Assignment Rule
Base Location
Location
The ticket is assigned to a technician associated with the asset's base location.
Installed Location
Location
The ticket is assigned based on the asset's installed location.
Asset Owner
—
The ticket is directly assigned to the technician/user who owns the asset.
Match By
Enable the Match By toggle.
Enables asset-based technician matching during delayed assignment.
Mandatory
Enable or disable Mandatory.
Determines whether the ticket remains team-assigned when no matching technician is found or falls back to the existing assignment logic.
Asset Attribute
Select the required asset attribute.
Defines the asset information used for delayed technician matching.
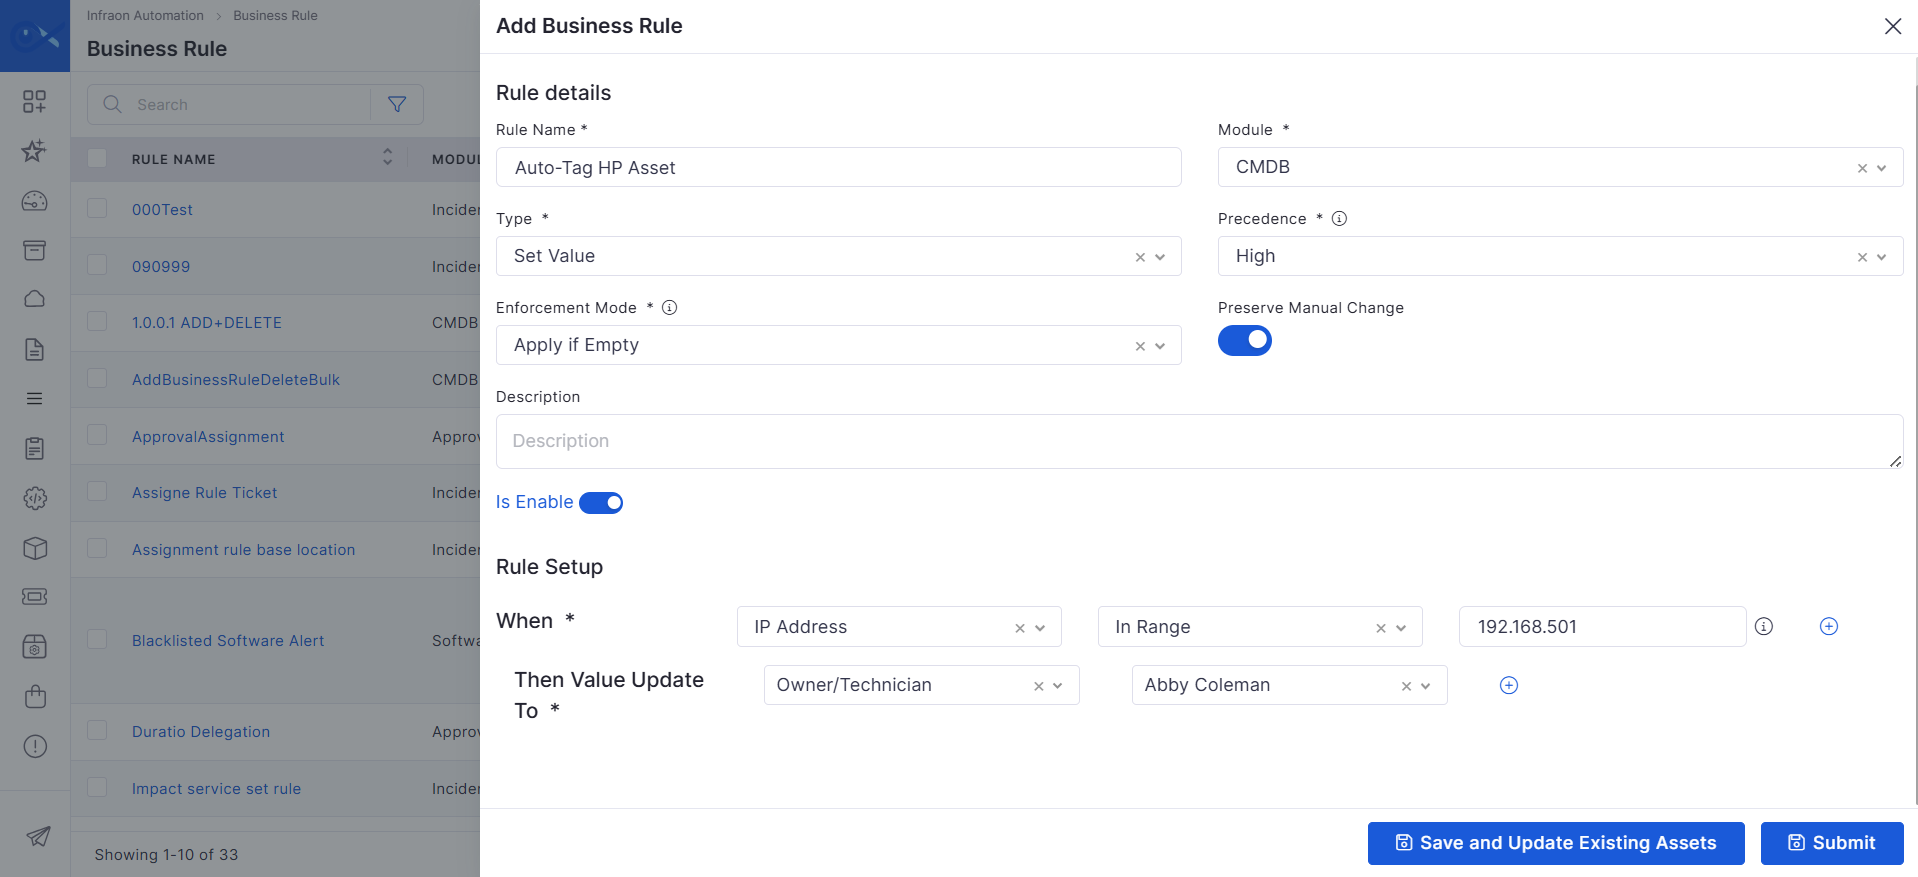
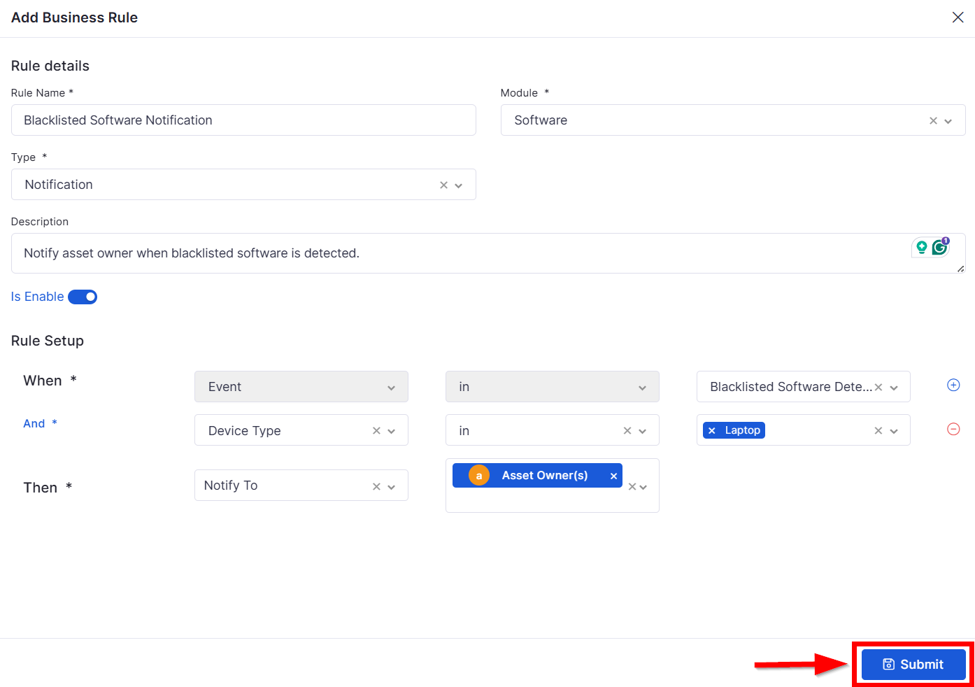
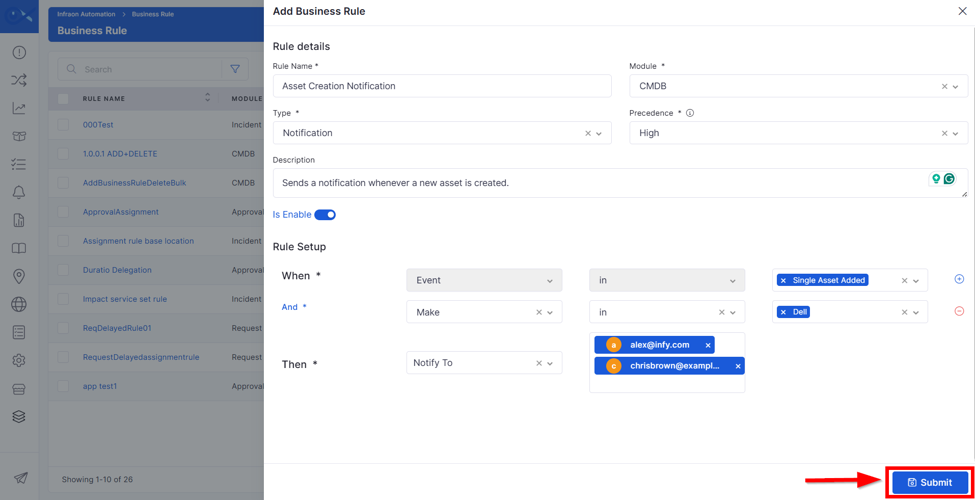
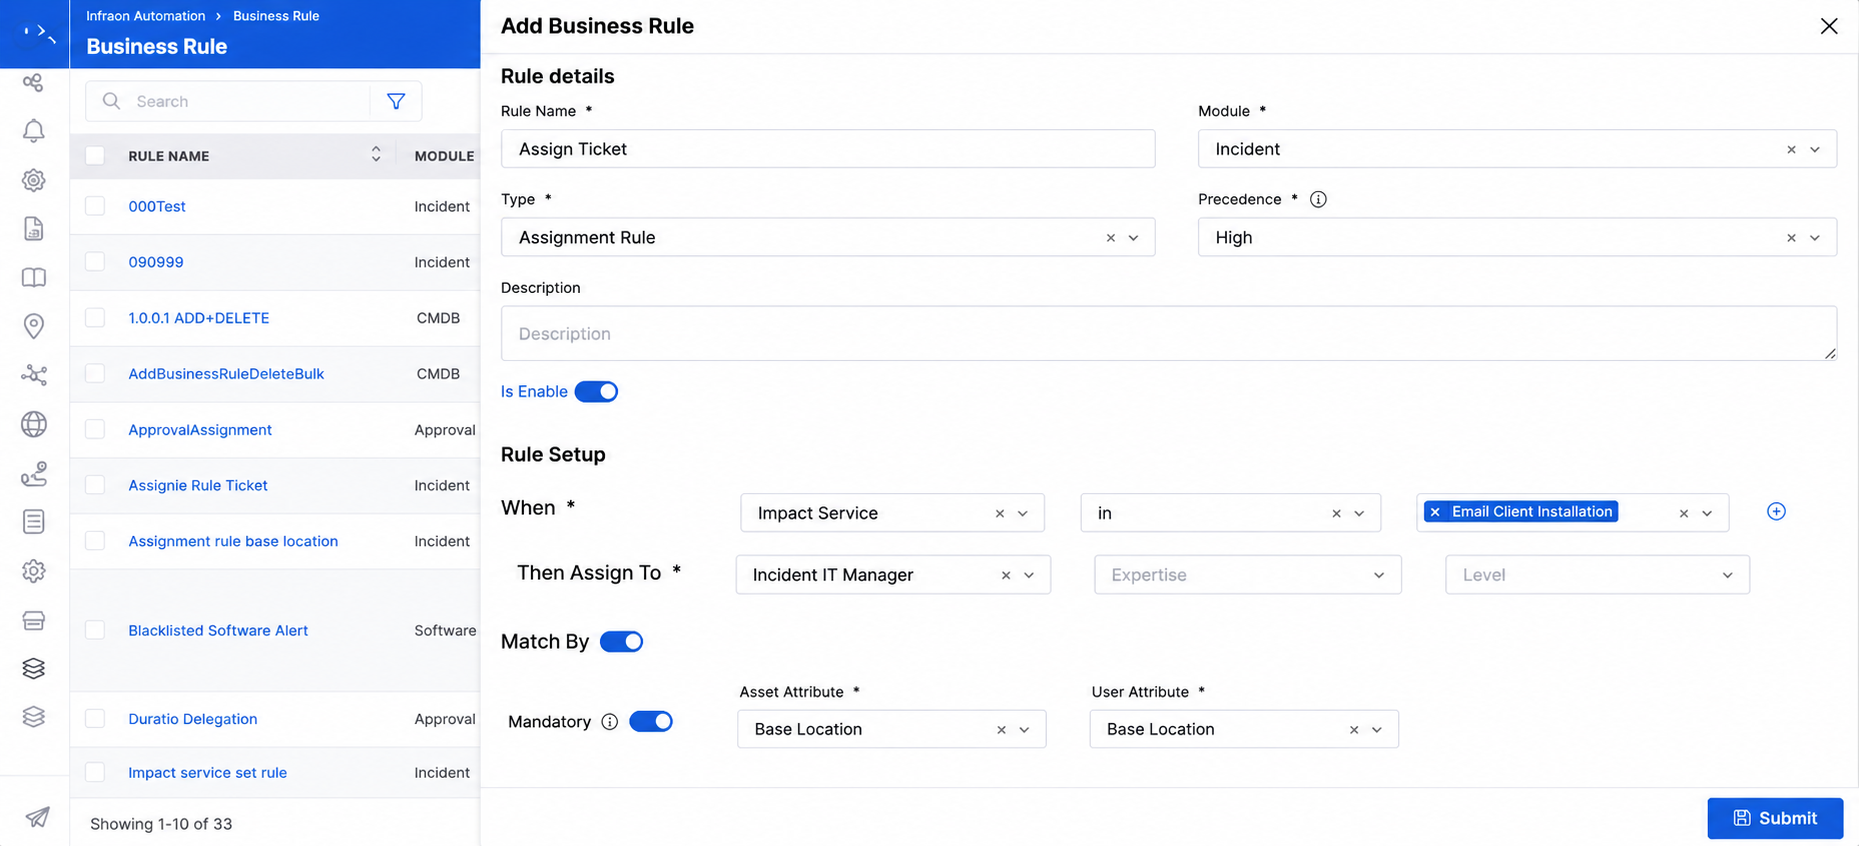
[Optional]
Precedence
And
Add Months
Description
Department (Optional)
Specify the execution priority when multiple notification rules exist. Example: High
Add additional asset filters if the notification should apply only to specific assets. Example: Make → In → Dell
Defines the rule for automatically assigning tickets based on asset attributes.
Asset Tag
User Attribute
Specify the comparison operator.
Example: In
Value
Enter or select value
Specify the matching value or range.
Example: 1.0.0.0
Select the value to assign to the target field.
Example: IT Team
Select an operand
Specifies the incident or related field that should be evaluated.
Operator
Select an operator
Defines how the selected operand should be evaluated against the value.
Value
Select or enter a value.
Specifies the value that the operand must match for the rule to be triggered.
Level
Select the required level.
Filters technicians based on their configured support or expertise level.
Match By
Enable the Match By toggle.
Narrows the technician pool of the resolved team by matching the selected asset attribute with the corresponding user attribute.
Example: Match the asset's Base Location with the technician's location.
Mandatory
Enable or disable Mandatory.
Determines what happens when no matching technician is found. When enabled, the ticket remains assigned to the team if no match is found.
When disabled, the system falls back to the existing team, expertise, and level-based assignment.
Asset Attribute
Select an attribute.
Defines the asset information used for matching. Available options include Base Location, Installed Location, Asset Owner, Asset Tag, and Owner Tag.
User Attribute
Select the compatible attribute.
Defines the technician/user information to match the selected asset attribute. The available options depend on the selected Asset Attribute.
This consists of your workflow's drag-and-drop elements, such as state, action, and condition. This helps create a customised workflow based on your organisational, compliance, or process requirements.
The Build Form contains three main categories of workflow elements, each serving distinct purposes in the workflow automation process:
State
Actions
Conditions
Represents different stages or conditions in the workflow lifecycle
State elements define the various phases that a workflow item can exist during its lifecycle. Each state represents a specific condition or stage of processing that requires different actions, permissions, or behaviors.
The Open State serves as the initial entry point for all workflow items. This is the mandatory starting state for new tickets, requests, or incidents as they begin their journey through the workflow process. It establishes the foundation for all subsequent workflow operations and defines the initial parameters for processing.
Initialise new workflow items with default values
Set initial assignments and ownership
Configure entry-level permissions and visibility
Establish baseline notifications and alerts
Configuration Options
The In Progress State represents the active work phase where assigned resources are actively working on resolving, completing, or processing the workflow item. This state indicates that work has commenced, and progress is being made toward resolution.
Track active work and progress updates
Monitor time spent and resource allocation
Enable status updates and communication
Provide escalation triggers based on time thresholds
Support collaborative work environments.
Configuration Options
The On Hold State represents a temporary suspension of workflow processing while awaiting external input, resources, or conditions. This state maintains the workflow item in the system while clearly indicating that active work cannot proceed until specific requirements are met.
Pause workflow progression with defined reasons
Maintain visibility while work is suspended
Set automatic resume triggers when conditions are met
Track hold duration for reporting and analysis
Configuration Options
The Resolved State indicates that the primary work has been completed and a solution has been implemented, but final verification or customer confirmation is still pending. This state represents the completion of technical work, pending validation of the solution's effectiveness.
Mark solution completion while awaiting verification
Trigger customer satisfaction surveys
Enable solution validation processes
Support knowledge base integration
Prepare for final closure procedures.
Configuration Options
How Cancellation Works
The Close State represents the completion of the workflow with all requirements satisfied, validation completed, and no further action required. This state triggers final reporting, metrics collection, and archival processes.
Finalize workflow with complete resolution
Capture closure metrics and categorization
Execute post-completion procedures
Archive workflow data for historical reference
Generate completion reports and analytics.
Configuration Options
The Approval State represents a decision point where workflow progression requires explicit authorization from designated stakeholders. This state enables governance, compliance, and decision-making processes within automated workflows.
Pause workflow for authorization decisions
Route approval requests to appropriate stakeholders
Support multiple approval methods (email, system, mobile)
Handle approval hierarchies and delegation
Configuration Options
Approval Configuration Section
Email Approval Template Configuration
Approval Outcomes
The approval state typically branches into two paths:
Accepted: Green button leading to next workflow state
Rejected: Orange button leading to rejection handling state
In the Approval state, approvers are provided with multiple action options to handle the request effectively.
By default, the following actions are available across supported modules such as and :
The Approval state represents a decision point where workflow progression requires authorization. The workflow pauses at this state until an approval action is completed, after which it proceeds based on the configured outcome.
Configuration Options
Approval Configuration
This section defines how approval requests are routed. You can configure one of the following approval types:
Approval – Route approval to users, teams, or the Change Manager
Is CAB Approval – Route approval to CAB (Change Advisory Board)
Reporting Manager – Route approval to the requester's reporting manager
Approval
Used for routing approvals to specific users, teams, or the Change Manager.
Is CAB Approval
Used for routing approvals to CAB (Change Advisory Board), typically for high-impact or planned changes.
Reporting Manager
Used for hierarchical approval based on organizational structure.
Email Approval Template Configuration
Defines the email content sent to approvers.
Approval
Workflow pauses when it reaches the Approval state
Approval request is sent based on the configured approval type
Approvers can take action via:
Email approval link
The Review card is used to configure a Post Implementation Review (PIR) process in request workflows. It allows selected users or teams to review a completed request, provide comments, and, optionally, trigger an automatic status transition after the review.
Configuration Options
Action blocks represent automated tasks that execute during workflow state transitions. These blocks enable workflow automation by performing predefined operations, such as field updates, state transitions, notifications, and third-party integrations, without requiring manual intervention.
The Transfer State Action automatically moves workflow items between different states based on predefined conditions or triggers. This action enables automated workflow progression and routing based on business logic, eliminating the need for manual state transitions.
Automate state transitions based on conditions
Route workflow items to appropriate processing states
Enable conditional workflow branching
Support time-based and event-driven transitions
Configuration Options
The Set Value Action automatically assigns or updates field values during workflow execution. This action enables dynamic field population based on conditions, calculations, or predefined business rules, ensuring consistent data management across workflow processes.
Automate field value assignment
Support dynamic calculations and conditional logic
Enable bulk field updates during transitions
Maintain data consistency across workflow states
Support both static and calculated value assignments
Configuration Options
Configuration Examples
The Send Email Action triggers automated email notifications to stakeholders during workflow execution. This action supports template-based communication with dynamic content insertion, enabling comprehensive management of workflow events through notifications.
Automated stakeholder notifications
Template-based email composition
Dynamic content and merge field support
Multi-recipient support with role-based routing
Rich text formatting and attachment support
Configuration Options
Email Template Configuration
The Send SMS Action delivers automated text message notifications for time-sensitive or urgent workflow events. This action provides immediate mobile communication capabilities for critical updates and alerts.
Instant mobile notifications
Character-optimized messaging
Role-based SMS routing
Critical alert delivery
Mobile-friendly communication
Configuration Options
The App Integration Action enables workflow automation to interact with third-party applications and systems through API calls and integration nodes. This action extends workflow capabilities beyond the Infraon platform to create comprehensive automation solutions.
Third-party system integration
API-based data exchange
External process automation
Custom integration development
Bi-directional data synchronization
Configuration Options
Integration Capabilities
Configuration Examples
The Send via WhatsApp action allows workflows to send automated WhatsApp notifications to selected recipients when specific conditions or state transitions occur.
This action integrates with the configuration. Ensure that WhatsApp is configured and templates are enabled before using this action. Its enables:
Real-time notifications to users via WhatsApp
Supports template-based communication for consistency
Reduces dependency on email/SMS for critical updates
Improves user engagement and response time
It can be added to any workflow stage, such as:
Ticket Management
Request Management
Problem Management
Change Management
How it works
Admin configures integration from Marketplace
Templates are enabled and made available
Workflow is configured with the Send via WhatsApp action
When the workflow is triggered:
Selected template is fetched
Configuration Options
Configuration Details | Send via WhatsApp
Condition blocks establish logical criteria that control workflow behavior and routing. These blocks enable intelligent decision-making within workflows by evaluating data values against predefined business rules, allowing workflows to respond dynamically to different scenarios and requirements.
The If Condition Block creates conditional logic branching within workflows by evaluating specified criteria and executing different workflow paths based on the results. This block serves as the primary decision-making component, enabling workflows to respond intelligently to varying data conditions and business scenarios.
Create conditional logic branching within workflows
Evaluate field values against specified criteria
Enable dynamic workflow routing based on real-time data
Support complex boolean logic with multiple conditions
Configuration
The If Condition block uses a three-column configuration approach:
Configuration Options
Using the 'Save' option saves the workflow. The workflow changes and conditions are added when they are published.
Service mapping allows administrators to associate services with workflows so that records for a service follow the appropriate workflow. The Services tab is available only for the Incident, Request, Problem, and Release modules. It is hidden for Change and other unsupported modules, and attempts to add or remove services through the API are rejected.
When adding a service, the system checks whether it is already mapped to another workflow and prevents duplicate mappings. Adding services to preconfigured workflows is also restricted.
When removing a service, the system checks for open records associated with that service in the same workflow and blocks removal if any exist.
Service | Configuration Options
The Build Form section enables administrators to design and customize the ticket workflow form according to their organization's and operational requirements. It consists of drag-and-drop HTML elements that can be used to add custom fields and modify the layout of sections.
Macros | Details
When configuring workflow items, you can use macros to instantly insert real-time information into emails, SMS, or notifications. Technicians can quickly generate clear and complete notifications by embedding these macros into workflow configurations.
The following Macros can be availed:
Asset (IP Address, Hostname, etc.)
Basic Info (Severity, Event Message, etc.)
NCCM (Job Failure Reason, Running Changes, etc.)
Resource (Type, Name, etc.)
Assignment Information (Group Name, Assignee, etc.)
A custom field is a configurable data field that allows administrators to extend the standard ticket form with organization-specific attributes. It enables teams to capture additional information required for process control, compliance tracking, or reporting, beyond the predefined fields available in the system.
Custom fields can be created using various input types such as Text, Dropdown, Checkbox, Date, or Number fields. These can be placed across multiple sections — General, Assignment, Resolution, and Closure — to gather context-specific details at different stages of the ticket lifecycle.
Each section in the workflow (such as General, Assignment, Resolution, and Closure) can be customized independently.
Choose a Section
Identify the section where you want to add the new fields: General, Assignment, Resolution, or Closure.
Each section has a dedicated preview area to visualize the form.
Add Content
From the Add content here panel on the left, drag and drop the required element (e.g., Text, Dropdown, Date, Checkbox) into the section.
You can add multiple fields depending on your data collection needs.
Configure the Field
Once dropped, click the field to configure its label, field type, placeholder text, mandatory status, or default values.
Example: For a Text field, rename it to “Requester Department” and make it mandatory.
Arrange the Layout
You can reorder the fields or add Dividers and Headings for better form structure and readability.
Preview and Save
Click Preview to check how the fields will appear in the ticket form.
Once satisfied, click Save to update the workflow form layout.
Publish Changes
Select Publish to make the updated form available for users during ticket creation or processing.
The IT team needs to distinguish between time-barred and non-time-barred tickets during ticket creation. This classification helps monitor compliance, prioritize time-sensitive issues, and ensure SLA adherence.
To achieve this, a custom checkbox field named “Time-Barred Ticket” is added to the General Section of the ticket workflow.
Navigate to Workflow → Configure Workflow → Build Form.
In the General Section, drag and drop the Checkbox element from the left panel.
Configure the field as shown below:
Checkbox Field Configuration
When creating a ticket, the Time-Barred Ticket checkbox appears in the General Section.
If checked, the ticket is categorized as a Time-Barred case.
If unchecked, it is recorded as a Non-Time-Barred case.
The field is visible both to technicians (in add/edit forms) and optionally to end users (if enabled for the self-service portal).
Once implemented, this custom field can be leveraged in analytical widgets and dashboards.
In the Count Summary Widget, the system displays the total number of Time-Barred and Non-Time-Barred tickets based on the checkbox selection.
Under Widget Configuration, you can now also use Location in the Group By option.
Example: View the count of Time-Barred vs Non-Time-Barred tickets by Location, Department, or Technician.
The organization gains real-time visibility into time-sensitive tickets.
Teams can track SLA breaches more effectively.
Management dashboards now provide categorized insights based on the new custom checkbox field.
In the monthly summary widget, you can now view:
10 Time-Barred Tickets and 25 Non-Time-Barred Tickets under the “Network Support” team.
Filter or group these results further by Location to analyze regional ticket handling performance.
This use case demonstrates how to configure a checkbox custom field in the workflow form such that:
Selecting the checkbox dynamically displays associated fields.
Certain fields become mandatory based on checkbox selection.
Filling in associated fields can mark the checkbox as mandatory.
A group dropdown is included within the custom field for enhanced functionality.
Navigate to Workflow → Configure Workflow → Build Form.
In the General Section, drag and drop the Checkbox element from the left panel.
Configure the field as shown below:
When creating a ticket, the custom field appears alongside other customer details, such as phone number and Email.
Dynamic behavior based on selection
Online selected:
Fields displayed: Credit Card Number, CVV
Mandatory fields: Credit Card Number, CVV
COD selected:
Fields displayed: Delivery Address, Address Type
Mandatory fields: None
The checkbox selection automatically governs which fields are displayed and required, providing dynamic validation in the ticket form.
Toggle Switch
Enable/disable SLA response time tracking from this state
Reopen
Toggle Switch
Allow tickets to return to the Open State from other states
Transition State
Dropdown Selection
Define the default next state when progressing from Open
Toggle Switch
Automatically flag items that remain in this state beyond the threshold
Reopen
Toggle Switch
Allow return to previous states if needed for rework
Transition State
Dropdown Selection
Define the next logical state after work completion
Toggle Switch
Allow resumption of workflow when hold conditions are resolved
Transition State
Dropdown Selection
Define the target state when the hold is released
Toggle Switch
Automatically resolve when specific system events occur
Is Cancelled
Toggle Switch
Allows items (Tickets, Requests, Problems) to be moved into a Resolved-Cancelled state. When enabled, users must provide a cancellation reason, and the closure category is automatically set to Cancelled.
Peer Review
Toggle Switch
Require peer validation before moving to closure
Transition State
Dropdown Selection
Define next state after validation (typically Close)
Toggle Switch
Mark as the final workflow exit point (prevents further transitions)
Auto Closure
Toggle Switch
Enable automatic closure after specified conditions/timeframes
Peer Review
Toggle Switch
Require final review before permanent closure
Transition State
Dropdown Selection
Generally disabled for the closed state (end of workflow)
Toggle Switch
Automatically submit for approval when entering this state
Transition State
Dropdown Selection
Define the next state for approved items
Approve
Enter the required action
The default approval action can be renamed to a preferred label, such as Accept, Authorize, or Confirm.
Reject
Enter the required action
The default rejection action can be renamed to a preferred label, such as Decline, Deny, or Return.
Toggle Switch
Route to specific team members for group approval
Team*
Dropdown Selection
Select target team for approval routing (required field)
Note:
Information Text
"User must have view & edit permission for configured process"
Request Signature
Enable the toggle to request signature approval from configured team members.
Check to request a signature from approval team members during the approval process. When enabled, users must configure the approval team and associated signatures in the module.
Approvers can then add a new signature or select an existing one when approving requests through the application UI or via the email approval action.
Toolbar Controls
Bold, Italic, Underline, Lists, Text alignment
Macro Support
Text Input
"Type {{ To Add Macros" for dynamic content insertion
Dropdown Selection
Define the next state to which the workflow will move after approval is completed
Toggle Switch
Routes approval to the assigned Change Manager; the approval link is sent via email and available in the technician portal
Team*
Dropdown Selection
Select the team whose members will receive the approval request (mandatory when team-based routing is enabled)
Toolbar Controls
Apply formatting such as bold, italic, lists, and alignment for better readability
Macro Support
Text Input
Use {{ }} syntax to insert dynamic fields into the email template
Requires Self Review
Enable/Disable
Enables self-review for the ticket requester. When enabled, the review is automatically assigned to the requester who created the ticket. The requester must submit the review before the ticket status can proceed to the next stage. The Team and reviewer selection fields are disabled or hidden.
Send to Random Review
Enable/Disable
Sends the review request to a reviewer specified when the ticket reaches the configured review status. When enabled, the Team and reviewer selection fields are hidden, and a Review Configuration dialog prompts the user to enter the reviewer's email address.
Transition Status
Select Status
Configure the status the request should automatically move to after the review is completed. If no transition status is selected, the request remains in the Review status after completion.
Team
Select Team
Select the team responsible for performing the review. Only users belonging to this team can access the review action. Note: Users must have view and edit permission for the configured process.
Email Review Template – Subject
Enter Subject
Define the subject of the email sent to the review team when the request is submitted for review.
Email Review Template – Message Body
Enter Message
Configure the email content sent to reviewers. Supports macros for dynamic values. Default action buttons (Approve / Reject) are included automatically.
Macros
Insert Macros
Use macros to include dynamic request details in the email content. Example: Request ID, Request Title, Requested By.
Dropdown/Input Field
Define the source value or calculation.Available Options:
Critical (Red indicator): Highest priority level
High (Orange indicator): Elevated priority level
Medium (Blue indicator): Standard priority level
Low (Green indicator): Lowest priority level
Impact
High
System-wide impact assessment
Security Incident
Severity
Critical
Security-related escalation
Rich Text Editor
Email content with formatting options
Formatting Toolbar
Controls
Bold (B), Italic (I), Underline (U), Lists, Alignment
Macro Support
Text Input
"Type {{ To Add Macros" for dynamic content.
Used to insert dynamic details into approval emails, such as Request fields, dates, and Asset information. When an Impact Service is selected, its custom fields also appear as macros and can be added to the email content.
Is Resend
Toggle Switch
Enable/disable resend functionality
Advanced dynamic content
Conditional text, calculated values
Toggle Switch
Enable/disable resend functionality
Dynamic Section
Additional form-based parameters
Test
Button
Test integration configuration
Add Custom JSON
Button
Add custom JSON parameter configuration
Generate JSON
Button
Auto-generate JSON from form inputs
View
Link
View current parameter configuration
ERP, CRM, HR systems
Data validation, process automation
Custom APIs
Organization-specific systems
Tailored integration requirements
Acknowledge Alert
{"host": "{{hostname}}", "service": "{{service}}"}
Allows event-driven messaging (e.g., ticket created, assigned, resolved)
Variables are resolved dynamically
Message is sent via configured API
Delivery status is handled by the external provider
Base URL
Auto filled
Shows the base URL of the configured WhatsApp provider.
WABA ID
Auto filled
Displays the WhatsApp Business Account ID configured in the integration.
Phone Number ID
Auto filled
Shows the registered business phone number ID used for sending messages.
API Key
Auto filled
Displays the API key (if applicable). This field is secured and may be masked.
Secret Key
Auto filled
Displays the authentication key used for API authorization.
Version
Auto filled
Indicates the API version configured (e.g., v19.0).
App Name
Auto filled
Displays the configured application name (e.g., WhatsApp).
Save
Click action
Dropdown Selection
Select a field or parameter to evaluate
is
Operator Connector
Links operand to the comparison operator
Operator
Dropdown Selection
Choose a comparison method for evaluation
Value
Dropdown Selection
Select or input the target value for comparison
Change Management (Manager, etc.)
Close Information (Type, Note, etc.)
IT Asset Custom Fields
Number
Inserts a numeric-only field. Useful for fields requiring numerical input.
Use it for Ticket ID, Asset ID, or Priority Value (e.g., 1 = Critical, 2 = High).
Text
Adds a single-line text field for short inputs.
Capture Requester Name, Domain, or Subject of the incident.
Text Area
Adds a multi-line input field suitable for longer text entries.
Use it for Ticket Description, Resolution Notes, or Comments.
Dropdown
Creates a drop-down list with predefined options for consistent selection.
Use it for Category, Impact, Urgency, or Department selection.
Checkbox
Adds a checkbox input for binary (Yes/No) or multiple selections.
Use it to confirm Acknowledgment, User Agreement, or mark SLA Breach.
Radio
Provides a list of options where only one can be selected.
Use it for Ticket Type (e.g., Incident / Service Request / Problem).
Date
Adds a calendar field for selecting a specific date.
Use it to set Reported Date, Due Date, or Resolution Date.
DateTime
Adds a date and time picker to capture both date and time values.
Use it for Ticket Creation Timestamp or Escalation Schedule.
Divider
Adds a horizontal separator to distinguish different sections visually.
Place a divider between the Assignment Section and the Resolution Section for clarity.
This section is used at the final stage of the ticket workflow, where confirmation of closure and validation details are captured.
Fields like Closure Code, Customer Feedback, Verification Notes, and Closure Date.
Input
Define the system value for the selection, e.g., True.
Show & Require Fields Based on Checkbox Selection
Toggle
Enable this if you want to show or require additional fields only when the checkbox is selected. For example, if “Time-Barred Ticket” is checked, you might display a “Reason for Delay” field.
Add Item
Button
Add multiple checkbox options if needed. In most cases, one option is sufficient.
Show on Add Page
Toggle
Turn on if this field should be visible when creating a new ticket.
Show on Self Service Portal
Toggle
Enable this to make the checkbox visible for end users submitting tickets via the self-service portal.
Save
Button
Click to save the checkbox field configuration.
Value (for option 1)
Text
Value stored if Online is selected, e.g., online
Action (for option 1)
Cross icon
Remove this option from the configuration
Show & Require Fields Based on Checkbox Selection
Toggle
Enables showing/mandating fields on selection
Fields to display on Checkbox selection (Online)
Dropdown / Multi-select
Fields revealed when Online is selected, e.g., Credit Card Number, CVV
Mandatory Fields on Checkbox selection (Online)
Dropdown / Multi-select
Fields required if Online is selected, e.g., Credit Card Number, CVV
Label (for option 2)
Text
Checkbox label for the second option, e.g., COD
Value (for option 2)
Text
Value stored if COD is selected, e.g., COD
Action (for option 2)
Cross icon
Remove this option from the configuration
Show & Require Fields Based on Checkbox Selection
Toggle
Enables showing/mandating fields on selection
Fields to display on Checkbox selection (COD)
Dropdown / Multi-select
Fields revealed when COD is selected, e.g., Delivery Address, Address Type.
Mandatory Fields on Checkbox selection (COD)
Dropdown / Multi-select
No compulsory fields set for this option
Show on add page
Toggle
Field not visible on direct add
Show on Self Service Portal
Toggle
Field visible on the self-service portal
State
Dropdown Selection
Select "Open" from the available state options
Status
Text Input Field
Enter custom status name (e.g., "New Ticket", "Initial Request")
Select Status Color
Color Picker
Choose visual indicator color (default: red) for dashboard/queue display
State
Dropdown Selection
Select "In Progress" from available state options
Status
Text Input Field
Enter custom status name (e.g., "Working", "Under Investigation")
Select Status Color
Color Picker
Choose visual indicator color (default: orange) for active work identification.
State
Dropdown Selection
Select "On Hold" from available state options
Status
Text Input Field
Enter custom status name (e.g., "Awaiting Customer", "Pending Approval")
Select Status Colour
Color Picker
Choose visual indicator colour (default: cyan/blue) for hold identification.
State
Dropdown Selection
Select "Resolved" from the available state options
Status
Text Input Field
Enter custom status name (e.g., "Solution Provided", "Fix Implemented")
Select Status Color
Color Picker
Choose visual indicator colour (default: green) for resolution identification.
Resolved-Cancelled State
Available under the Resolved state in the status dropdown on both Panel and Edit pages. Provides a structured way to mark tickets, requests, or problems as “Cancelled” when resolution is not applicable.
Cancellation Reason
When selecting “Resolved-Cancelled,” a sidebar prompts the user to enter a mandatory cancellation reason. These reasons are documented for audit and reporting purposes.
Saving & Closing
Once saved, the item’s state updates to Resolved-Cancelled. When the item is closed, the closure category defaults to “Cancelled.”
Notifications
All relevant users and teams are automatically notified when an item is moved to the “Resolved-Cancelled” status. Ensures transparency and communication across stakeholders.
Audit Trail & Tracking
Cancellation actions are logged in the audit trail. Trends of cancellations can be analyzed to identify recurring issues, bottlenecks, or non-actionable tickets.
State
Dropdown Selection
Select "Close" from the available state options
Status
Text Input Field
Enter custom status name (e.g., "Completed", "Successfully Closed")
Select Status Color
Color Picker
Choose visual indicator color (default: dark gray/black) for closure
State
Dropdown Selection
Select "Approval" from the available state options
Status
Text Input Field
Enter custom status name (e.g., "Pending Approval", "Awaiting Authorization")
Select Status Color
Color Picker
Choose visual indicator color (default: purple) for approval identification.
Request approval from the reporting manager
Toggle Switch
Route to the immediate supervisor based on the org chart
Send to Requester with approval access.
Toggle Switch
Send the approval request back to the original requester
Send to Random Requester
Toggle Switch
Route to randomly selected approver from pool
Subject*
Text Input
Default: "{{display_id}} submitted for approval"
Message Body
Rich Text Editor
Customizable email template with merge fields
Available Merge Fields
Dynamic Tokens
{{approvee_name}}, {{display_id}}, {{basic_info.summary}}, {{approval_link}}
Accept
Approves the request and moves it to the next stage in the workflow.
Reject
Rejects the request and stops further processing based on workflow configuration.
Request More Information
Allows the approver to pause the approval and request additional details from the submitter before making a decision.
State
Dropdown Selection
Select Approval to define this step as an approval stage in the workflow
Status
Text Input Field
Enter a status name to represent this stage (e.g., Pending Approval, Awaiting CAB Approval)
Select Status Color Standard
Color Picker
Assign a color to visually distinguish the approval state in the workflow
Send to Requester with approval access
Toggle Switch
Allows the requester to approve the change
Send to Random Requester
Toggle Switch
Routes approval to a randomly selected user from the requester pool
Send to Team Members
Toggle Switch
Routes approval to selected team members
Is ECAB Approval
Toggle Switch
Enables ECAB (Emergency CAB) approval for urgent changes
Cab Team*
Dropdown Selection
Select the CAB team responsible for reviewing and approving the change
Reporting Manager Approval
System Routing
Automatically routes the approval request to the requester's reporting manager as defined in the organization hierarchy
Subject*
Text Input
Define the email subject (default: {{display_id}} submitted for approval)
Message Body
Rich Text Editor
Configure the email body with approval details and instructions
Available Merge Fields
Dynamic Tokens
Insert dynamic values such as {{approvee_name}}, {{display_id}}, {{basic_info.summary}}, {{approval_link}}
State
Select State
Select Review as the state for which the review process is configured. This determines when the review action becomes available in the request lifecycle.
Status
Enter Status Name
Define the status name displayed to users when the request enters the review stage. Example: Post Implementation Review
Select Status Color
Choose Color
Assign a color to visually identify the Review status on the workflow and request grid.
State*
Dropdown Selection
Select the target state for transition from available options.
Open: Return to initial processing state
In Progress: Route to active work state
On Hold: Move to suspended processing state
Resolved: Transition to solution completion state
Close: Move to final workflow completion state
Approval: Route to authorization/decision state
Add Data and Value
Dynamic Section
Container for field assignment configurations
+ Add
Button
Add new field-value assignment pairs
Operand*
Dropdown Selection
Select the target field for value assignment.Available Operand Fields:
Priority: Set incident/request priority level
Impact: Define business impact assessment
Urgency: Set time-sensitivity classification
Severity: Assign technical severity rating
VIP Customer
Priority
High
Automatic priority elevation for VIP accounts
After Hours
Urgency
Low
Non-critical hours classification
To*
Dropdown Selection
Select email recipients from available optionsAvailable Recipient Options:
Team Group Emails: Distribution lists for team communication
Team Members: All members of the assigned team
Team Level Members: Hierarchical team structure recipients
Requester: Original workflow initiator
Team Lead/Owner: Team leadership roles
Assignee: Currently assigned resource
Submitter: User who submitted the request
Follower: Users following the workflow item
Reported By: User who reported the issue
Asset Vendor: External vendor contacts
Cc
Additional Field
Carbon copy recipients (optional)
Subject*
Text Input
Email subject line with merge field support
Subject Line
Dynamic subject with merge fields
"Incident {{ticket_id}} - {{status}} Update"
Merge Fields
Dynamic content insertion
{{requester_name}}, {{due_date}}, {{priority}}
Rich Formatting
Professional email presentation
Bold headers, bullet lists, signatures
To*
Dropdown Selection
Select SMS recipients from available optionsAvailable SMS Recipient Options:
Requester: Original workflow initiator
Team Lead/Owner: Team leadership roles
Assignee: Currently assigned resource
Submitter: User who submitted the request
Follower: Users following the workflow item
Reported By: User who reported the issue
Asset Vendor: External vendor contacts
Message Body
Text Area
SMS content (character limit considerations)
Macro Support
Text Input
"Type {{ To Add Macros" for dynamic content
Select App*
Dropdown Selection
Choose the target application for integration
Action*
Dropdown Selection
Select a specific integration action to perform
Requester Parameters
JSON Configuration
Define request parameters for API calls
ITSM Tools
Service management platforms
Ticket synchronization, status updates
Monitoring Systems
Infrastructure monitoring
Alert correlation, auto-remediation
Communication Tools
Chat and collaboration platforms
Team notifications, status updates
Slack Notification
Slack
Post Message
{"channel": "#incidents", "message": "{{summary}}"}
Asset Update
CMDB
Update CI
{"ci_id": "{{asset_id}}", "status": "{{new_status}}"}
Monitoring Alert
To *
Select recipient
Choose the recipient of the WhatsApp message. Supported options are based on the workflow selected:
Requester
Assignee
Team Lead / Owner
Submitter
Template *
Select template
Select a WhatsApp template configured in the Marketplace. Only enabled templates will be available.
API URL
Auto filled
Displays the complete API endpoint for sending messages. This is derived from the Marketplace configuration.
Operand
Field or data to evaluate
System and custom fields
Operator
Comparison method
Equality, comparison, pattern matching
Value
Target value for comparison
Static values, dynamic references
+ Add Rule
Button
Add additional condition rules to create complex logic
AND/OR Logic
Toggle Options
Define logical relationships between multiple conditions
If
Condition Prefix
Identifies the conditional statement
Label
Action
Description/ Example
Select Service
Select service from the drop-down list.
Select the service you want to associate with the workflow.
Example: Select Email Support to add it to a Request workflow.
Add Service
After selecting the service, click the add button to add the service
It checks whether the service is already mapped to another workflow and whether the target workflow is preconfigured.
If the service is not mapped elsewhere and the target workflow allows changes, it is added successfully.
If the service is already mapped to another workflow, the system blocks the addition and displays an error.
Remove Service
Click the remove icon to remove the added service
It checks whether any open records are associated with the service in the same workflow.
If an open record exists, the system blocks the removal and displays an error indicating that the service is currently in use. Closed or exited records do not prevent removal.
Heading
Used to add section headers or titles within the ticket form. It helps in organizing different segments for clarity.
Add a heading like “Customer Information” or “Ticket Details” at the top of a section.
Allows users to add a field to capture or display an email address.
Add a field to record the requester’s email or assignee’s email for communication.
Phone Number
Adds a field for entering or displaying a contact number.
Use it to capture the customer’s phone number for direct communication.
General Section
This section typically contains the basic and mandatory details of the ticket, such as requester information, date, issue details, and classification fields. It acts as the entry point for ticket data.
Fields like Requester Name, Email, Category, Priority, Date, Domain, etc.
Assignment Section
This section focuses on details related to ticket ownership, technician assignment, or team allocation. It helps define who is responsible for addressing the issue.
Fields like Assignee Name, Assigned Department, Assignment Date, and Contact Number.
Resolution Section
Used for recording details related to the issue’s resolution. Technicians can document the solution, steps taken, and attach any supporting data.
Fields like Resolution Summary, Resolution Date, Technician Remarks.
Field Type
Dropdown
Select Checkbox as the input type to allow a proper/false selection.
Label
Input
Enter the display name for the field, e.g., Time-Barred Ticket.
Option 1 (Label under item)
Input
Specify how the option will appear to the user — e.g., Enable if the ticket is time-barred.
Field Type
Text
Defines form input as a checkbox
Label
Text
Main field label on form, e.g., Payment Type
Label (for option 1)
Text
Checkbox label for first option, e.g., Online

Mark the status for Response Time
Mark As Escalated
Reopen
Is Resolve By Event
Is Exit
Auto Submit
Send to Team Members
Formatting Options
Transition State
Send to Change Manager
Formatting Options
Value*
Production Impact
Message Body
Macro Support
Is Resend
Form Parameters(0)
Business Applications
Nagios
Operand
Closure Section
Option-1 (Value under item)